
Onar Alili
Engineer
9 minutes to read
Stop spam on Typeform using Zapier and OOPSpam
Intro
Typeform is a popular form builder used for creating various types of forms such as contact forms, feedback forms, sign-up forms, surveys, and more. However, when it comes to spam protection, Typeform doesn’t provide any built-in options. According to their official documentation, CAPTCHA solutions like reCAPTCHA or hCAPTCHA are not supported. Instead, they recommend alternative measures to prevent spam, such as preventing search engine indexing and password-protecting your forms. Another workaround suggested in the Typeform community is to include a CAPTCHA image on your form and require users to fill it out before submitting.
It’s likely that you are experiencing spam issues on Typeform, just like many others in the community (source 1, source 2, and more). The methods mentioned earlier may no longer be sufficient to protect your forms from spam, as spammers are becoming more sophisticated and use advanced tools.
An alternative solution involves leveraging automation tools such as Zapier or Make to capture form submissions, filter them using OOPSpam, and then receive filtered email notifications or simple store them. By implementing this approach, you can further mitigate the amount of spam received through your Typeform forms.
- Intro
- Choose your automation tools (Zapier, Make, etc.)
- Configuring the Typeform Zap
- Checking for spam with OOPSpam
- Storing spam and non-spam submissions
- Send an email notification with Email by Zapier
- Final thoughts
Choose your automation tools (Zapier, Make, etc.)
We’ll be focusing on Zapier for this tutorial, but it’s worth mentioning that you can achieve the same results using Make or any other automation platforms of your choice.
If you prefer to skip the following steps and get started quickly, we have created a template that you can use.
Zapier will guide you through the configuration process for all four steps: Typeform -> Spam check with OOPSpam -> Filter -> Email by Zapier.
The Filter step should be pre-configured with a simple rule: continue processing only if the Spam Score is less than 3.
In contrast to the previous template, we’ll take a slightly different approach. Instead of using Filter by Zapier, we’ll utilize Paths by Zapier to store both spam and non-spam submissions in an Airtable table. This allows you to review spam entries at a later time.
Configuring the Typeform Zap
To demonstrate the process, we have created a typeform with 5 fields to collect inquiries from potential clients. Here are the form fields:
- Our organization size is
- Our website is
- The number of API calls we estimate to make per month is
- My email address is
- Let us know if you any questions?

Let’s proceed with configuring the Zapier workflow to capture submissions through the form.
Follow these steps to set up Typeform with the New Entry event:
- Select Typeform Zap and choose New Entry under Event.
- Connect your Typeform account by selecting Choose account.
- Under Trigger, select your form.
- An example submission will be populated under Test trigger. Check if you receive the We found an entry! message. If not, fill and submit the form with example data.
- That’s it! The next step is to check for spam.

Checking for spam with OOPSpam
To set up spam protection, follow these steps:
- Register for an API key on the OOPSpam dashboard.
- In Zapier, enter the API key when prompted in the “Choose Account” step.
- Map the necessary form fields to OOPSpam’s fields:
- Content: Map any message longer than 20 characters to this field.
- Sender IP: Leave blank as Typeform doesn’t provide IP.
- Email: Map the email field.
- Language Allowlist: Limit submissions by language, using the value from the Content field.
- Allow messages only from these countries: Filter submissions by country (available only if Sender IP is provided).
- Test the action and use the returned “Score” to approve or reject submissions.
Refer to the GIF below for a visual guide.

Storing spam and non-spam submissions
There are a few ways to handle this. You can either use Filter by Zapier to store only non-spam entries or use Paths by Zapier to categorize all entries as spam or non-spam. This allows you to have all submissions in one place and review spam entries later for any potential false positives.
In this case, we will store the submissions in an Airtable table. Let’s create a table to store the form field values. In addition to the form fields, we will add two more fields: Is it spam and Spam Score and map values:
- Is it spam?: This field will store either “spam” or “not spam.” You can use this field to filter and organize your submissions.
- spam score: OOPSpam Zap will return a spam score, which we will pass to this field. This provides useful information for potential issues and reviews.

📌 Note, Is it spam? is a Single select element with two options spam and not spam.

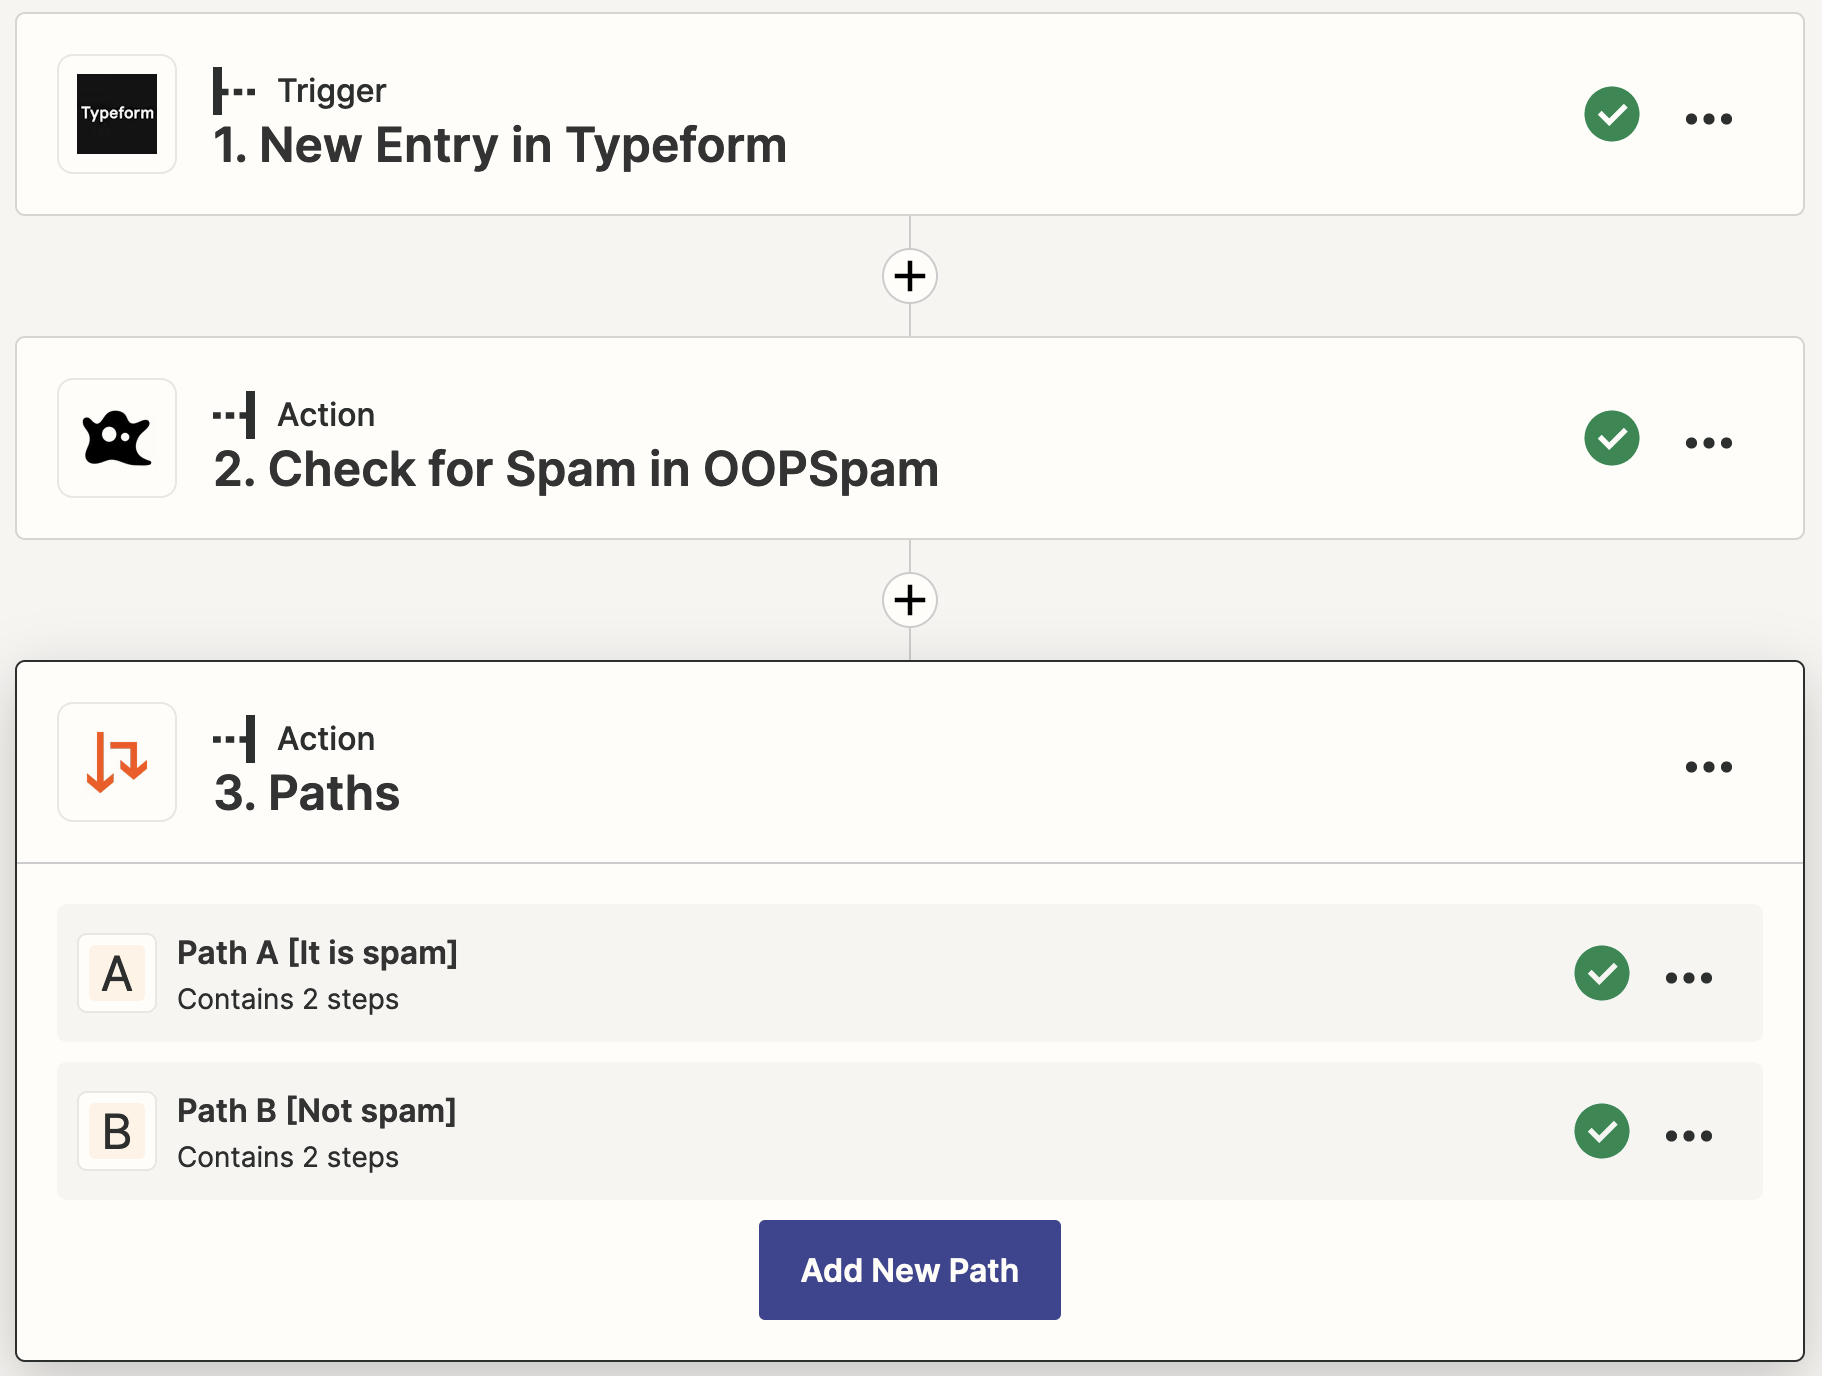
Now that our table is set up, we can use the “Paths by Zapier” app to set conditions for our automation flow to continue in two different paths.

Here is the basic logic behind the two paths:
- Path A: If the score is greater than 2, create a record in Airtable (you can also use Google Sheets) to store spam submissions for later review. Set the Is it spam? value to spam.
- Path B: If the score is less than 3, create a record in Airtable. Set the Is it spam? value to not spam.
It’s important to note that any score equal to or higher than 3 should be classified as spam, whereas scores lower than 3 should be classified as non-spam.
Send an email notification with Email by Zapier
In addition to creating a record in Airtable, you can send yourself an email notification using Email by Zapier. Follow these steps to set up the Send Outbound Email action and notify yourself of new submissions:
In order to send an email, you need to map the required fields to the data from Typeform app. The required fields are:
- To: Enter your email address (you can add up to 5 email addresses).
- Subject: Specify the name of the form.
- Body: The email body can be in HTML or plain text. In the example, the data points (email, name, message fields) are separated by line breaks using the <p> HTML tag.
- Reply To (optional): This field is not required, but it allows for convenient response handling. You can add the sender’s email address here so that you can simply click the “Reply” button in your email client if you want to respond to the submission.

Testing the email notification is an important step to ensure that you receive the notification correctly when a new submission is made. It is recommended to submit a test form submission and verify that the notification email is received with the correct information.
Additionally, you can use other email service apps such as Postmark or Mailgun instead of Email by Zapier to send the emails. These services can offer better deliverability, additional features, and customization options such as email templates and analytics.
Final thoughts
This was a simple workflow to filter spam with OOPSpam in your Typeform forms using Zapier. You can also use other platforms to automate the process. Plus, you can add extra steps and conditions to make it more complex, such as sending an automated email response to the visitor confirming successful submission after the spam check or storing submissions in Google Sheets. The possibilities are endless, and you can customize the workflow according to your specific needs and preferences.
