
Chazie Baniquid
Technical Content Marketer
7 minutes to read
How to block countries in WooCommerce Order & Registration?
If you’re selling online with WooCommerce, you may need to block orders or customer registrations from certain countries. This could be for compliance, fraud prevention, or logistical reasons. WooCommerce includes built-in settings to control which countries you sell to — plus, you can use additional tools like OOPSpam Anti-Spam and Cloudflare for extra protection against fake registrations and spam.
Here’s how to set it up effectively.
Built-In Country Blocking in WooCommerce
Unlike some form builders, WooCommerce includes native country restriction options right in its settings. You can:
- Sell to all countries
- Sell to all countries except for…
- Sell only to specific countries
These rules apply to both the checkout process and account registration. Customers outside your allowed list will not be able to complete purchases, and their countries won’t appear as options in the billing/shipping dropdowns.
1. Block Countries in WooCommerce Using General Settings
If your goal is to stop receiving orders from certain countries (or only allow certain ones), WooCommerce’s “Selling location(s)” setting is the quickest way.
How to Set It Up
Step 1: Open WooCommerce General Settings
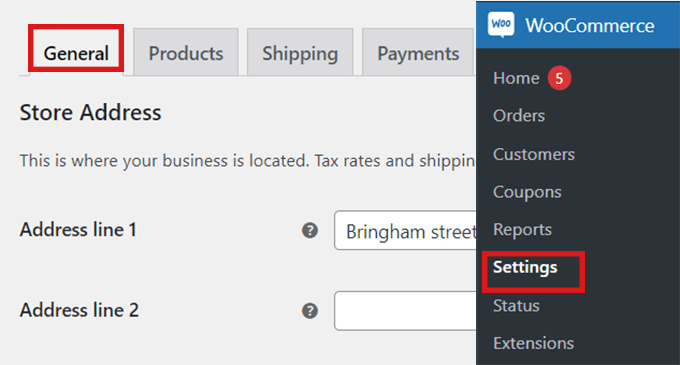
In your WordPress admin dashboard, go to:
WooCommerce > Settings > General
Step 2: Choose Your Selling Locations
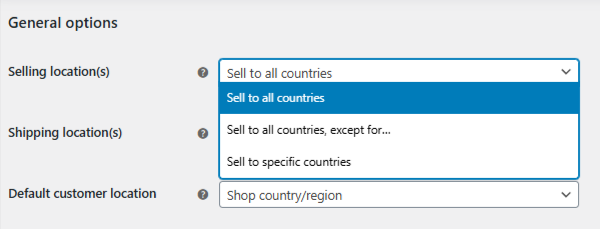
Find the Selling location(s) dropdown. You have three options:
- Sell to all countries
- Sell to all countries, except for…
- Sell to specific countries
Step 3A: Allow Only Specific Countries
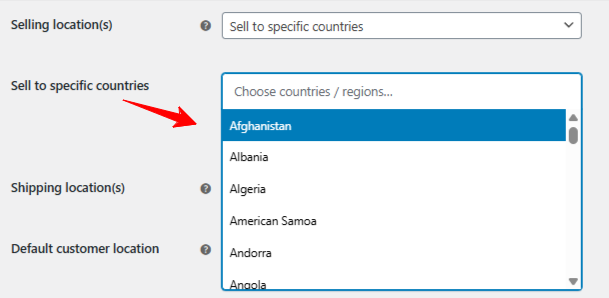
If you want to only sell to certain countries:
- Select Sell to specific countries
- In the “Sell to specific countries” field, search for and add the countries you want to allow
- Under Shipping location(s), choose Ship to countries you sell to
Step 3B: Block Certain Countries
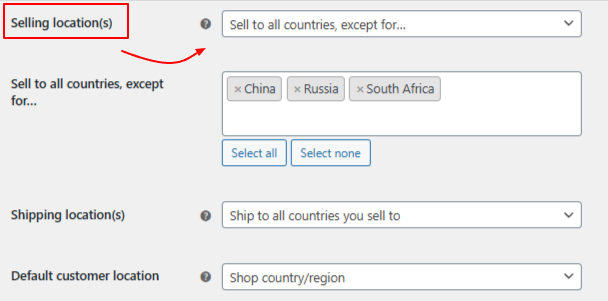
If you want to sell to all except a few countries:
- Select Sell to all countries, except for…
- In the “Sell to all countries except for” field, search for and add the countries you want to block
Step 4: Save Changes
Click Save changes at the bottom of the page
Step 5: Test Your Settings
Go to your checkout page and confirm that only your allowed countries appear in the dropdown or that blocked countries are excluded.
Pros & Cons of the Built-In Method
- Easy to set up — no extra plugins required
- Works site-wide for both orders and registrations
- Cannot block specific products by country without custom code or plugins
- Doesn’t prevent spam from contact or registration forms — only checkout-related actions
2. Filter Orders and Registrations with OOPSpam Anti-Spam
While WooCommerce’s built-in settings handle location-based selling rules, they don’t protect you from spam orders, fake signups, or abusive form submissions. This is where OOPSpam Anti-Spam (that’s us 👋) comes in.
What OOPSpam Adds to WooCommerce
- Country Filtering – Block or allow form and checkout submissions from specific countries
- Language Filtering – Stop spam written in certain languages
- Machine Learning Spam Detection – Identify bot and human spam automatically
- Block Proxies, VPNs, TOR Traffic – Reduce anonymous abuse
- Rate Limiting – Control how often your forms can be submitted
- Detailed Submission Logs – See exactly what was blocked and why
How to Set Up OOPSpam with WooCommerce
Step 1: Install the Plugin
From your WordPress dashboard:
Plugins > Add New > Search: OOPSpam Anti-Spam
Install and activate.
Step 2: Get Your API Key
Go to OOPSpam.com, sign up, and copy your API key.
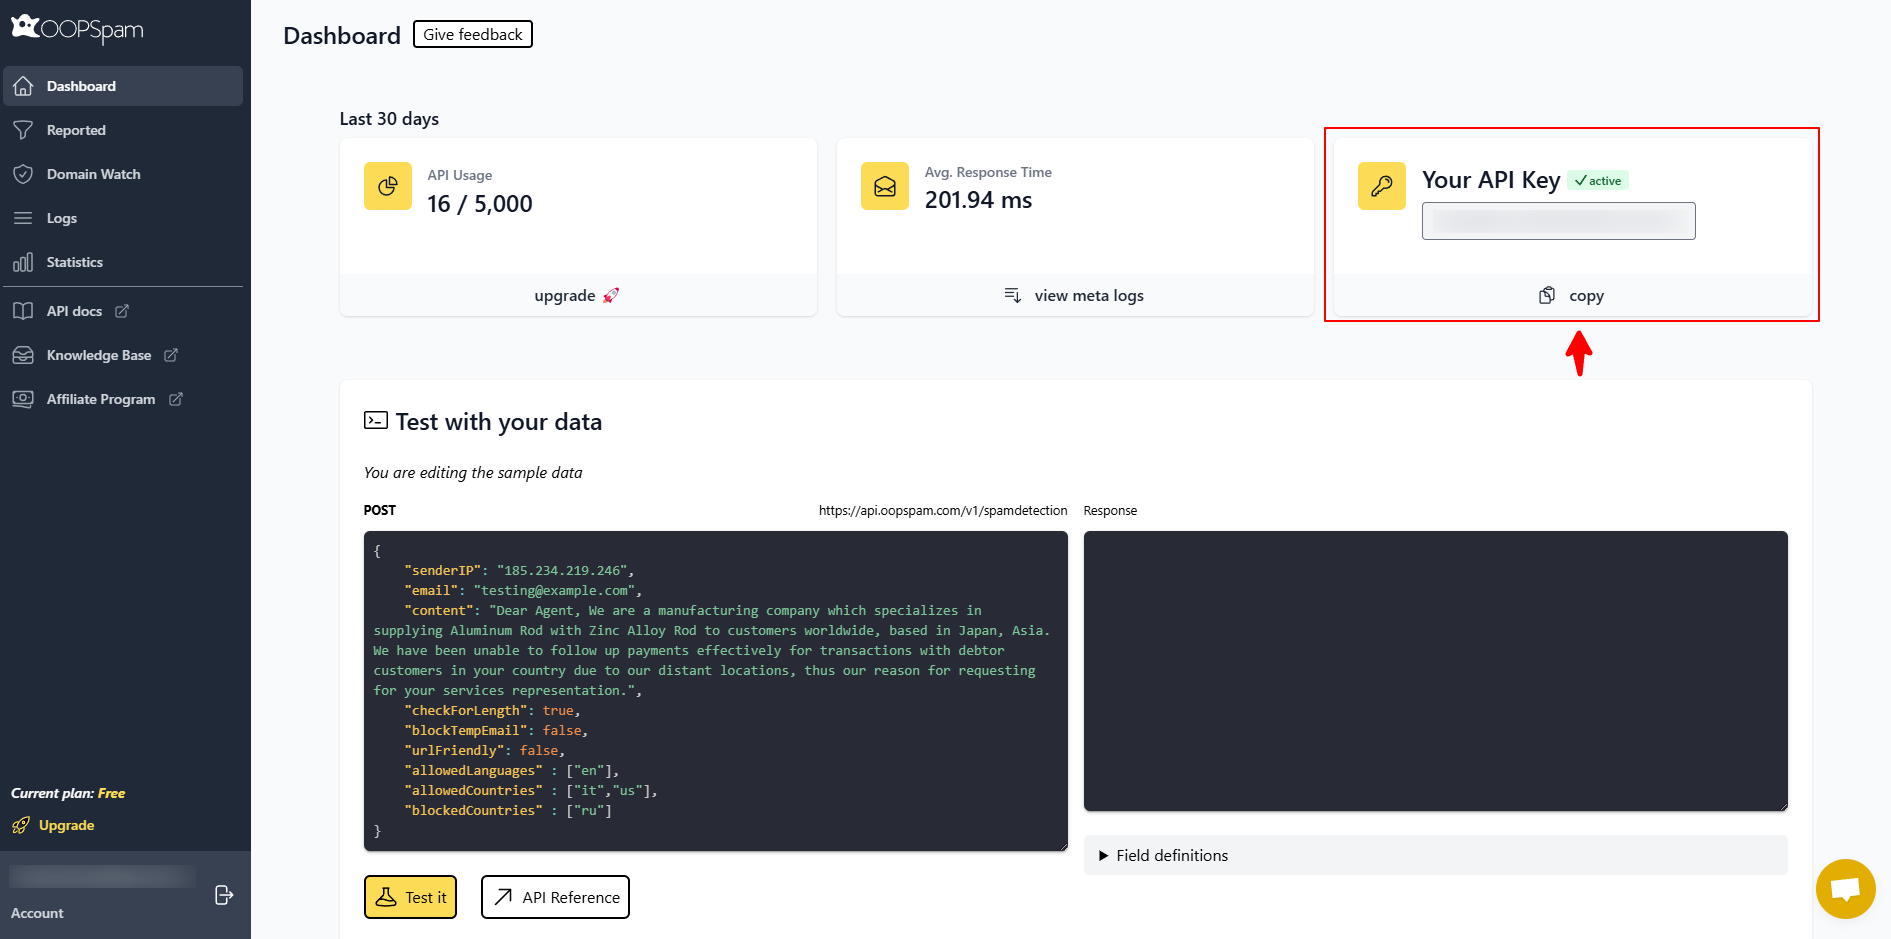
Step 3: Enable WooCommerce Protection
Go to: OOPSpam Anti-Spam > Settings and paste your API key.
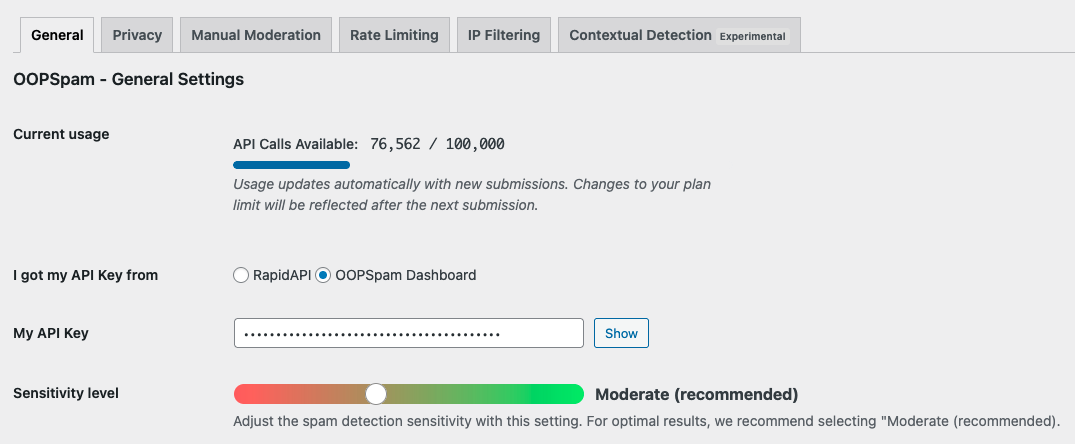
Step 4: Block Countries
Under Country Filtering, choose one of two modes:
- Allow only selected countries
- Block selected countries

Select the countries from the dropdown and save.
Step 5: Enable WooCommerce Spam Protection
If WooCommerce is installed, toggle Activate Spam Protection ON, add a custom spam message, and optionally enable Block orders from unknown origin and Honeypot protection for extra filtering.

Reviewing Blocked Activity
You can see logs for blocked orders or signups via:
- WordPress Dashboard → OOPSpam → Form Spam Entries / Form Ham Entries

- OOPSpam.com Dashboard (with additional details)

This transparency lets you fine-tune your rules and rescue legitimate entries if needed.
3. Block Entire Countries from Your WooCommerce Site with Cloudflare (Optional)
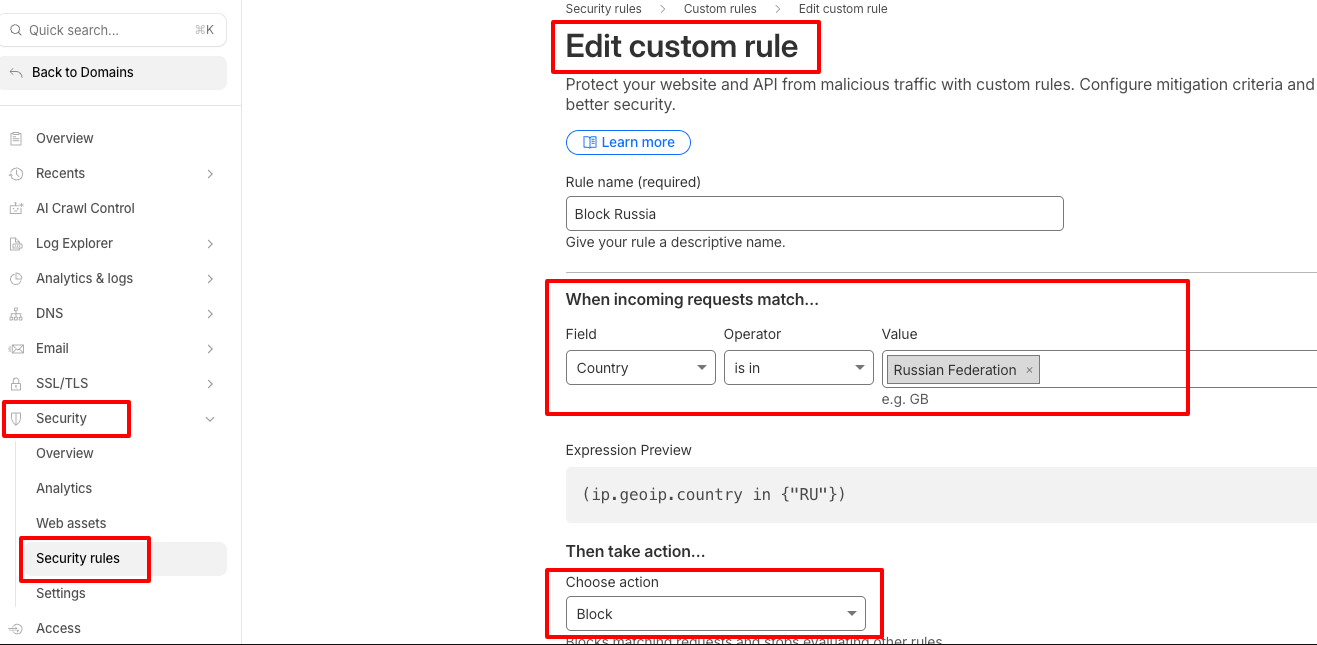
If you’re dealing with fraud, scraping, or server attacks, you may want to block certain countries entirely using Cloudflare’s Firewall Rules.
⚠️ This method blocks access to your entire site, not just WooCommerce checkout.
How to Set It Up in Cloudflare
- Log in to Cloudflare.com
- Choose your site
- Go to Security > Security rules
- Click Create rule
-
Set:
- Field:
Country - Operator:
is in - Value: Select countries to block
- Field:
- Choose Action =
Block - Save and deploy
Which Method Should You Use?
| Method | What It Blocks | Best For |
|---|---|---|
| WooCommerce Built-In | Orders & registrations | Simple selling restrictions by country |
| OOPSpam Plugin | Spammy orders & registrations | Extra protection against bots and targeted abuse |
| Cloudflare Firewall | Entire website access | High-security needs, legal compliance, or attack prevention |
Final thoughts
WooCommerce gives you native tools to control which countries can place orders, perfect for quick compliance and fraud prevention. But for advanced filtering and anti-spam protection, pairing it with OOPSpam Anti-Spam is the best approach.
If you need site-wide blocking, Cloudflare firewall rules are an option, but use them carefully to avoid blocking legitimate visitors.
Need help setting this up? You can check OOPSpam’s documentation or contact our support team for guidance.