
Chazie Baniquid
Technical Content Marketer
7 minutes to read
How to block countries in Elementor Forms?

Getting spam or unwanted traffic from specific countries? If you’re using Elementor Forms, there are two ways to block form submissions based on visitor location, even though Elementor doesn’t offer built-in geoblocking on its forms alone. In this guide, we’ll walk you through both:
- Blocking form spam using OOPSpam Anti-Spam
- Blocking entire countries using Cloudflare or Elementor Hosting’s built-in traffic controls
Let’s go through both methods step-by-step.
1. Block Countries in Elementor Forms Using OOPSpam
If your Elementor forms are getting spammed, especially from certain countries, OOPSpam Anti-Spam (that’s us 👋) is the easiest and most precise solution. It adds reliable spam filtering, country-based blocking, and submission logs without affecting your website’s accessibility.
Does Elementor Support Native Country Filtering?
No, Elementor Forms do not include a built-in country or IP blocking feature. That means you’ll need an external anti-spam plugin to filter form submissions based on location.
Why OOPSpam Works Great With Elementor Forms
Once OOPSpam is activated, it works in the background to scan every form submission before it reaches your inbox. You get:
- Country Filtering – Block or allow form entries from specific countries.
- Language Filtering – Exclude spam in specific languages.
- Machine Learning-Powered Spam Detection – Automatically detects suspicious or bot-like entries.
- Block Proxies, VPNs & Bots – Reduce abuse from anonymized traffic sources.
- Rate Limiting – Limit how often your form can be submitted.
- Submission Logs – Review blocked vs. accepted entries in real time.
How to Set Up OOPSpam with Elementor
Step 1: Install the OOPSpam Plugin
From your WordPress Dashboard, go to Plugins > Add New, search for “OOPSpam Anti-Spam”, then install and activate it.
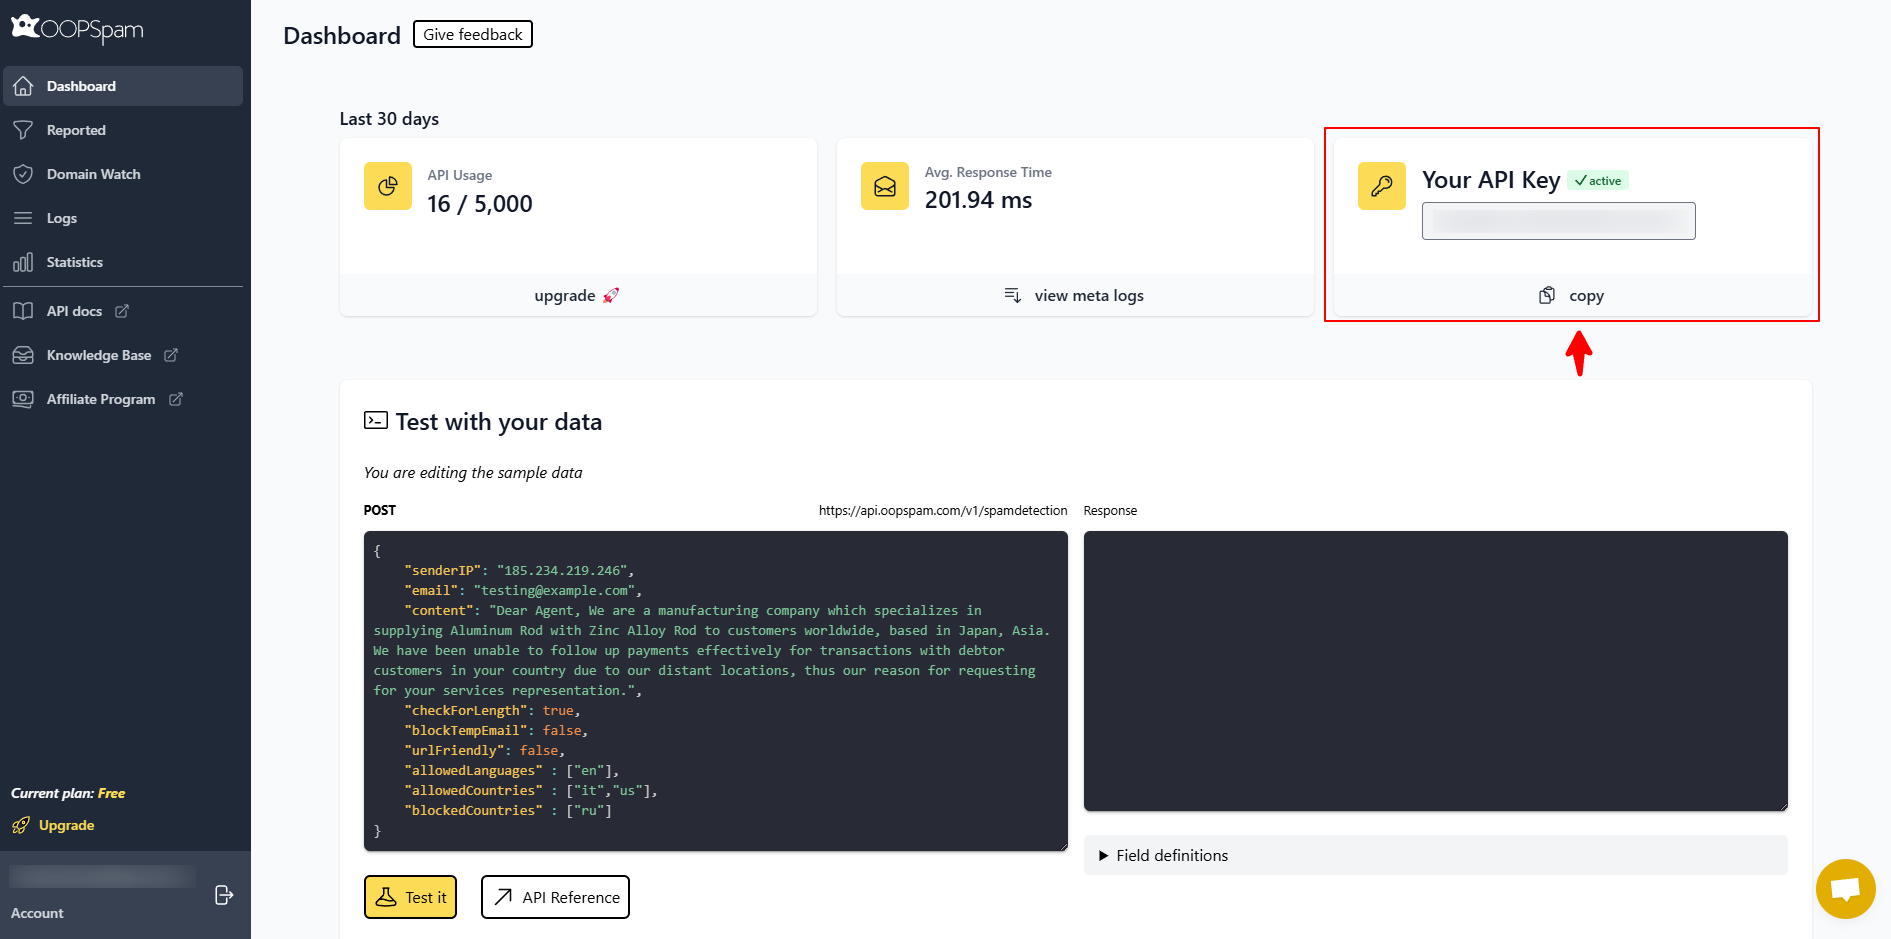
Create an account on OOPSpam.com and generate your API key.
Step 2: Connect Your API Key
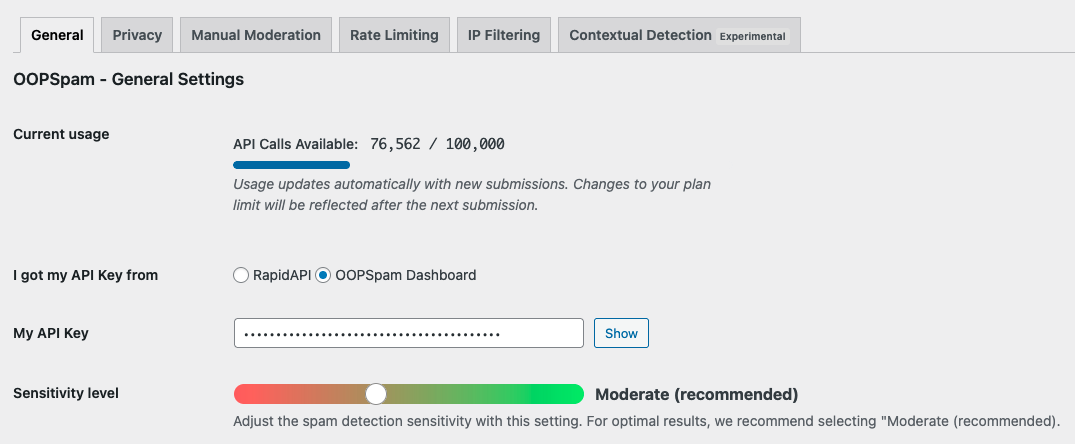
Back in your WordPress admin, go to OOPSpam Anti-Spam > Settings, and paste the API key into the designated field.
Step 3: Enable Elementor Support
Scroll to the Elementor Forms section in the plugin settings and activate spam protection.

Once activated, all Elementor Forms on your site will start filtering submissions based on your OOPSpam rules.
Step 4: Block Countries
Go to the Country Filtering section. You’ll see two options:
- Country Allowlist (only accept from these countries)
- Country Blocklist (reject submissions from these countries)
- Trusted Countries (always bypasses spam checks)

Choose your preferred method and select the countries. Don’t forget to save.
That’s it! Spammy form entries from restricted countries will be filtered silently without affecting your site access.
Review Blocked Submissions from Elementor
With OOPSpam, you’ll always know what’s been filtered and why. You can check:
- Submission content
- IP address
- Spam score and detection reason
- Timestamp
- Email or form field values
Access this via:
- WordPress Admin > OOPSpam > Form Spam Entries / Form Ham Entries

- OOPSpam Dashboard (for enhanced filtering and export)

This gives you clarity and control, especially helpful if you’re trying to fine-tune Elementor forms spam filters or rescue false positives.
2. Block Entire Countries from Your Elementor Website
If you’re using Elementor Hosting, you also get built-in geoblocking tools at the hosting level.

⚠️ Note: This method blocks access to your entire site, not just form submissions. It’s best for broader security concerns or compliance needs.
How to Block Countries in Elementor Hosting
![]()
- Go to your My Elementor Dashboard
- Hover over the website card and click “Manage this site”
- In the side panel, click “Advanced”
- Switch to the Security tab
- Find “Limit traffic by country” and click the pencil ✏️ icon
- Choose your approach:
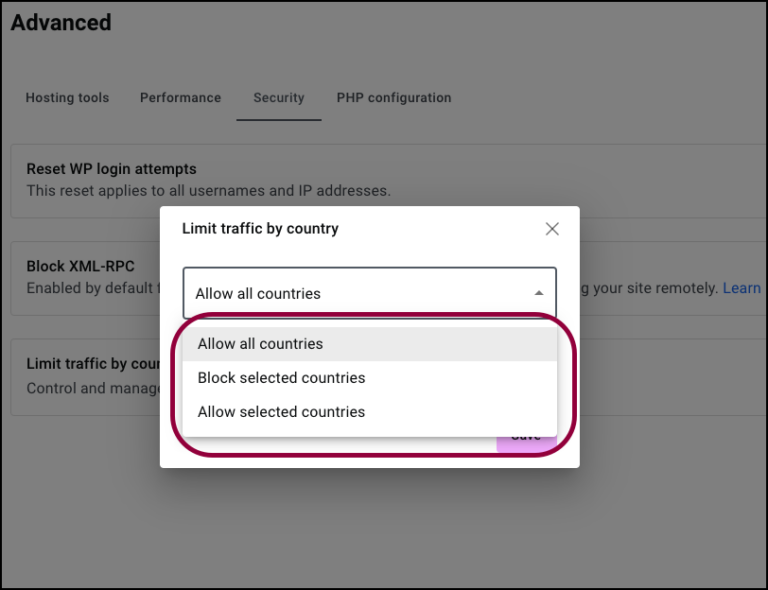
- Allow all countries
- Block selected countries
- Allow only selected countries
- Use the dropdown to select countries to block or allow
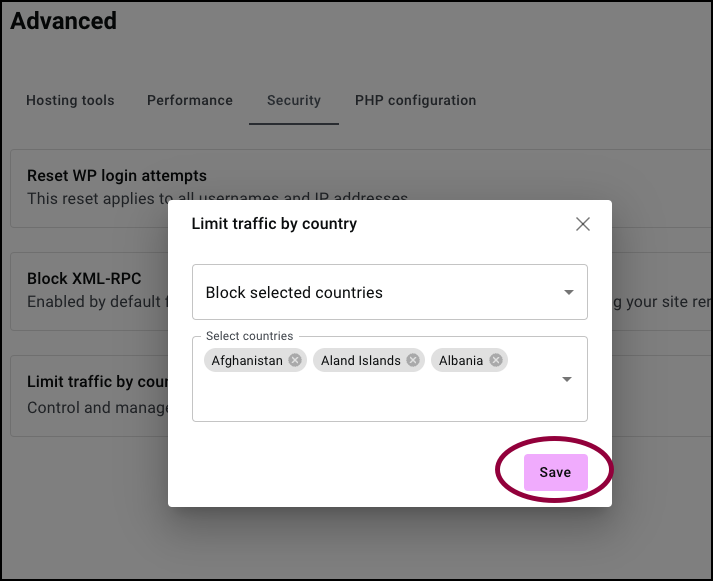
- Click Save
Blocked users will see a 403 Forbidden message and won’t be able to access your website.
When to Use This Method?
Use Elementor’s native geoblocking when:
- You’re under attack from a specific region
- You don’t serve users in certain countries (e.g., for eCommerce restrictions)
- You want to prevent access for compliance reasons
Alternative: Use Cloudflare Firewall Rules (Optional)
If your site is behind Cloudflare, you can also block countries using its Web Application Firewall.
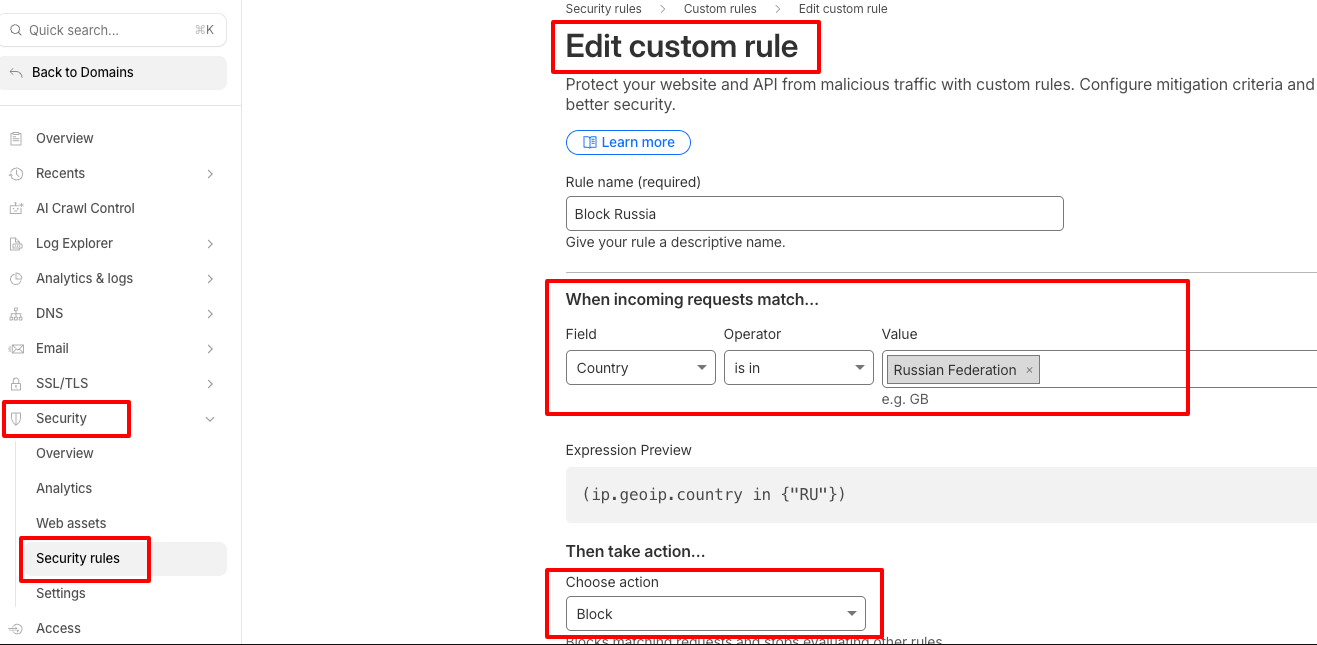
Steps:
- Log in to Cloudflare.com
- Choose your domain > go to Security > Security rules
- Create a new rule
- Set Field =
Country, Operator =is in, and choose the countries - Choose Action =
Block - Save and deploy
Just like Elementor Hosting’s tool, this blocks all traffic from those countries site-wide.
What’s the Best Way to Block Countries in Elementor?
| Method | What It Blocks | Best For |
|---|---|---|
| Elementor Native (Hosting) | Entire website access | Geoblocking for security or business restrictions |
| OOPSpam Plugin | Form submissions only | Spam filtering and per-form country blocking |
| Cloudflare Firewall | Entire website access | Advanced use cases like scraping or DDoS protection |
Final thoughts
Elementor Forms don’t offer native country filtering but you’re not stuck. With OOPSpam Anti-Spam, you get advanced, form-level spam protection and region-based filtering without blocking legitimate traffic to your site.
Pair it with Elementor Hosting’s built-in geoblocking or Cloudflare rules if you need stricter site-wide controls.
Need help setting this up? You can check OOPSpam’s documentation, or contact our team anytime.