
Chazie Baniquid
Technical Content Marketer
6 minutes to read
How to block countries in Gravity Forms?
Gravity Forms doesn’t have a built-in feature to block submissions by country or IP address, but there are effective ways to achieve country-level restrictions. Whether you want to limit the countries users can select in your forms or block spam entirely, this guide covers it all.
No Built-In Country Blocking in Gravity Forms
Gravity Forms does not natively support country-based submission blocking. However, you can customize its Country Select field using filters or use third-party tools like OOPSpam Anti-Spam for more comprehensive blocking. If you need broader site-wide control, Cloudflare can help you block access from entire regions.
We’ll go over both methods:
- Using Gravity Forms filters to add/remove countries from your forms.
- Integrating OOPSpam Anti-Spam (that’s us 👋) to block spam and filter by country.
- Blocking entire countries at the server level with Cloudflare.
1. Block Countries in Gravity Forms Using Code
One of Gravity Forms’ features is its ability to be customized through hooks and filters. With a small code snippet, you can add or remove countries from the dropdown list of your Country field.
Using the gform_countries Filter
You can edit your form’s country list by adding code to your functions.php file (in your active theme) or within a custom plugin.
Example: Removing a Country
To remove “United States” from the list of countries, you can use:
add_filter( 'gform_countries', 'remove_country' );

function remove_country( $countries ) {

    $key = array_search( 'United States', $countries );

    unset( $countries[ $key ] );

    return $countries;

}
This code uses array_search to find and remove the country from the list.
Example: Adding a Country
To add a custom country to the list, use:
add_filter( 'gform_countries', 'add_country' );

function add_country( $countries ) {

    $countries[] = 'Custom Country';

    sort( $countries );

    return $countries;

}
Limiting Countries in a Single Form
To restrict countries for one specific form (e.g., form ID 77), you can use form-specific filters like:
gform_pre_render_77gform_pre_validation_77gform_pre_submission_filter_77gform_admin_pre_render_77
Replace 77 with the actual form ID.
2. Block Spam and Countries with OOPSpam Anti-Spam
While filters are useful for customizing dropdowns, they won’t stop spam submissions from bots or unwanted countries. This is where OOPSpam Anti-Spam comes in. It integrates seamlessly with Gravity Forms and offers real-time spam detection, country filtering, and detailed logs.
What OOPSpam Adds to Gravity Forms
- Country Filtering – Allow or block specific countries.
- Language Filtering – Exclude certain languages.
- Machine Learning Powered Spam Detection – Filters out spammy behavior automatically.
- Bot & Proxy Blocking – Stop spam from TOR, VPNs, or proxies.
- Rate Limiting – Prevents form abuse by limiting submissions.
- Detailed Logs – Shows blocked vs allowed entries with reasons.
How to Set It Up
Step 1: Install the Plugin
Go to Plugins > Add New, search for OOPSpam Anti-Spam, install, and activate it.
Step 2: Connect Your API Key
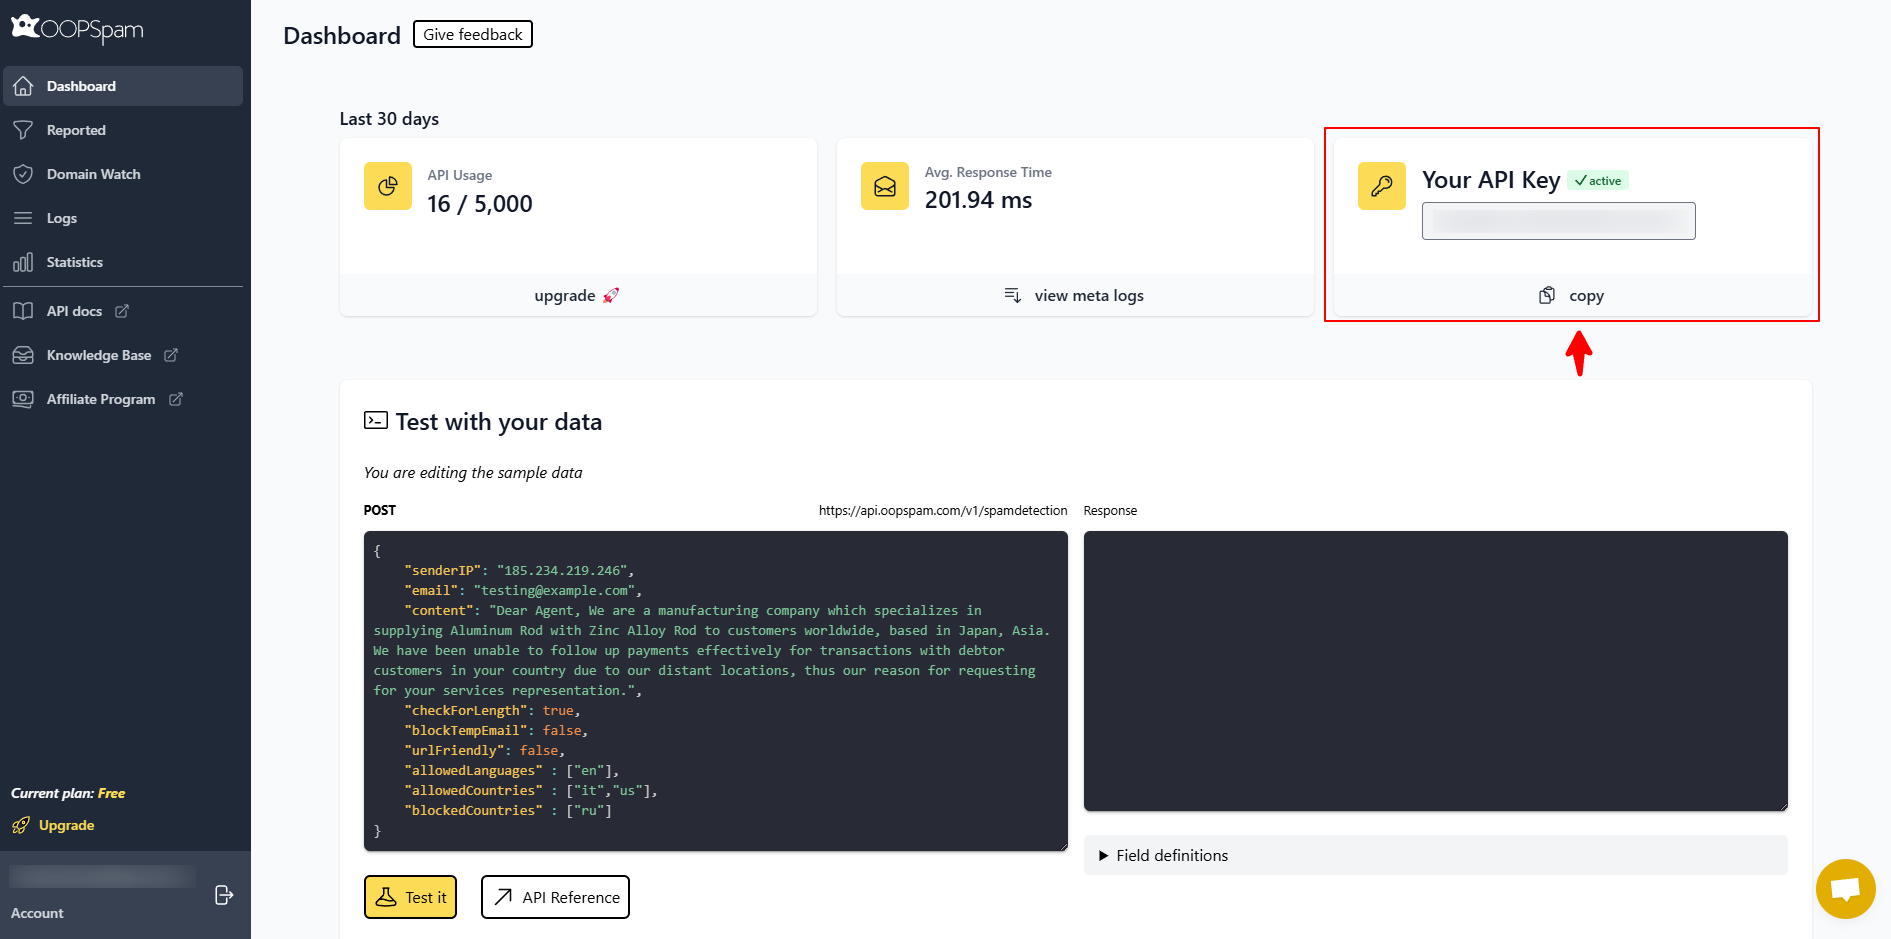
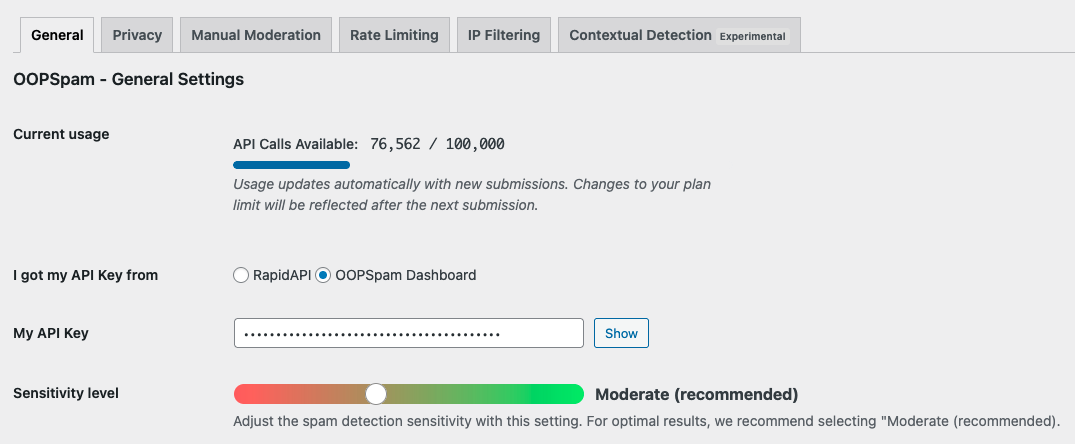
Create an account at OOPSpam.com, generate an API key, and paste it into OOPSpam Anti-Spam > Settings in your WordPress dashboard.
Step 3: Enable Gravity Forms Protection
Scroll to the Gravity Forms section and toggle spam protection on.

Step 4: Set Up Country Blocking
Use the dropdown settings to either:
- Allow submissions only from certain countries, or
- Block submissions from specific countries.

Save the settings, and OOPSpam will handle the rest.
Reviewing Blocked Submissions
OOPSpam offers transparent spam logs that include:
- IP address
- Email (if included in the form)
- Submission content
- Spam score
- Filtering reason
- Timestamp
You can review blocked and accepted entries directly in your WordPress dashboard:

or in the OOPSpam dashboard:

3. Block Entire Countries with Cloudflare
If you want to stop all traffic from specific countries not just form entries—you can do this at the network level with Cloudflare’s Web Application Firewall (WAF).
Important: This method blocks the entire site for visitors from certain regions.
How to Set Up Country Blocking in Cloudflare
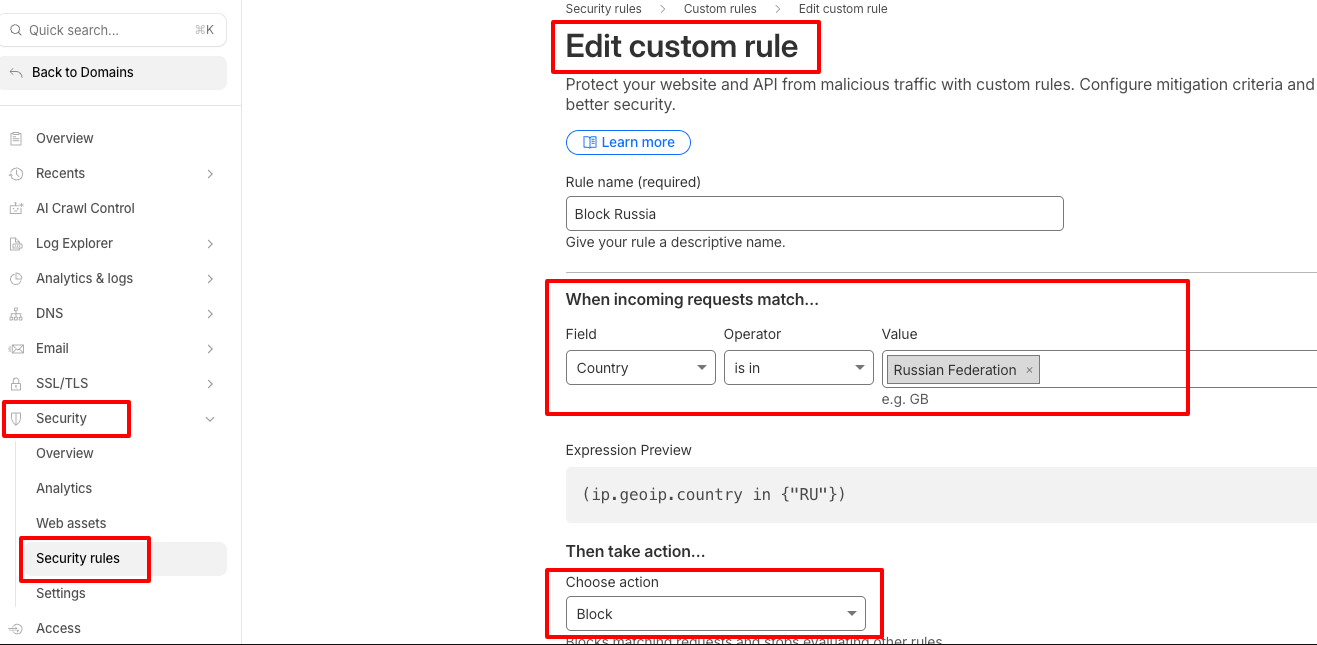
- Log in to your Cloudflare account.
- Select your website.
- Navigate to Security > Security rules.
- Click Create rule.
- Name the rule (e.g., “Block Countries”).
- Set conditions:
-
-
Field:
Country -
Operator:
is in -
Value: Select the countries to block.
-
- Action:
Blockand save the rule.
When to Use This
- When you’re under attack from a specific region.
- To comply with geo-restrictions.
- To reduce server load from irrelevant traffic.
Final Thoughts
Gravity Forms doesn’t have native country-blocking, but you can:
- Use filters (
gform_countries) to limit available countries in your forms. - Leverage OOPSpam for advanced country-based spam filtering.
- Combine with Cloudflare for complete site-level protection when necessary.
With these methods, you can keep your forms clean and secure while still providing a smooth user experience.