
Chazie Baniquid
Technical Content Marketer
4 minutes to read
How to verify and clean up your beehiiv email list?
Verify and clean your beehiiv email list by connecting OOPSpam’s native beehiiv integration. It scans every subscriber against a spam database and lets you unsubscribe or delete the risky ones directly from your dashboard. No CSV exports. No Zapier step. No manual cross-referencing.
Step 1: Find the Beehiiv Integration
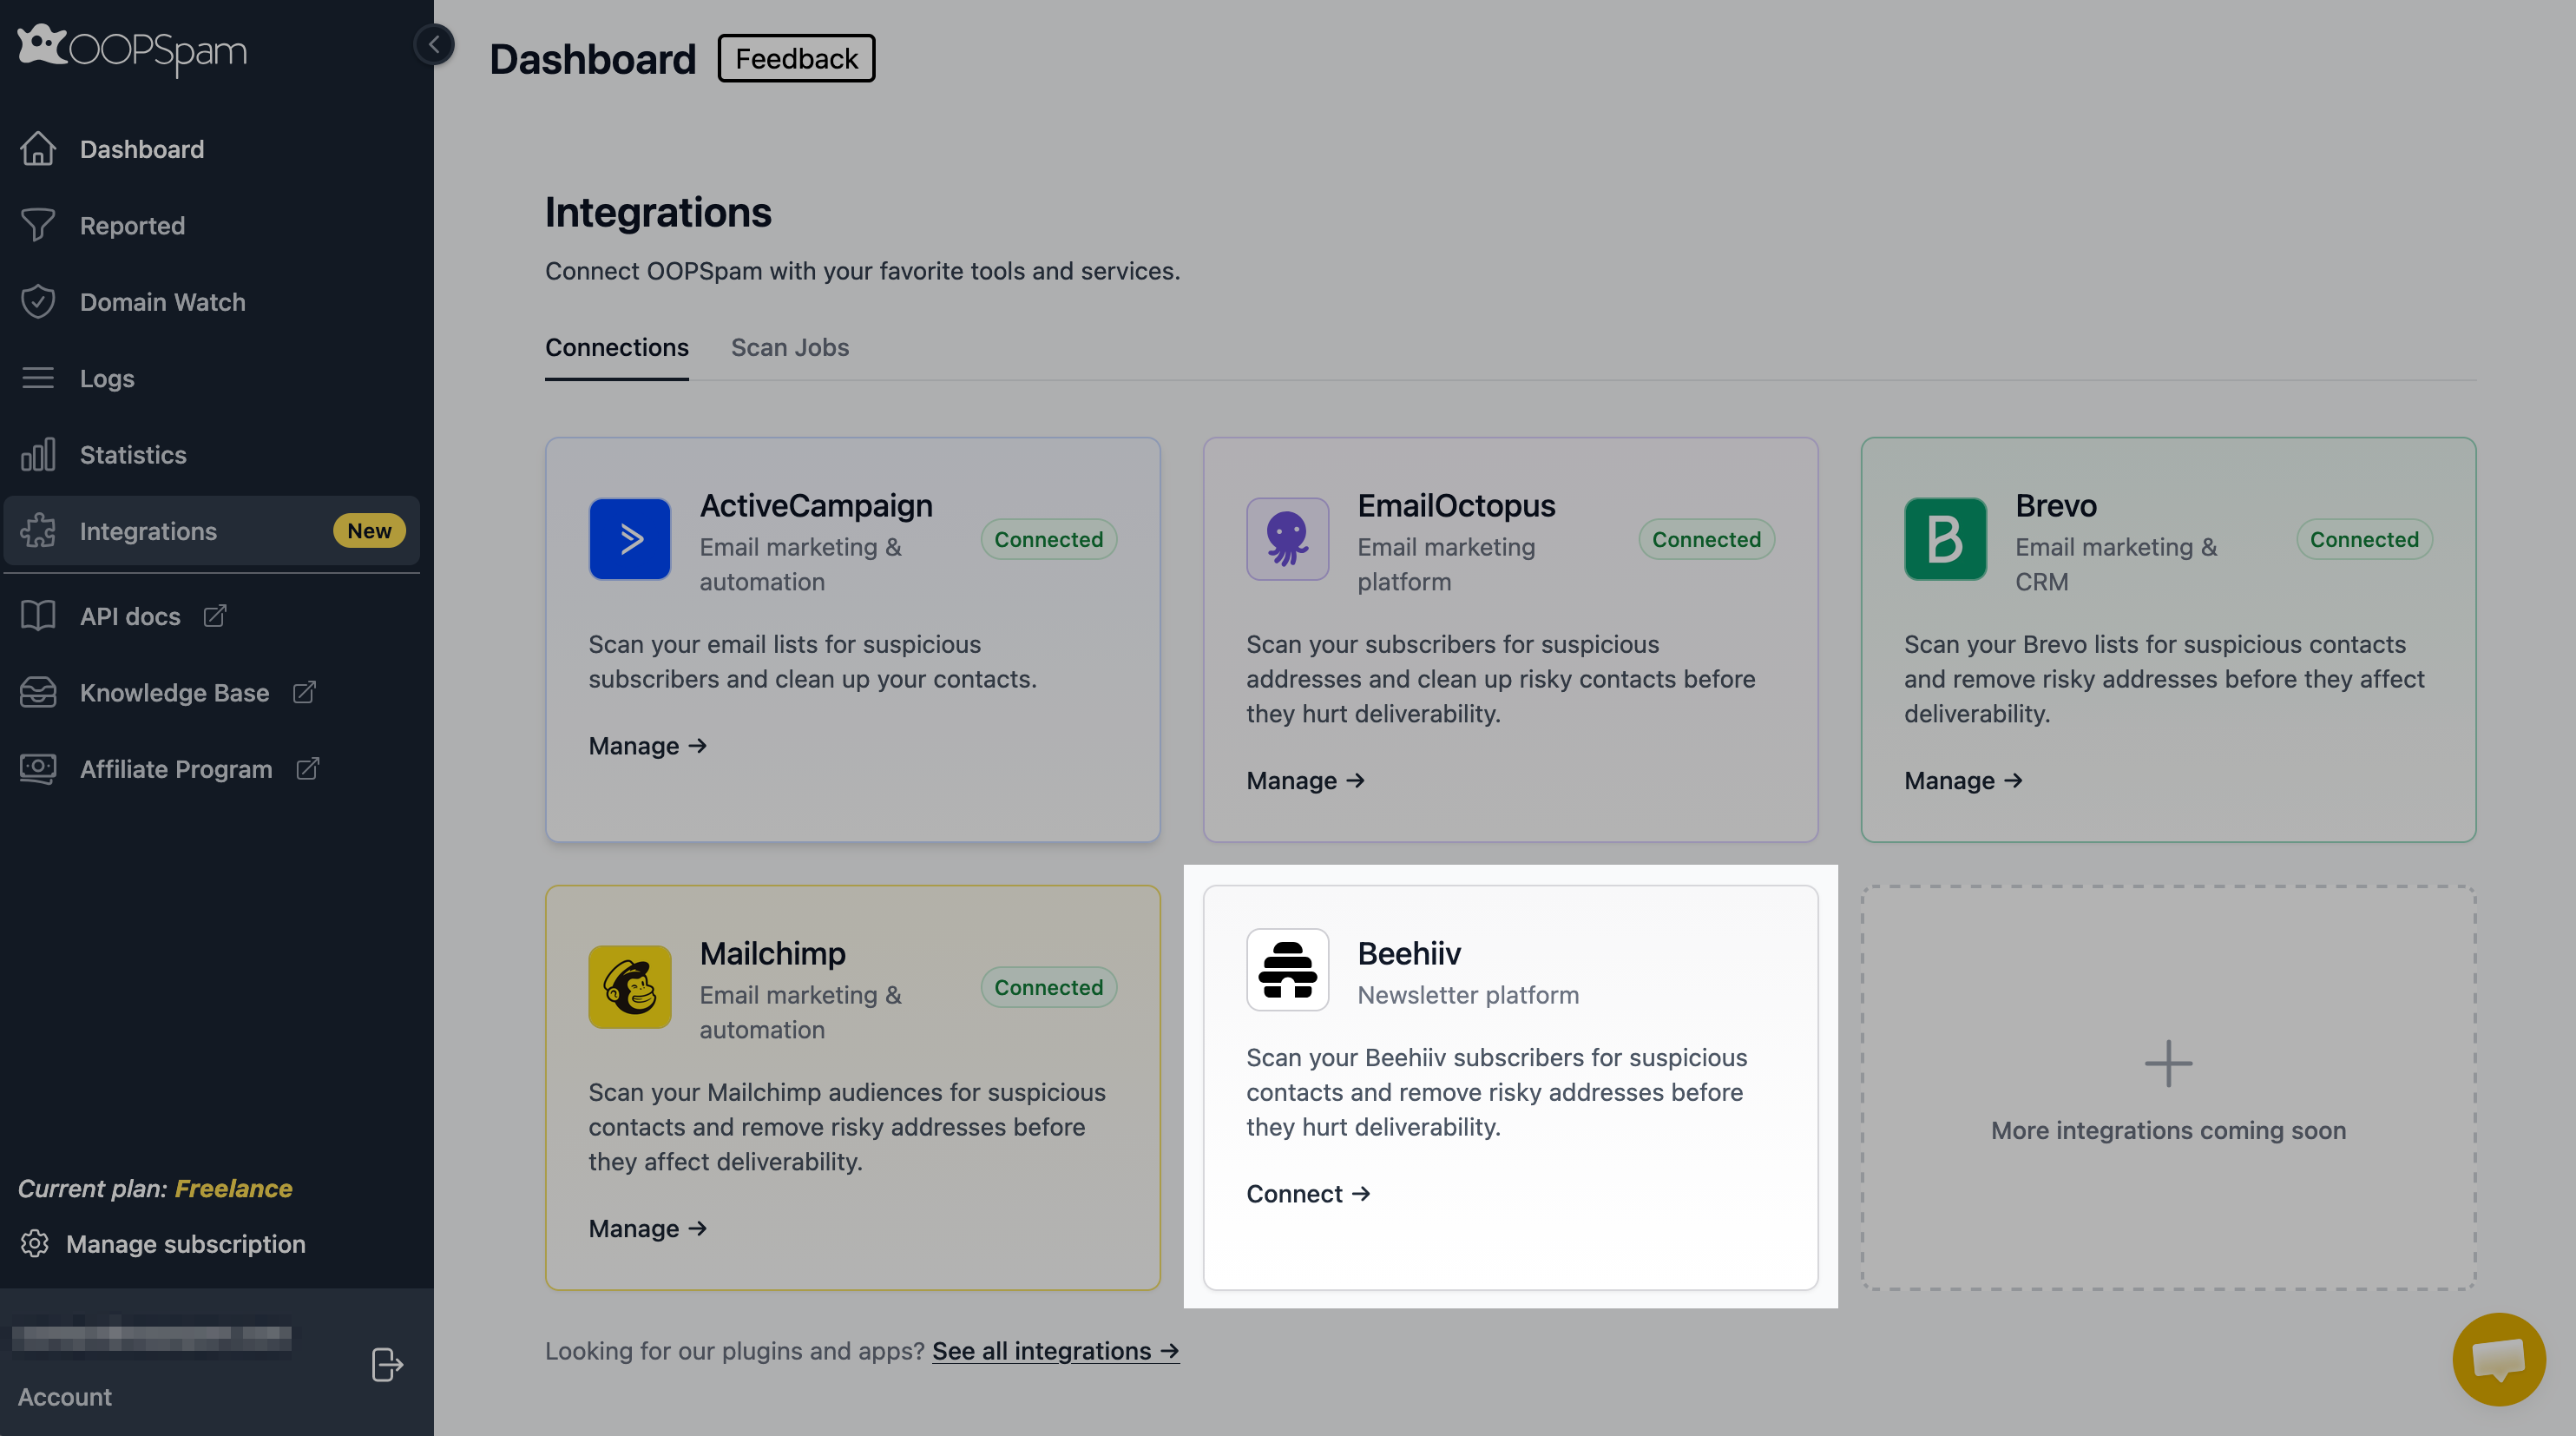
Log in to your OOPSpam Dashboard and click Integrations in the left sidebar. Find the Beehiiv card and click Connect.
Step 2: Connect With Your Beehiiv API Key
OOPSpam asks for a Beehiiv API Key. Get one from your beehiiv account under Settings → Integrations → API.
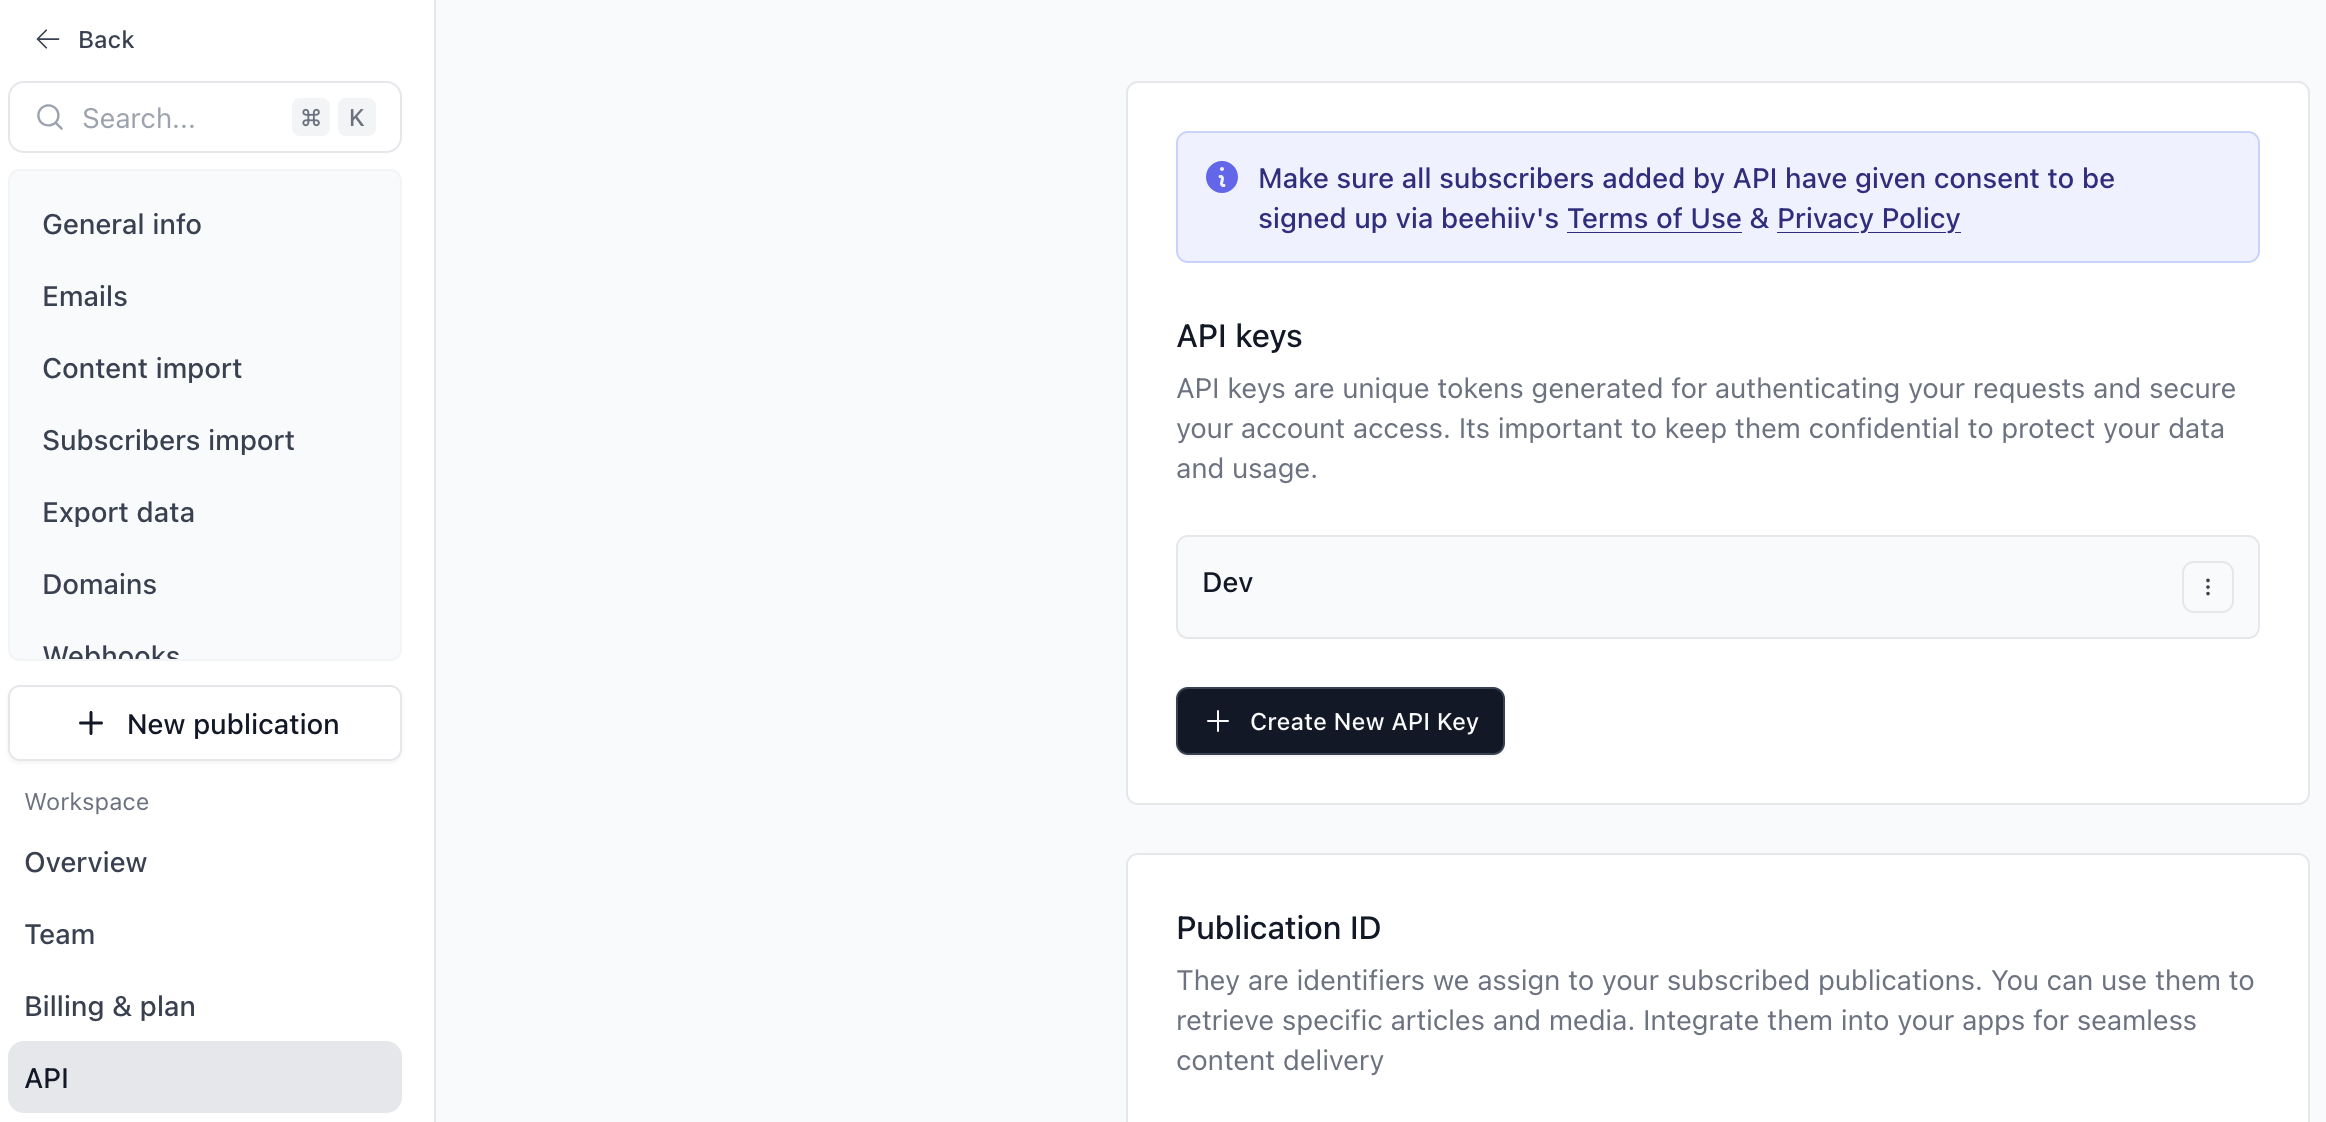
Create a key with read and write access to subscriptions, since OOPSpam needs write access to unsubscribe or delete contacts later.
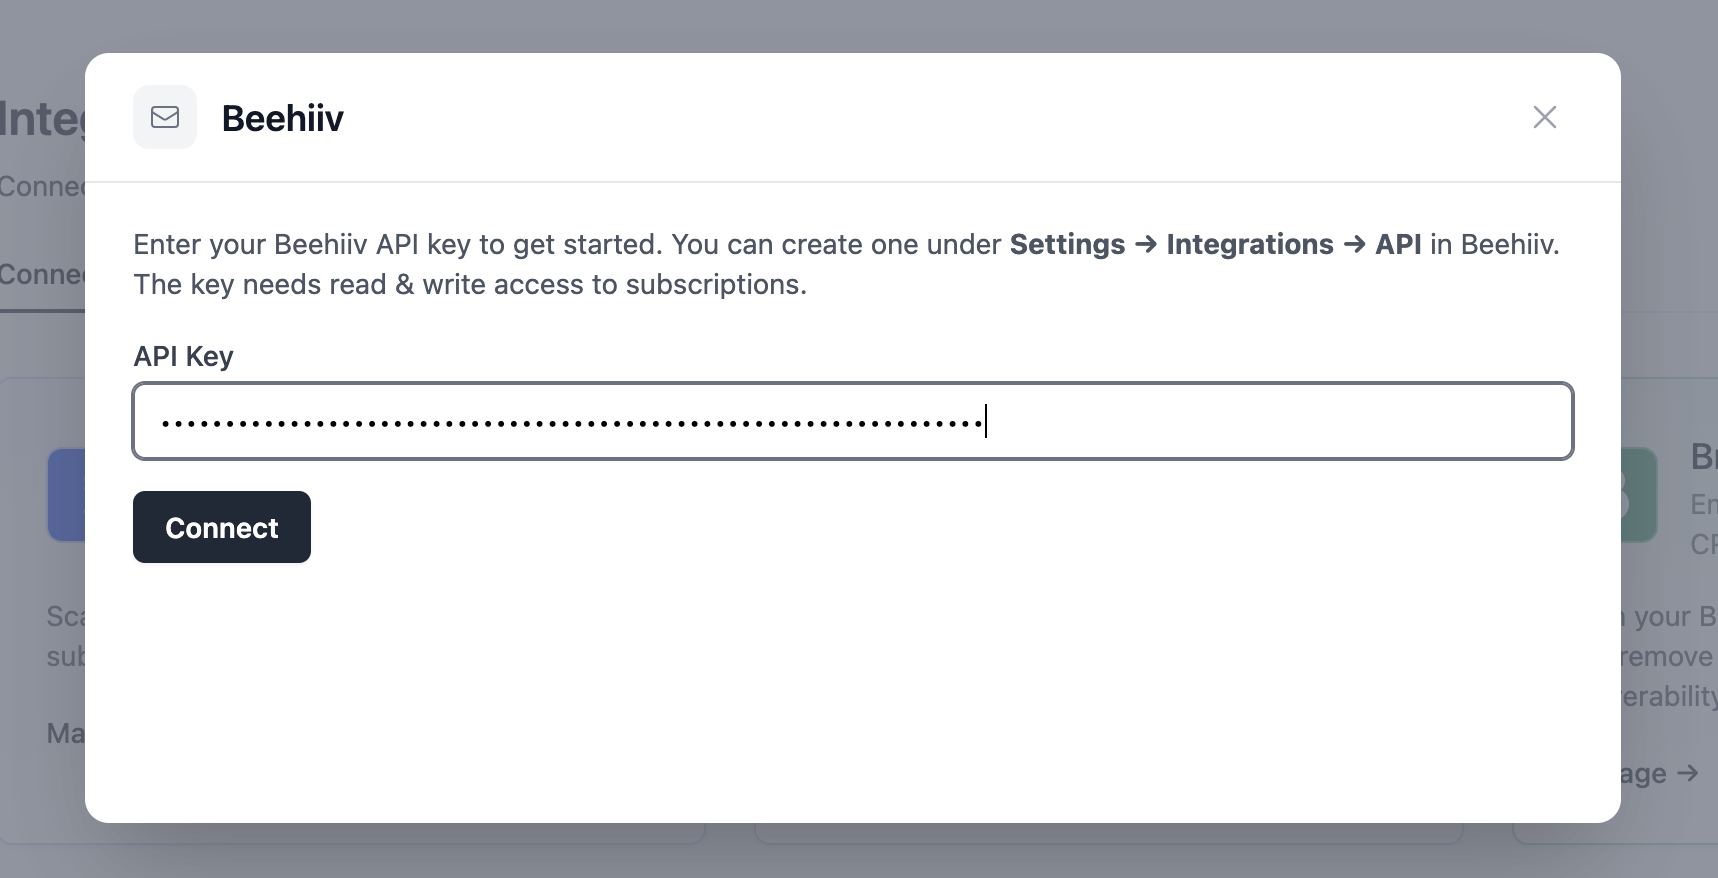
Paste the key into OOPSpam and click Connect.
Step 3: Pick a Publication to Scan
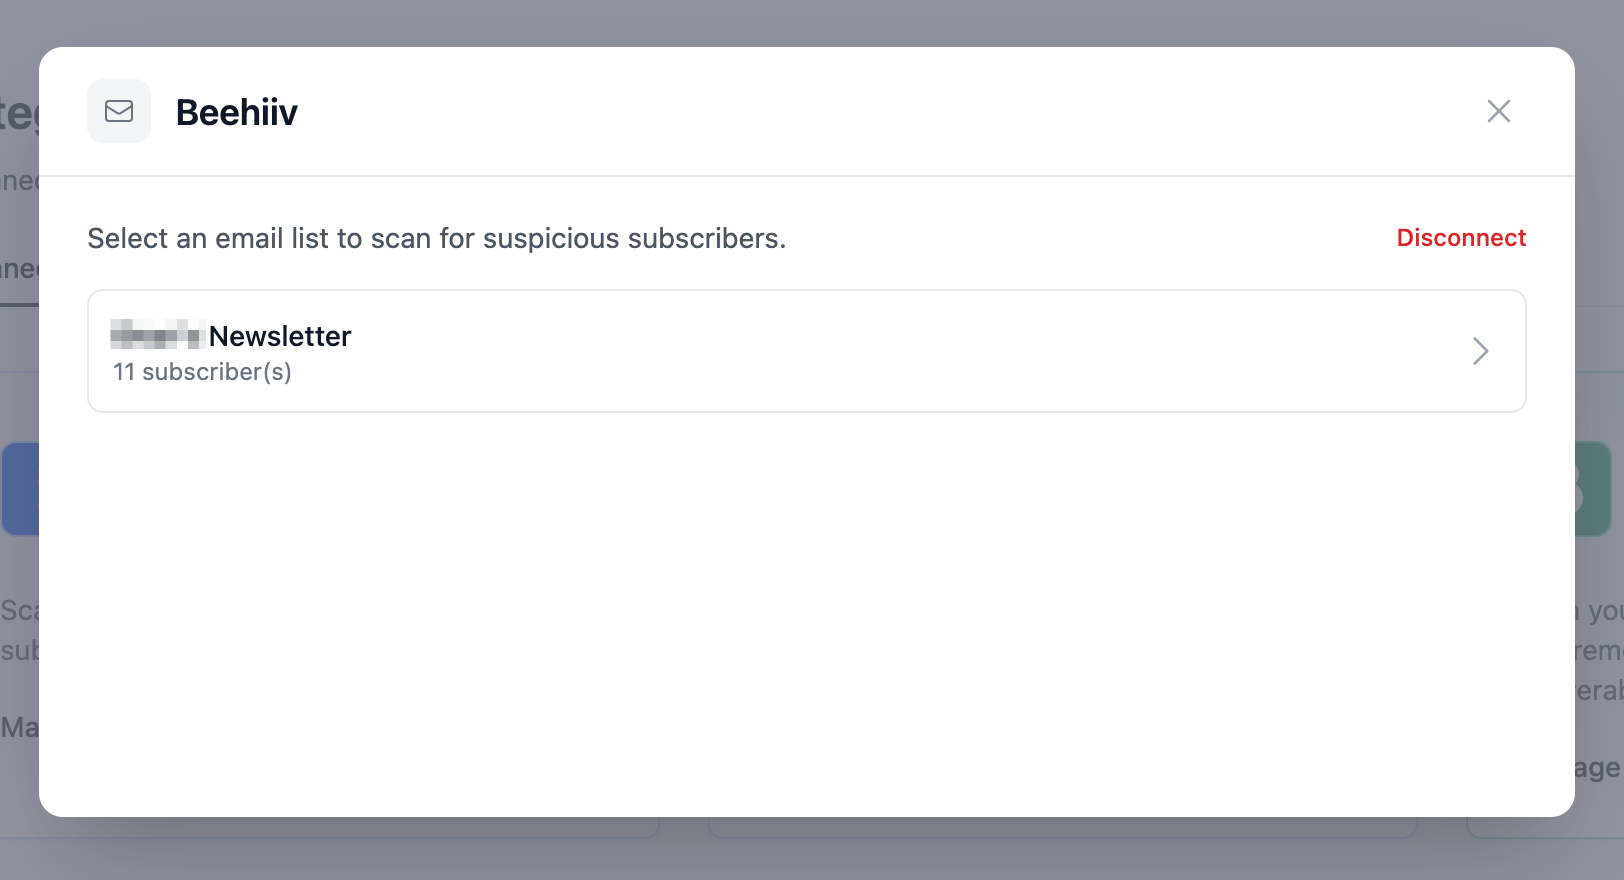
Once connected, OOPSpam lists every publication tied to your beehiiv account along with its subscriber count. Click the one you want to check.
Step 4: Preview Contacts and Fine-Tune What Counts as Risky
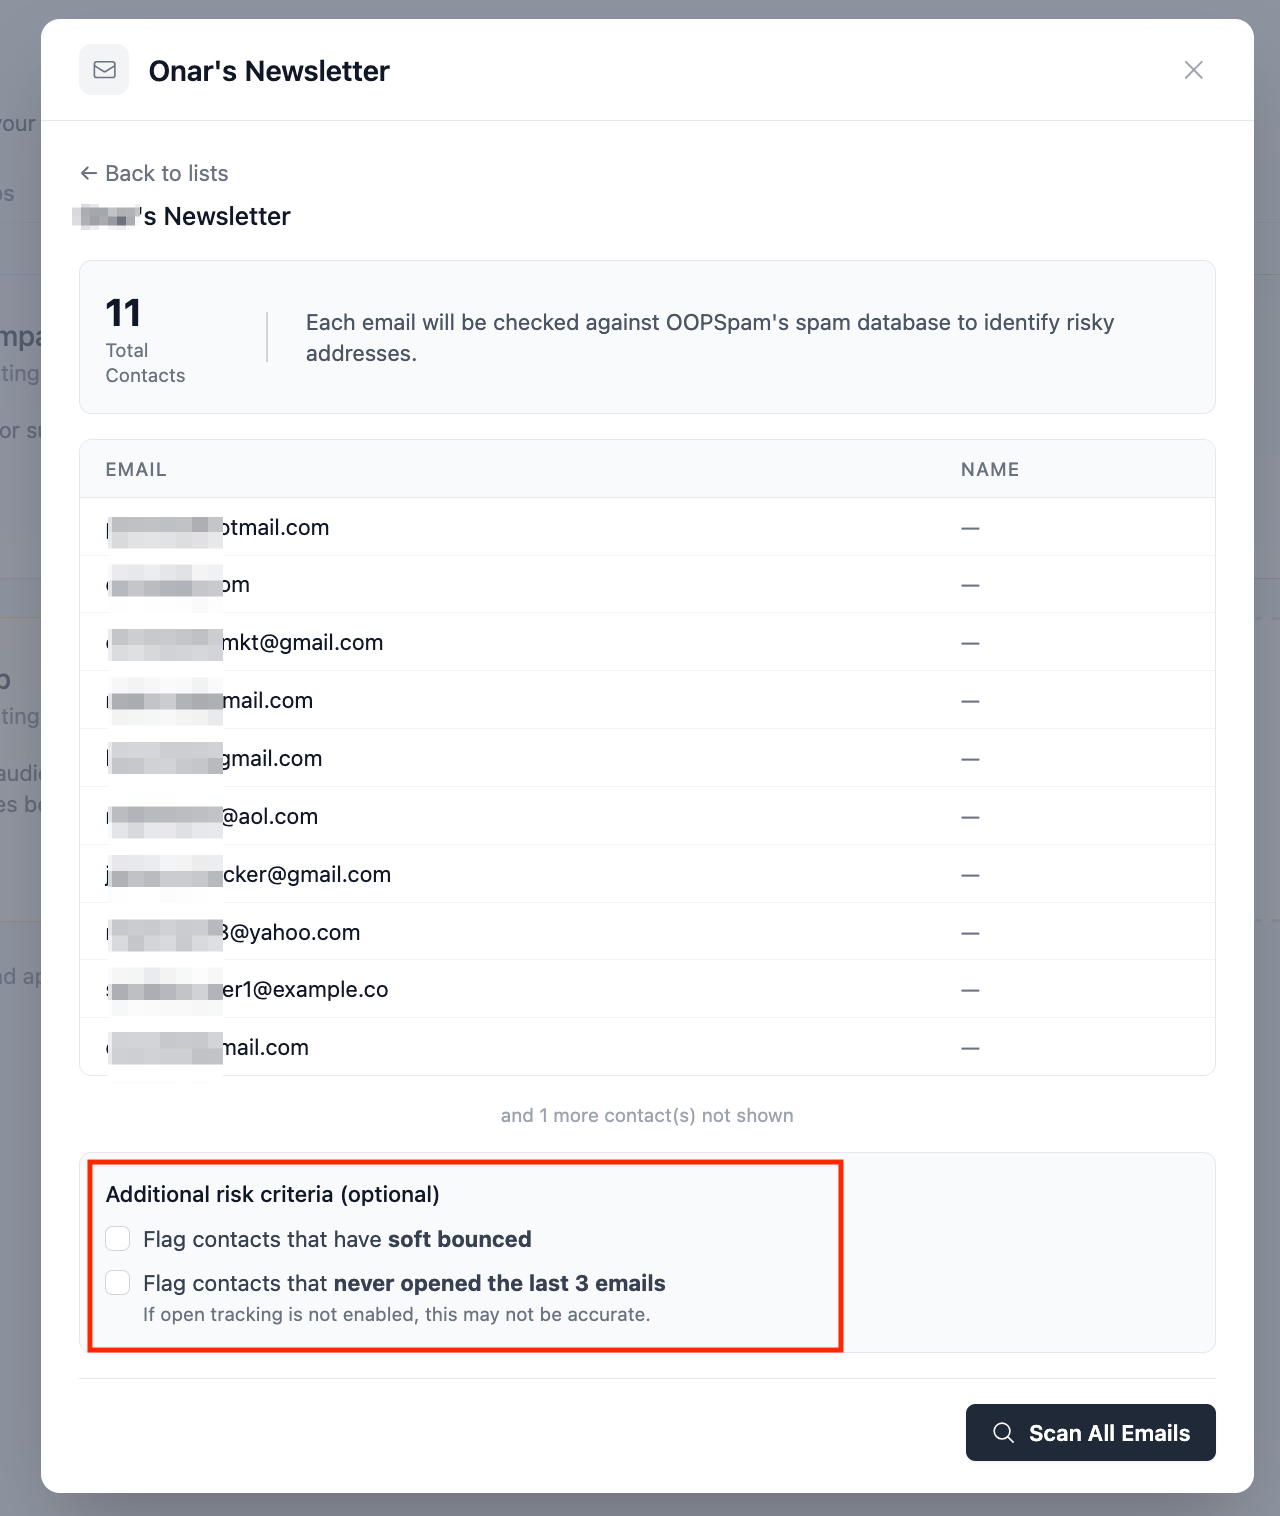
Before you scan, OOPSpam shows a preview of the contacts in that publication. Two optional filters sit on the same screen under Additional risk criteria:
- Flag soft bounced contacts catches subscribers whose most recent send came back as a soft bounce, an early sign the address is dying.
- Flag contacts that never opened the last 3 emails catches disengaged subscribers. This needs open tracking enabled in beehiiv, and results can be less accurate without it.
Step 5: Run the Scan
Click Scan All Emails. Scanning consumes OOPSpam API credits, so time it before a major send rather than after one. On larger publications, OOPSpam loads every contact first, then scans them, all without you needing to keep the tab open.

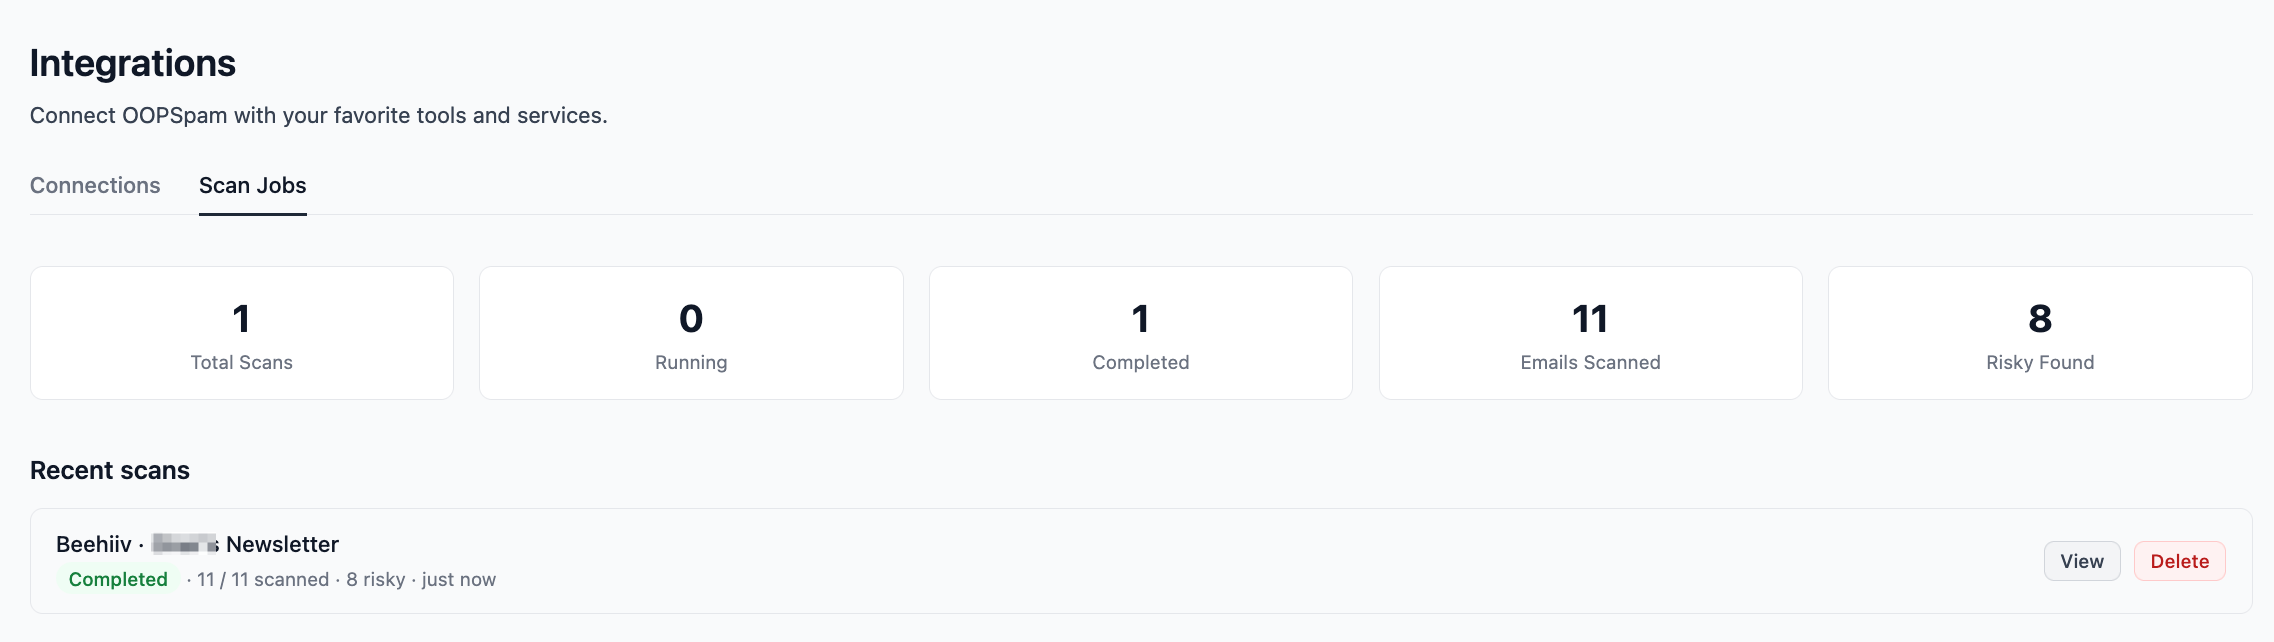
Track progress anytime from Integrations → Scan Jobs. It shows whether a scan is running, completed, or cancelled, plus how many emails were scanned and how many were flagged as risky.
Step 6: Review and Act on Risky Subscribers
Results land in three totals: Total Scanned, Clean, and Risky Remaining.
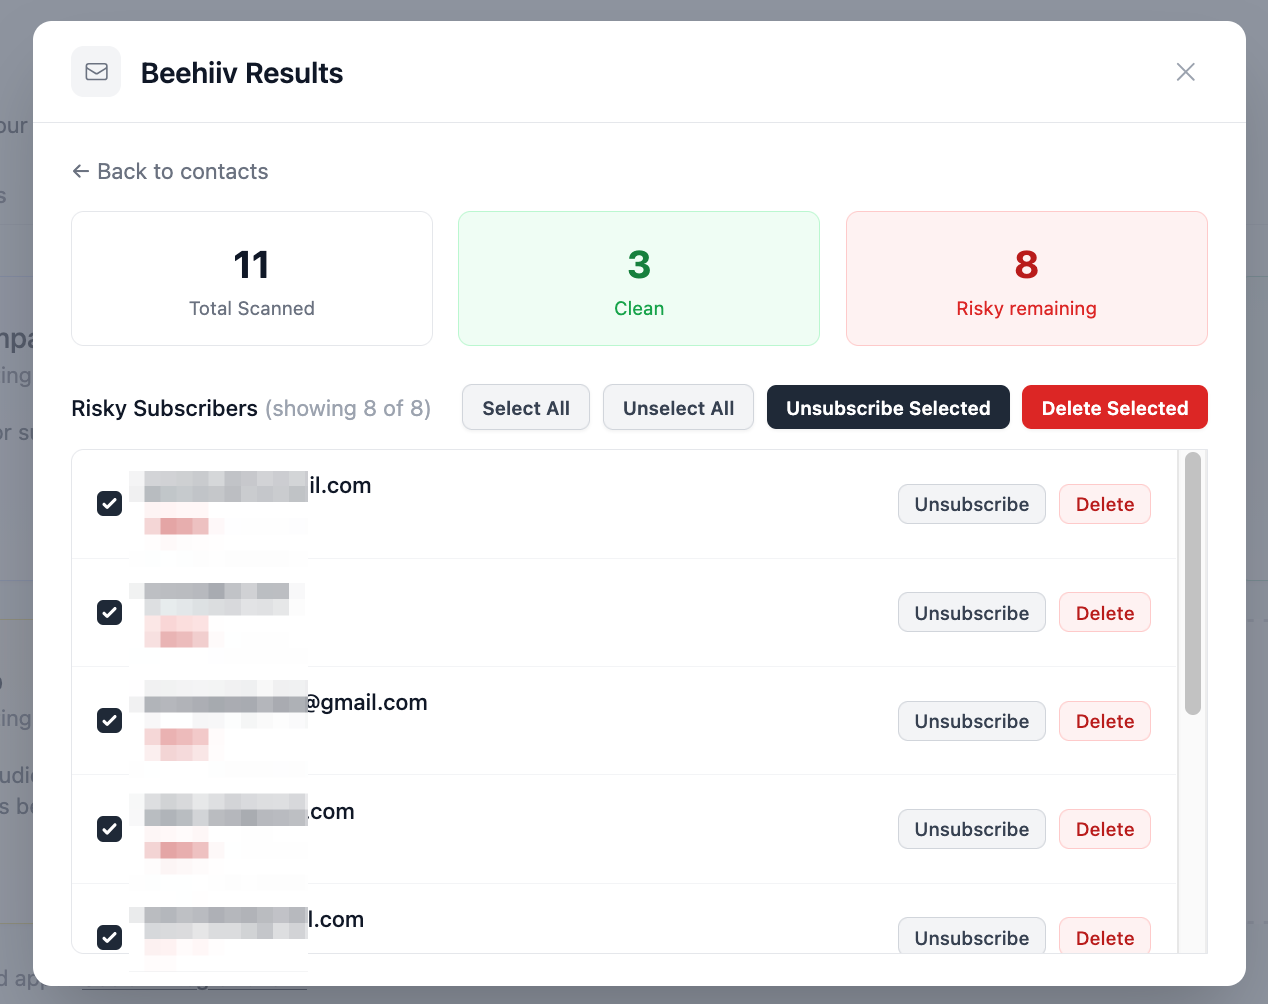
Every risky subscriber gets individual Unsubscribe and Delete buttons:
- Unsubscribe removes the contact from that publication only; they stay in your beehiiv account.
- Delete removes the contact from beehiiv entirely.
Use Select All, Unselect All, Unsubscribe Selected, or Delete Selected to clear out a full batch of risky subscribers in one action.
Once you confirm, the risky count drops and your publication is clean until the next batch of signups needs a scan.
Why Bother Cleaning Your Beehiiv List?
A beehiiv list does not stay clean on its own. A few reasons to check it on a schedule:
- Boosts and referrals pay per subscriber. Fake signups that slip through cost you money directly, not just deliverability.
- Spam traps get added through scraped or purchased contacts. Hitting even one can get your sending domain flagged.
- Gmail, Yahoo, and Microsoft now enforce bulk sender rules. A list full of dead or fake addresses drags down the engagement rate these providers watch closely.
- Engagement metrics stop meaning anything once a chunk of your list can’t or won’t open a post, which makes it harder to tell what content actually works.
A clean list means your posts reach real readers and your open rate reflects reality. Connect OOPSpam to beehiiv once, and run a scan whenever your publication needs it.