
Chazie Baniquid
Technical Content Marketer
8 minutes to read
5 Ways to Stop Spam in beehiiv
Stop spam in beehiiv with five steps: scan subscribers for risky addresses, turn on double opt-in, authenticate your sending domain, prune inactive contacts, and track your complaint rate. OOPSpam’s native beehiiv integration handles the first step. It scans your publication against a spam database in a few clicks, no CSV exports needed.
1. Scan and Clean Subscribers With OOPSpam
Every beehiiv publication picks up fake and disposable signups over time, especially once you run Boosts or a referral program. They sit quietly on your list until a send goes out and bounces spike. OOPSpam’s (that is us) beehiiv integration checks every subscriber against a spam database directly from your dashboard.
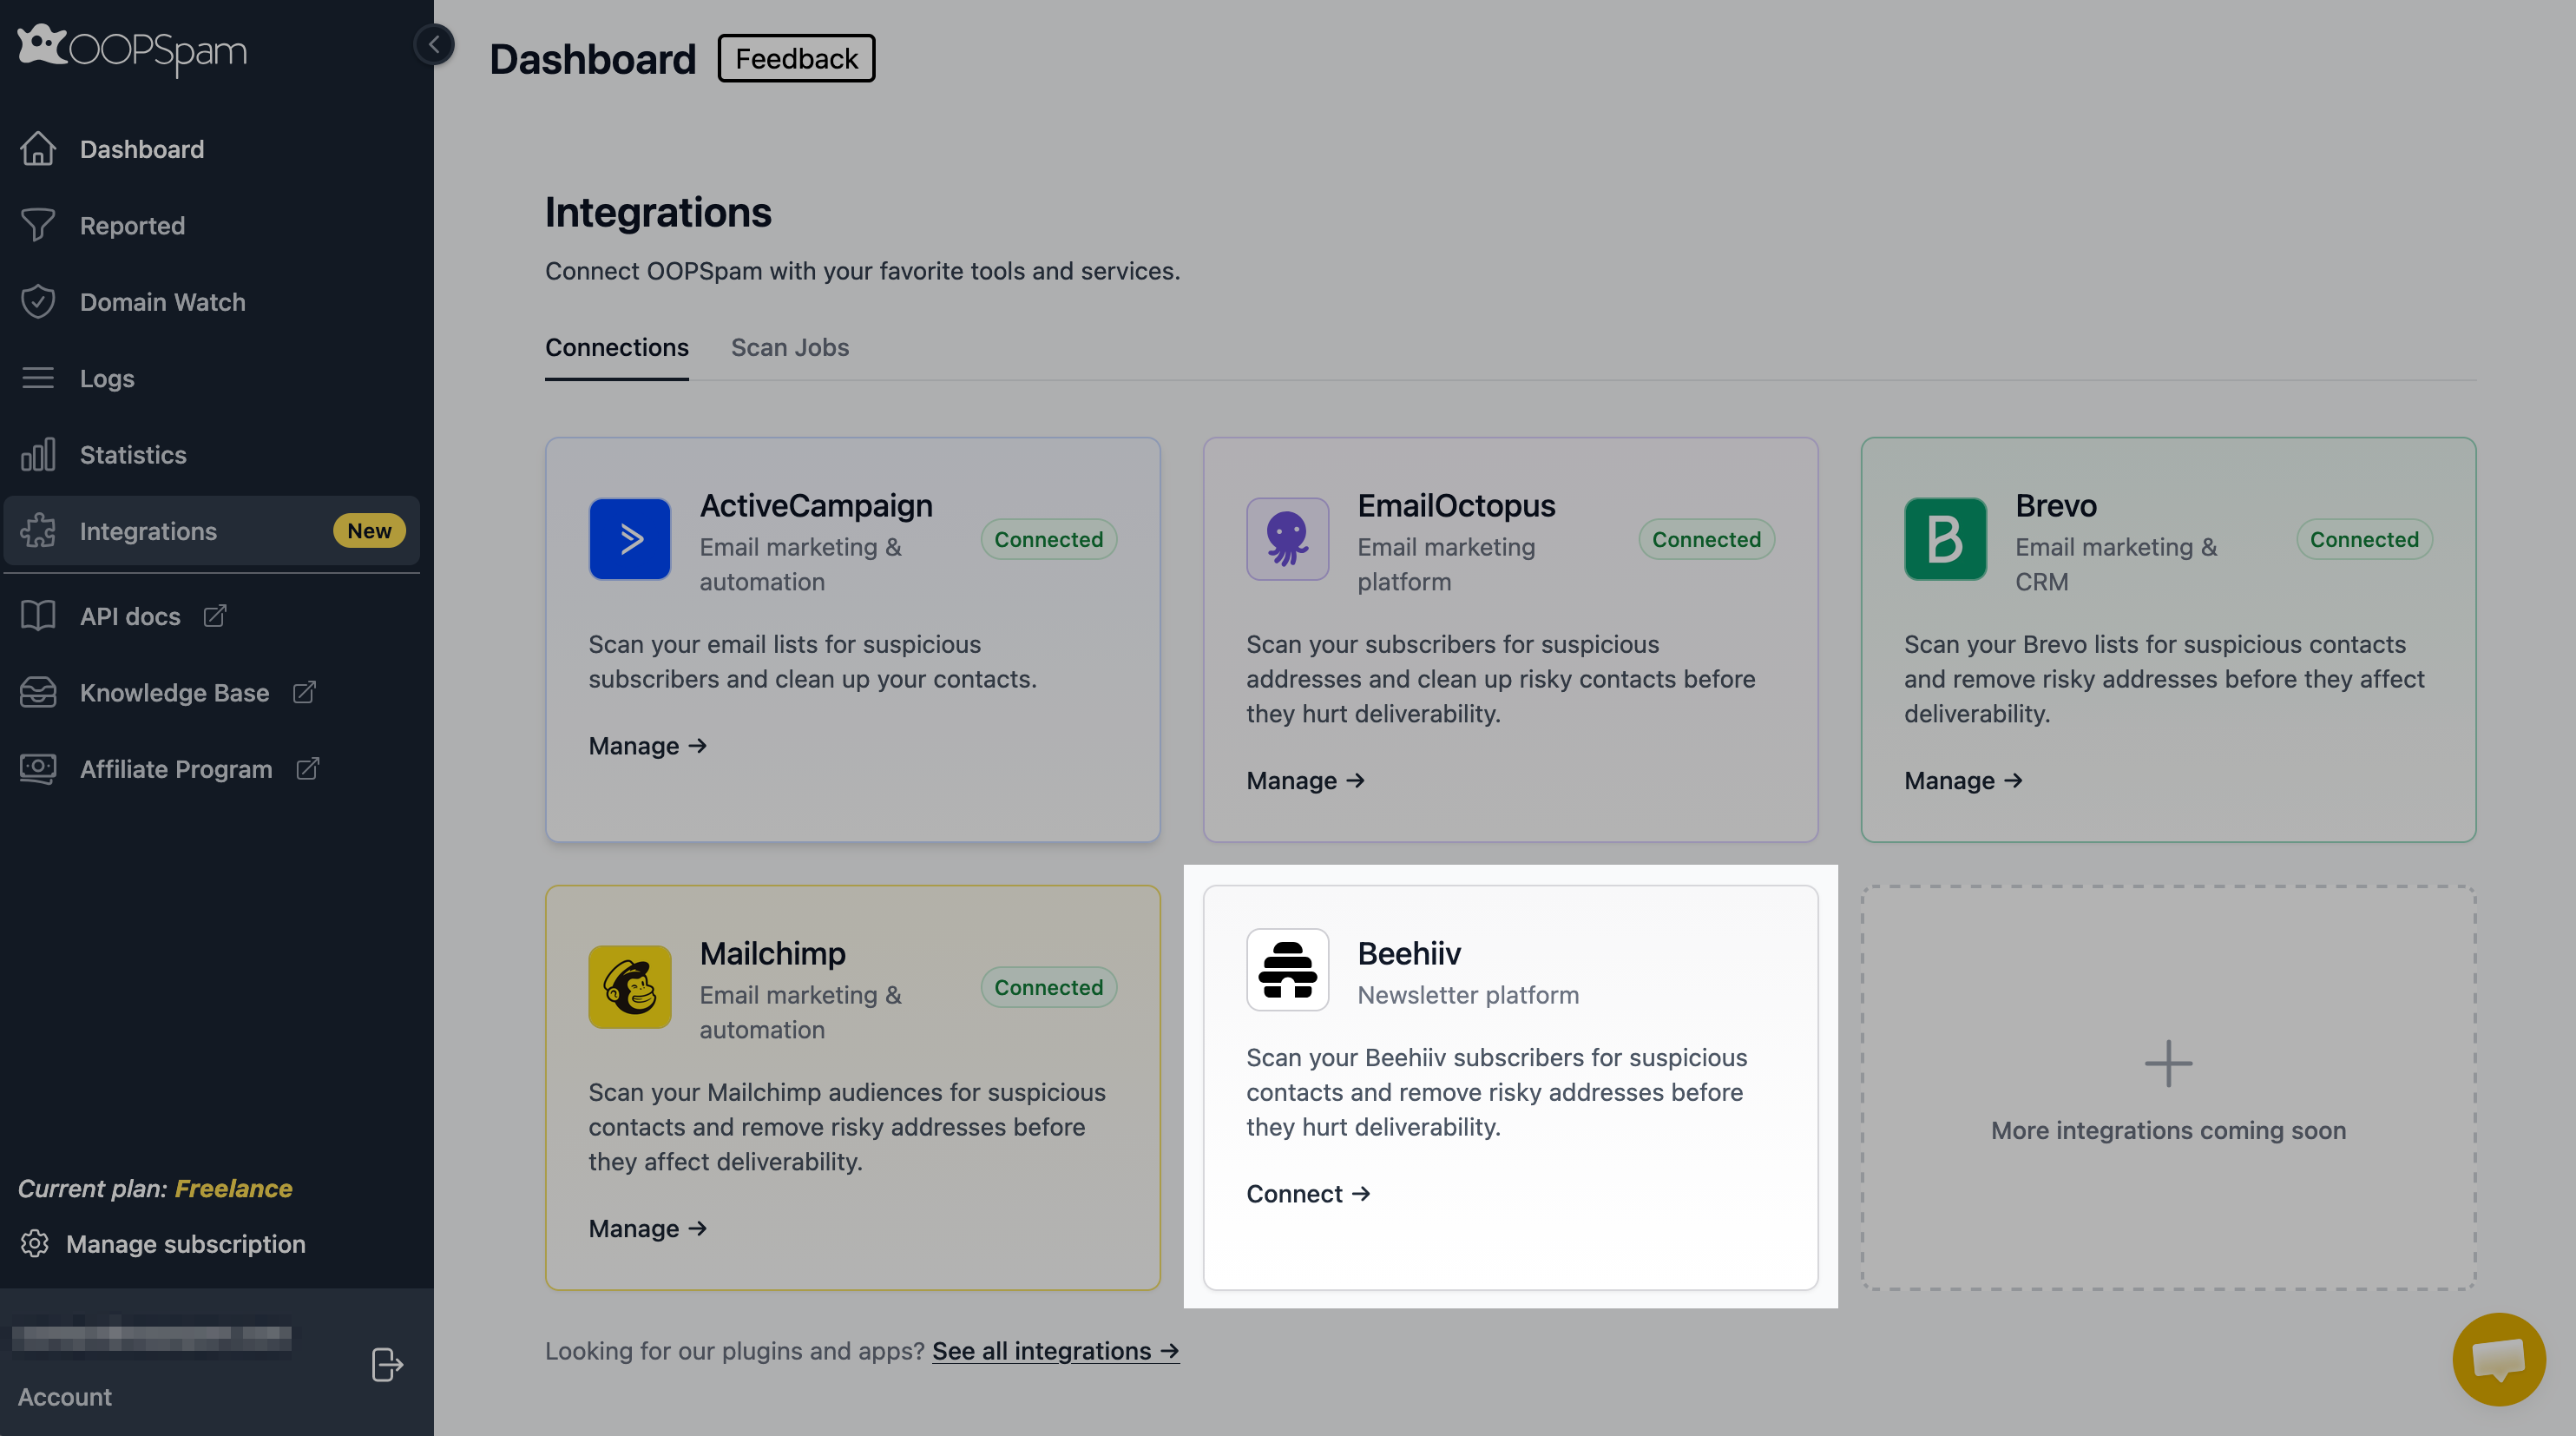
Open your OOPSpam Dashboard, click Integrations, and click Connect on the Beehiiv card.
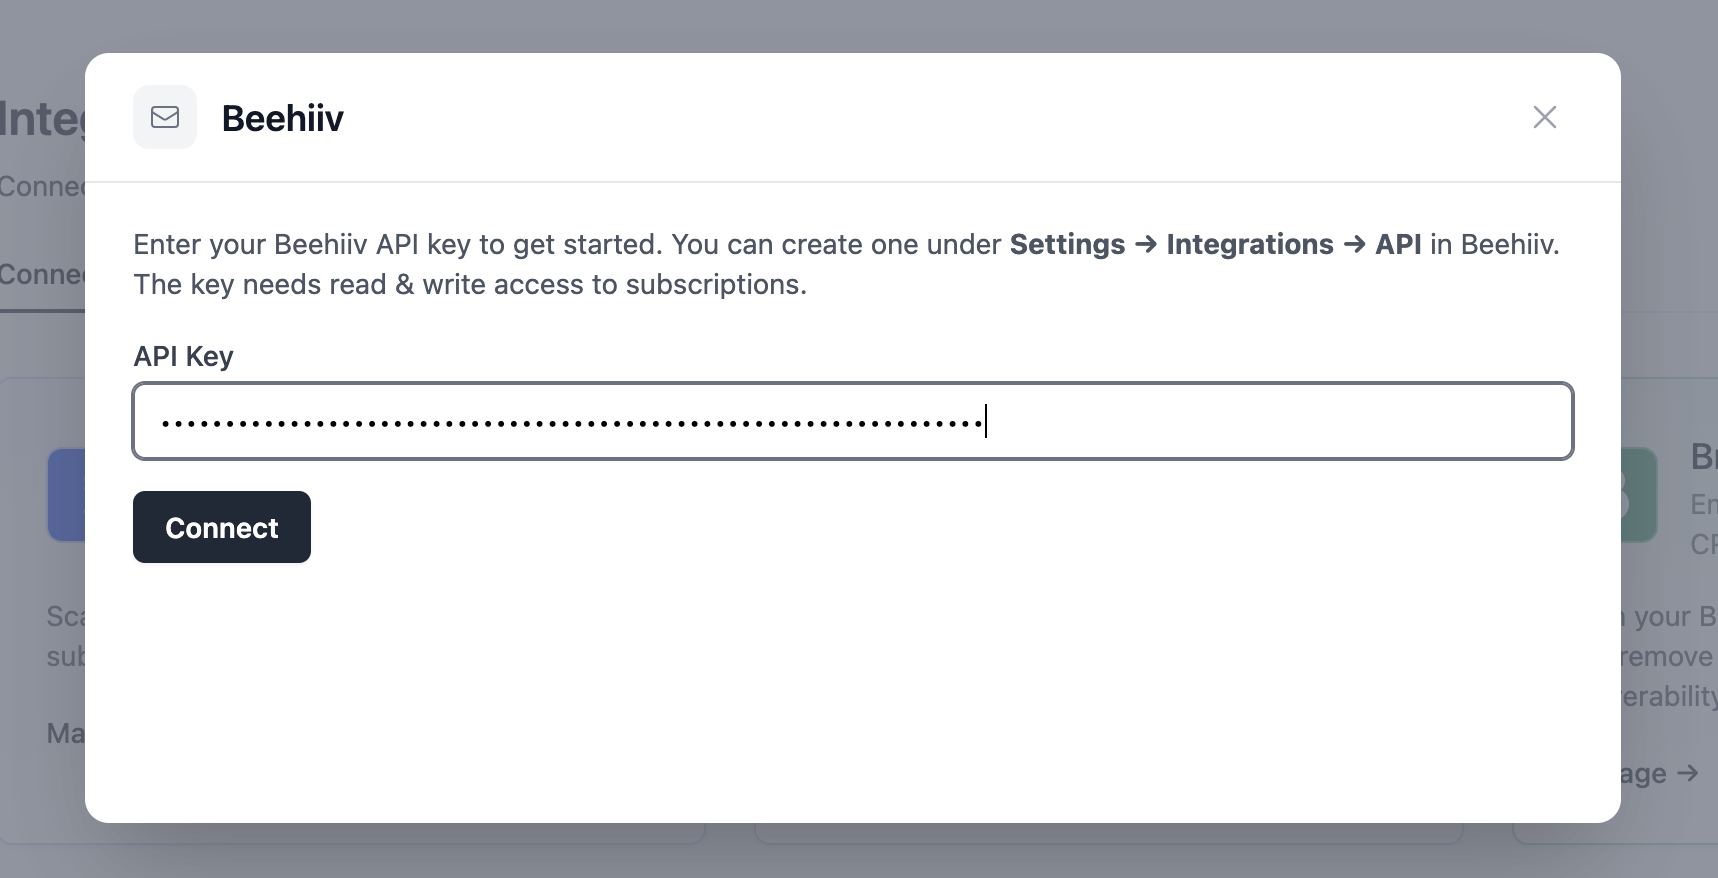
Paste your beehiiv API key. In beehiiv, go to Settings → Integrations → API and create a key with read and write access to subscriptions.
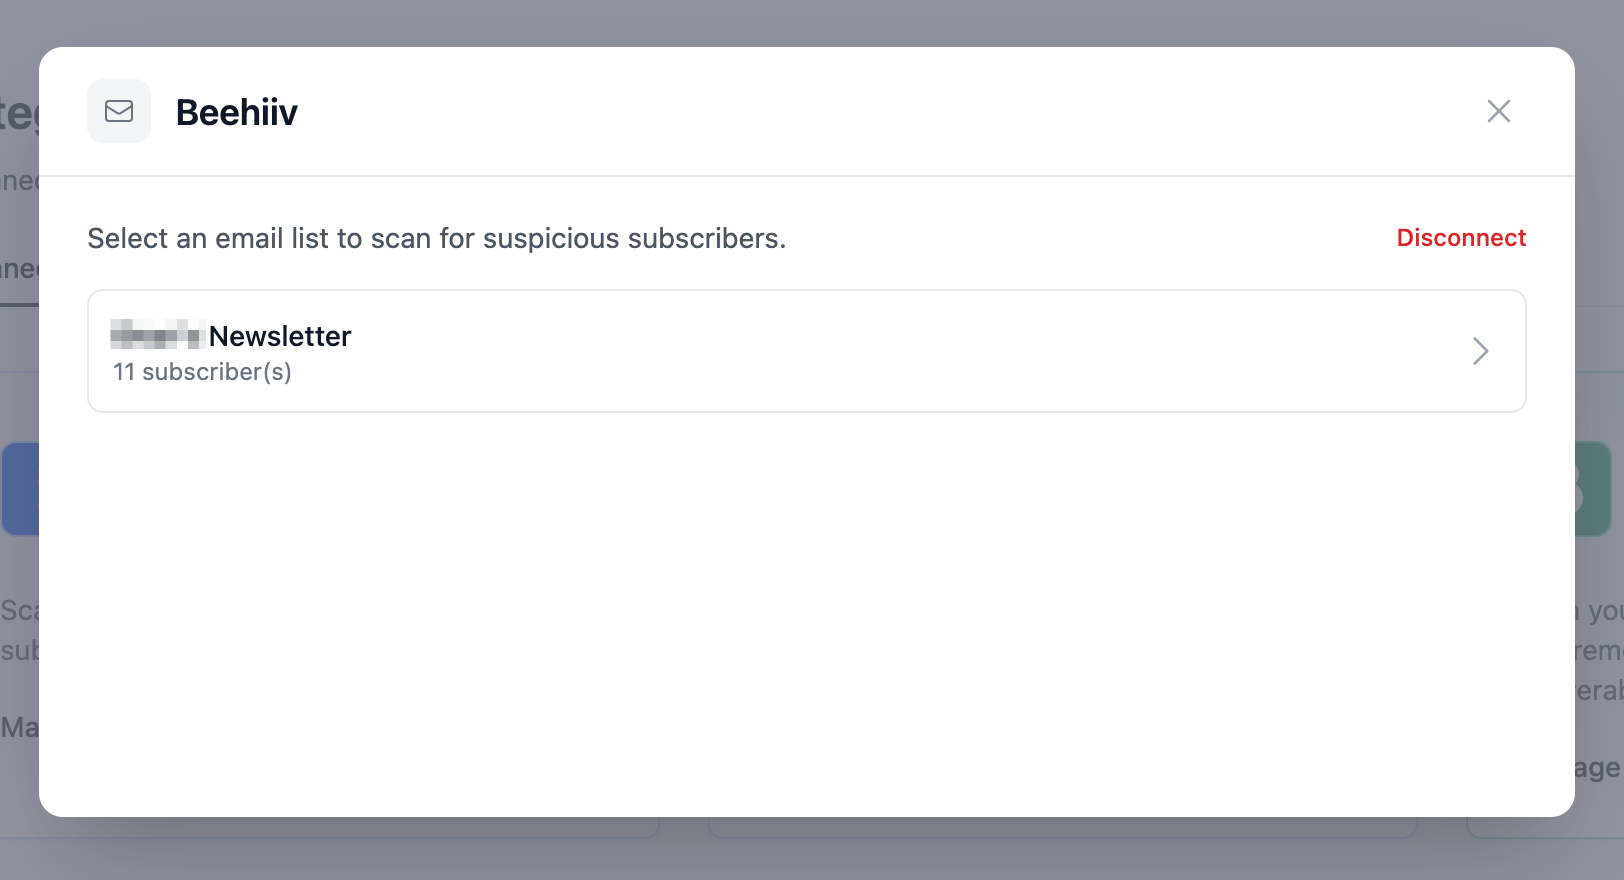
Pick the publication you want to scan. OOPSpam shows each one alongside its subscriber count.
Preview the contacts, then turn on any of these optional filters before you scan:
- Flag soft bounced contacts. Subscribers whose latest send came back as a soft bounce get flagged as risky.
- Flag non-openers. Subscribers who haven’t opened your last 3 emails get flagged. This needs open tracking enabled in beehiiv and can be less reliable without it.
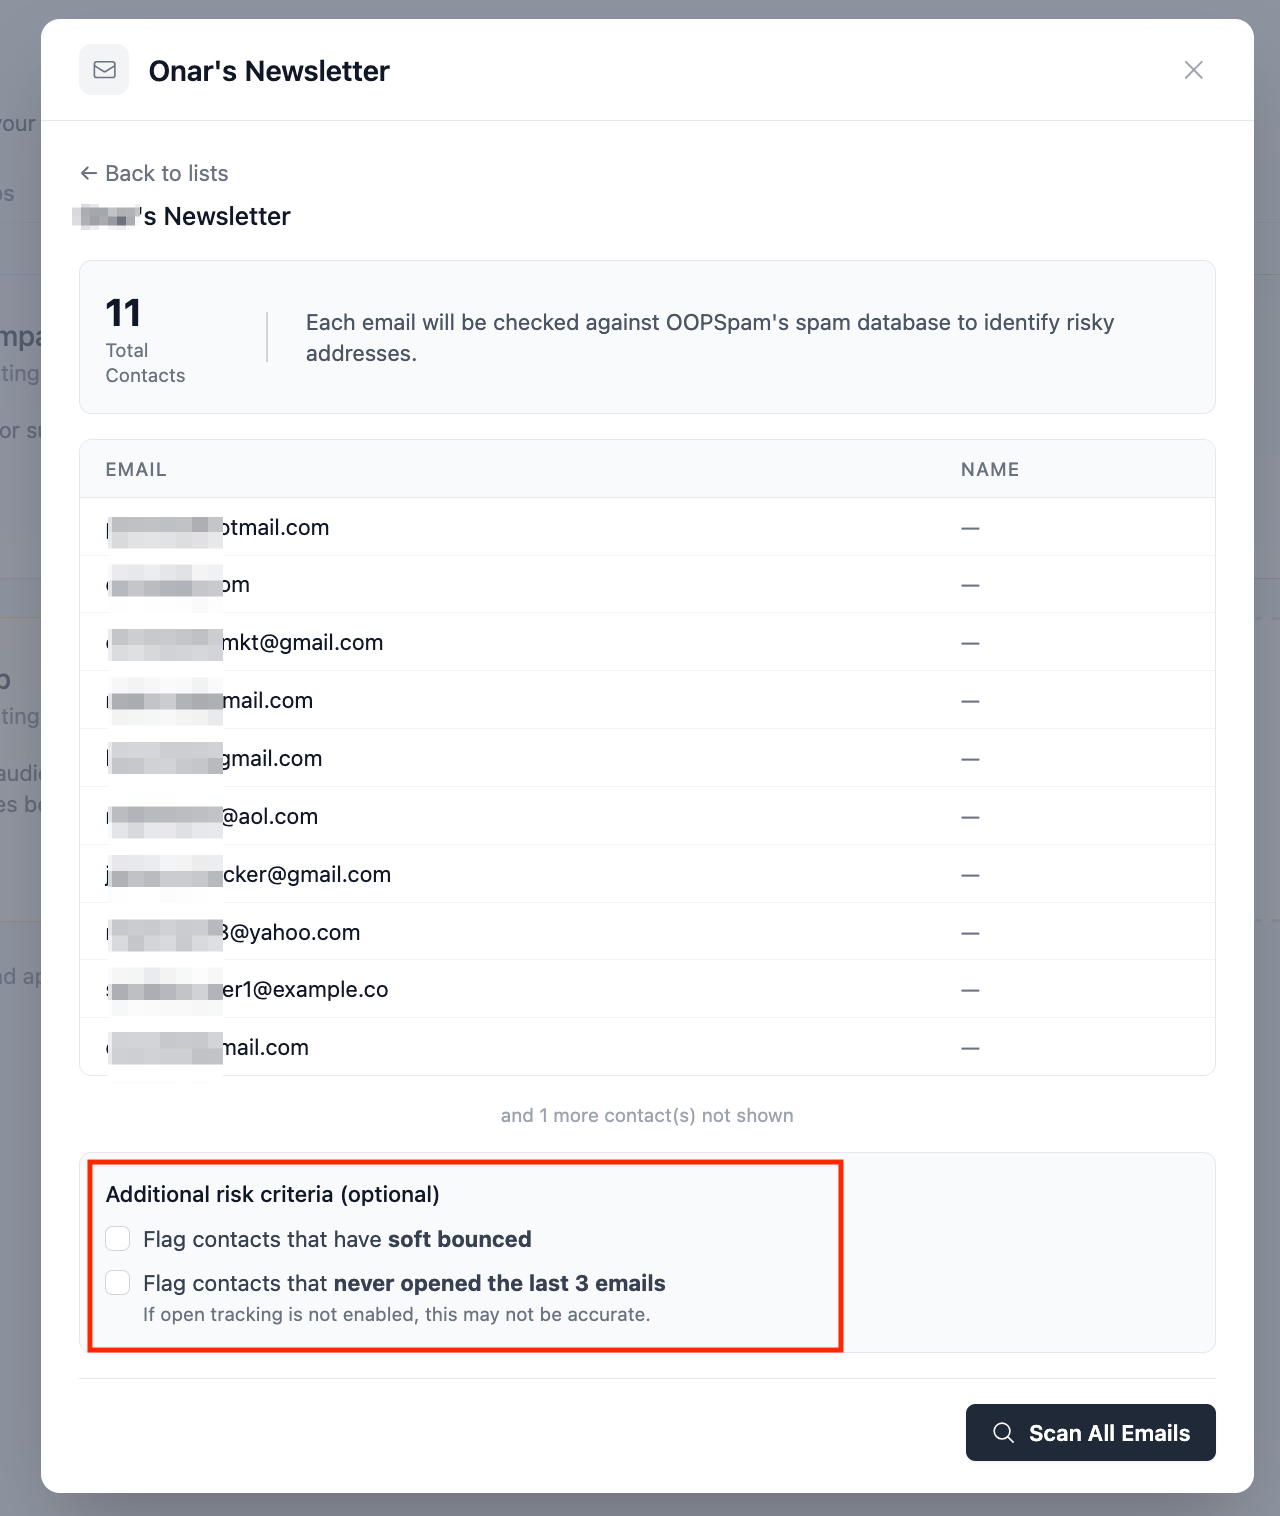
Click Scan All Emails. Scanning uses OOPSpam API credits, so run it before a big send rather than after.
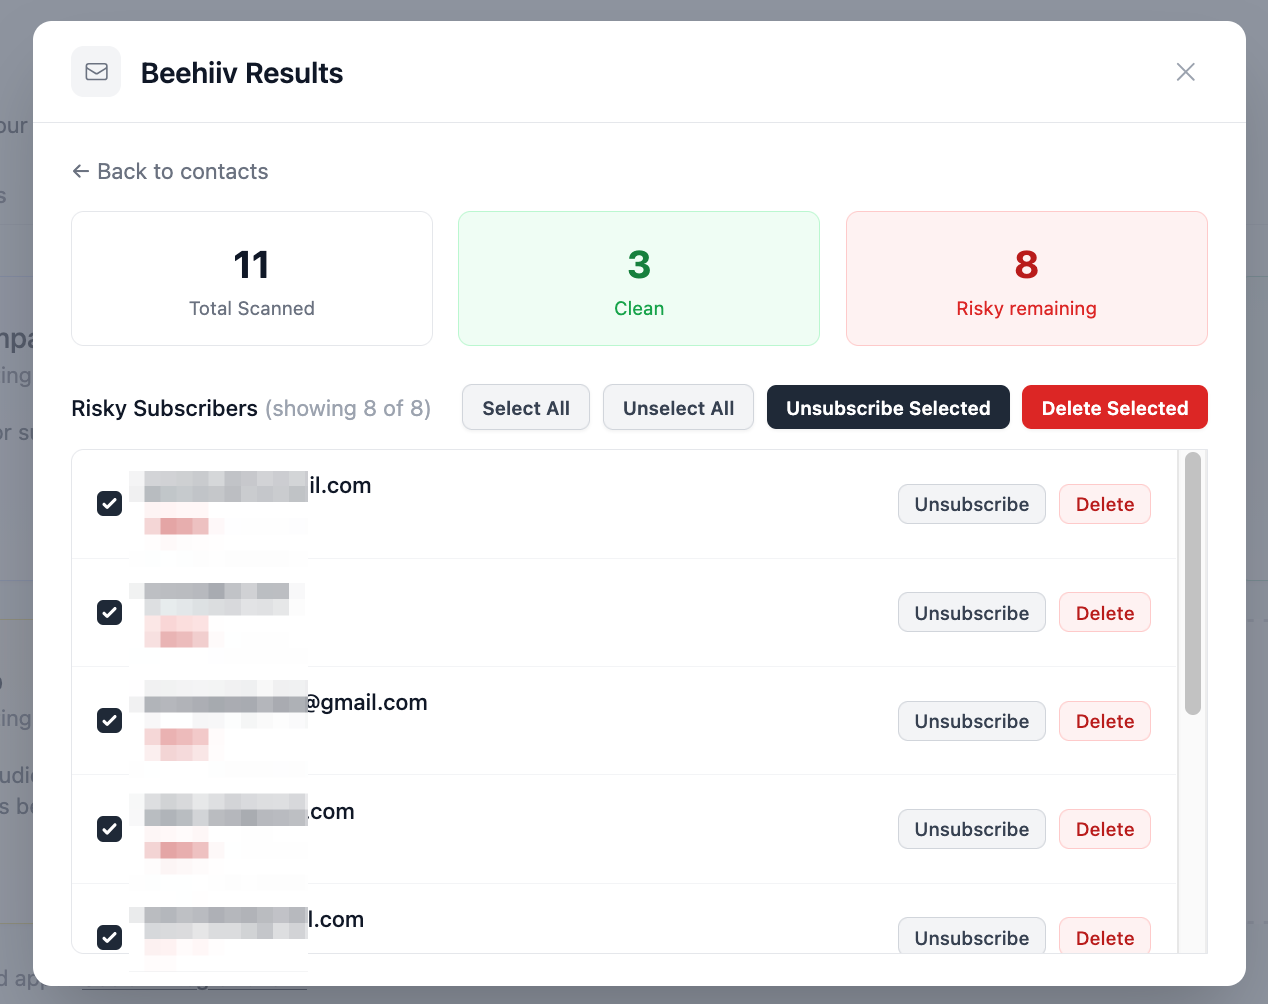
Review the totals: Total Scanned, Clean, and Risky Remaining. Select subscribers and Unsubscribe (removes them from that publication only) or Delete (removes them from beehiiv entirely). Use Select All or Unsubscribe/Delete Selected for bulk action.
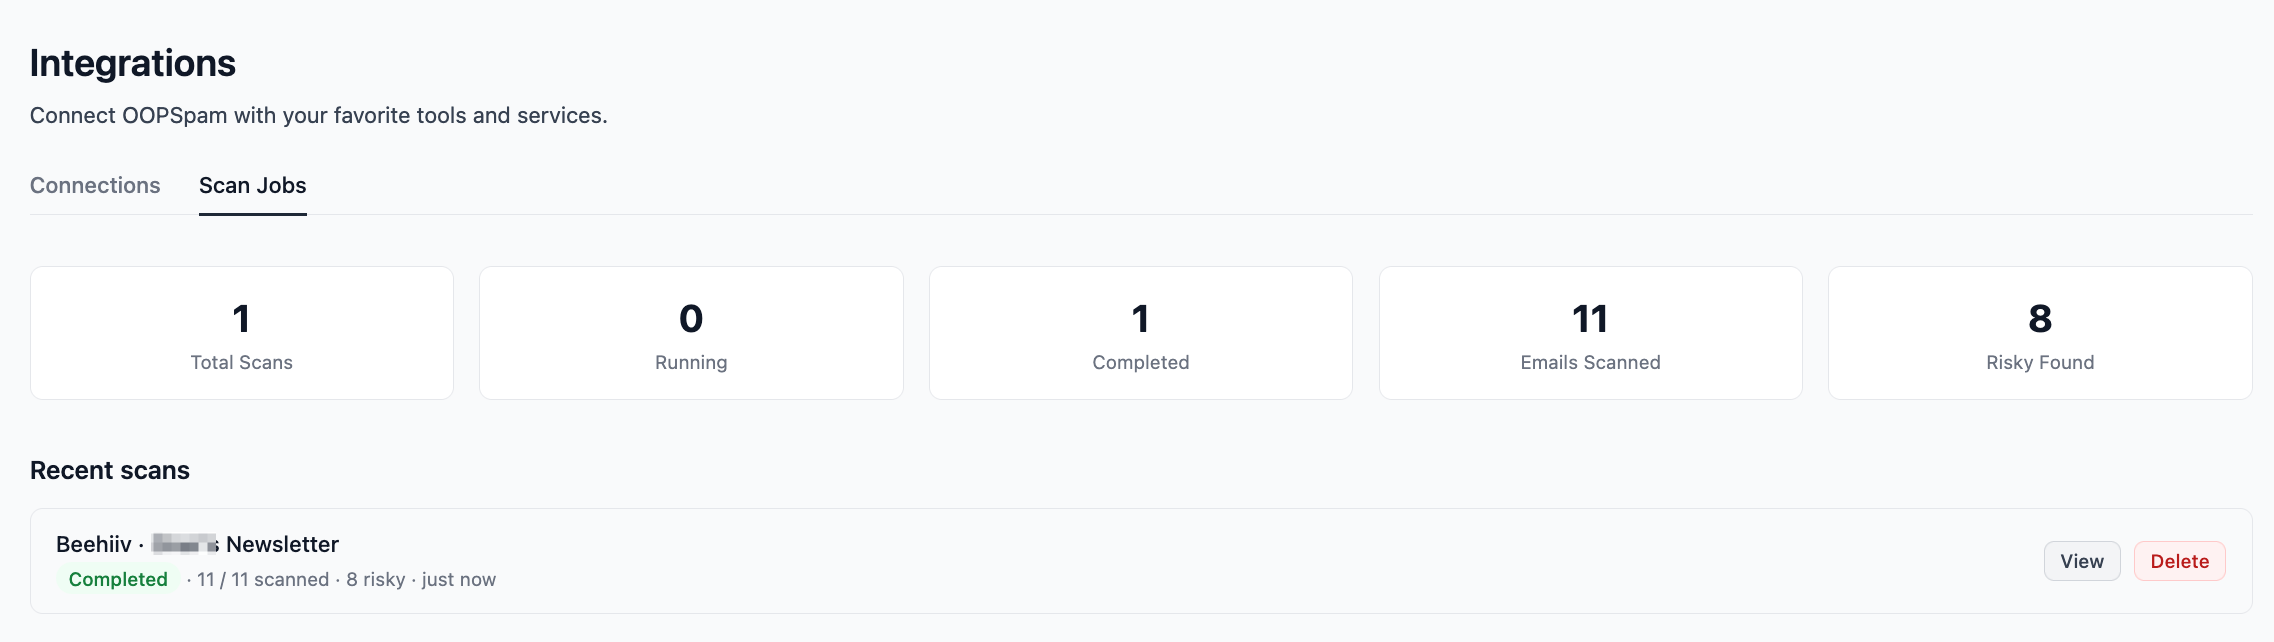
Every run is logged under Integrations → Scan Jobs, so you can see how many emails were scanned and how many were flagged across all past scans without re-running anything.
2. Turn on Double Opt-In and Smart Nudge
beehiiv ships single opt-in by default: a visitor submits an email and starts receiving posts immediately. Double opt-in adds a confirmation step a bot cannot complete, since it requires clicking a link inside the inbox it just signed up.
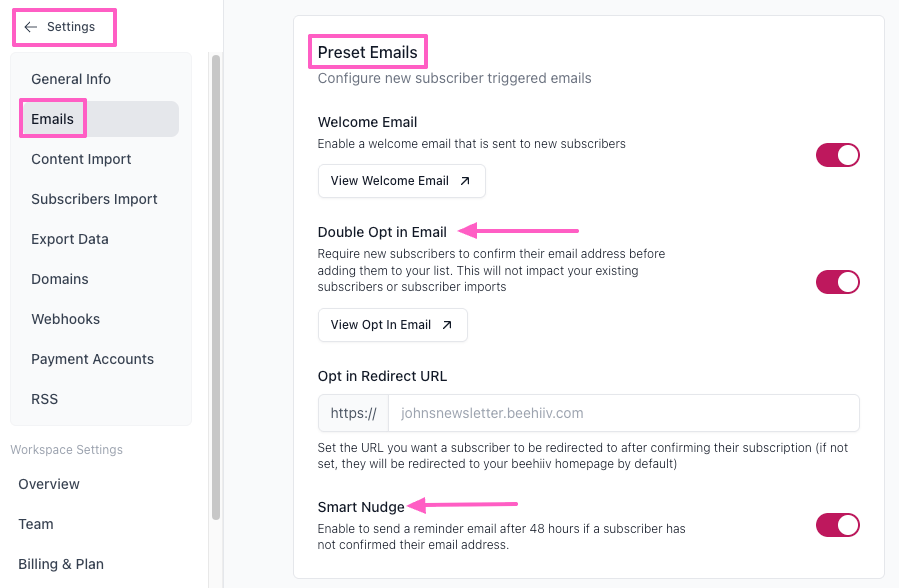
Go to Settings → Emails → Preset Emails, scroll to Double Opt-In, and toggle it on. Subscribers land in Pending status until they confirm, and pending subscribers never receive a post or a welcome email, so a mistyped or fake address never counts against your open rate or bounce rate.
Turn on Smart Nudge at the same time. It automatically re-sends the confirmation email once, 48 hours after the first attempt, which lifts confirmation rates without any manual follow-up. Double opt-in will not stop a subscriber using a disposable inbox that can still receive and click a link, so pair it with a periodic OOPSpam scan rather than relying on it alone.
Also Watch Your Referral Program and Boosts
beehiiv’s referral program and Boosts pay for verified subscribers, which gives people a reason to fake a signup. This risk does not exist in Mailchimp-style tools, since the fraud enters through a growth feature, not a signup form.
Check your referral dashboard periodically for repeat referrers with unusually high counts and no matching engagement, and review Boosts leads once they leave pending status.
3. Authenticate Your Custom Sending Domain
A beehiiv subdomain comes pre-authenticated. Connect a custom domain and authentication becomes your job, under Settings → Publication → Domains.
- SPF and DKIM beehiiv generates for you as CNAME records. Copy the exact host and value it gives you into your DNS provider; do not reuse records from another beehiiv publication or an old setup.
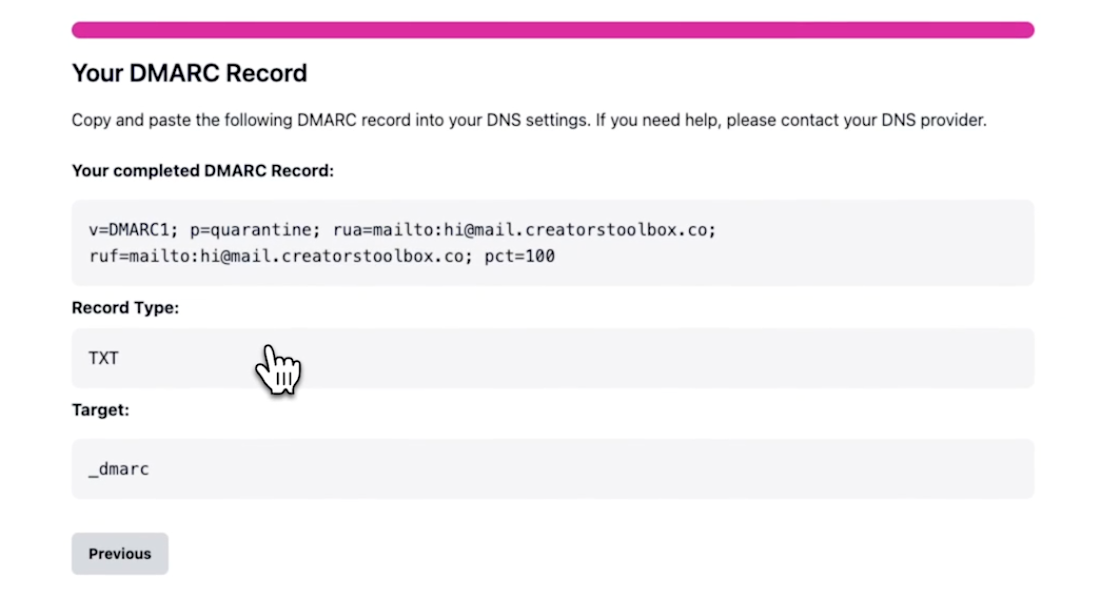
- DMARC beehiiv does not generate. Since February 2024, beehiiv has required a valid DMARC TXT record on every custom domain, and you publish it yourself at _dmarc.yourdomain.com. beehiiv’s DMARC wizard in the same Domains screen builds the correct record for you.
Two beehiiv-specific snags worth knowing: a DKIM status of “Not Found” right after setup is normal, since beehiiv only confirms DKIM once outbound mail actually triggers detection. And if your DNS runs through Cloudflare, set these records to DNS Only; a proxied record is invisible to beehiiv’s verification. Propagation can take up to 72 hours, so avoid deleting and re-adding records in that window.
Without SPF, DKIM, and DMARC, Gmail and Yahoo (both requiring all three for bulk senders since 2024) and Microsoft (2025) will bury your posts by default, regardless of how clean your subscriber list is.
4. Prune Inactive Subscribers and Watch Your Suppression List
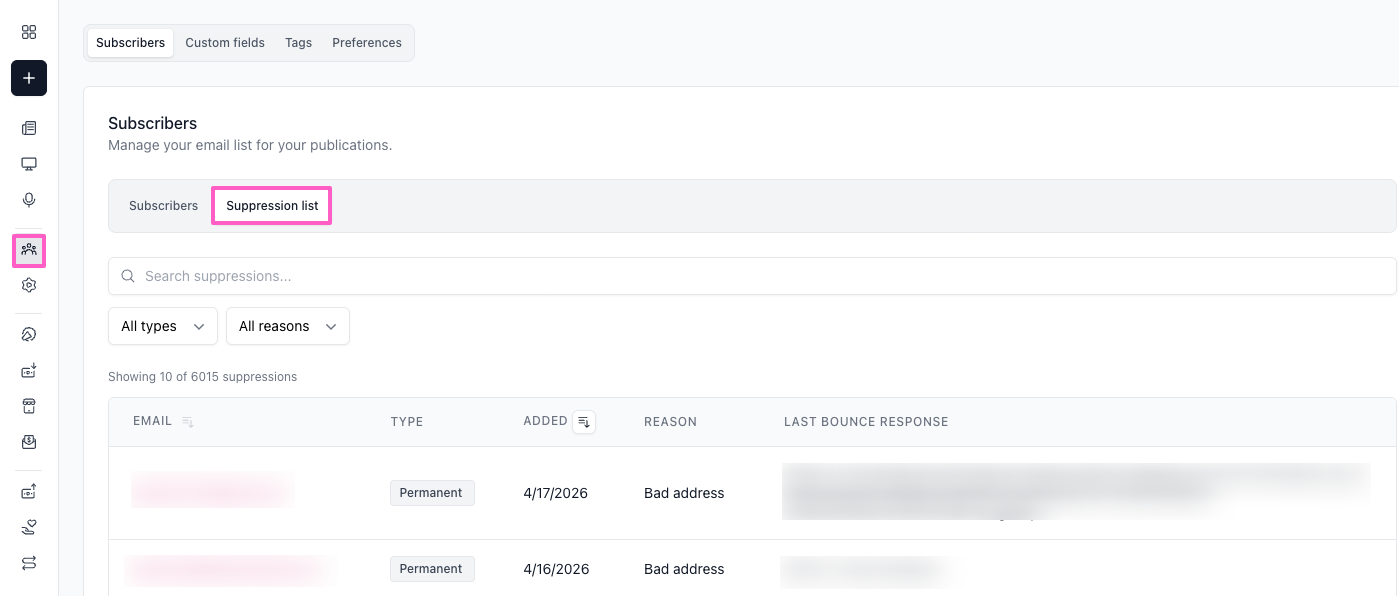
beehiiv tracks four subscriber statuses: Active, Inactive, Pending, and (on the backend) suppressed. A subscriber turns Inactive after they unsubscribe or a re-engagement automation marks them that way; beehiiv’s suppression list separately tracks hard bounces and complaints so you don’t accidentally re-email them, but it will not clean your active list for you.
Build a segment for subscribers with zero opens across your last several sends, review it manually, and unsubscribe or delete the ones who never engage. Do this on a recurring schedule, not just after deliverability drops, since inbox providers weight recent engagement more heavily than list size.
This is where an OOPSpam scan and manual pruning cover different ground: OOPSpam catches invalid, disposable, and spam-flagged addresses the moment they land on your list, while engagement-based pruning catches real addresses that simply stopped opening your posts. Run both.
5. Monitor Spam Complaints and Clean Up Your Content
A complaint means a real person marked your post as spam, something a bounce can’t tell you. beehiiv points to two common causes: misleading content, and lists grown from low-quality sources like co-registration forms or purchased lists. Track your complaint rate over time. If it climbs, check your list-growth source first.
Spam filters also score the content itself. Watch for:
- All-caps subject lines, excessive punctuation, or words like “free” and “guaranteed”
- Image-heavy posts with little real text
- A reply-to address that does not match your sending domain, or links that redirect somewhere unexpected
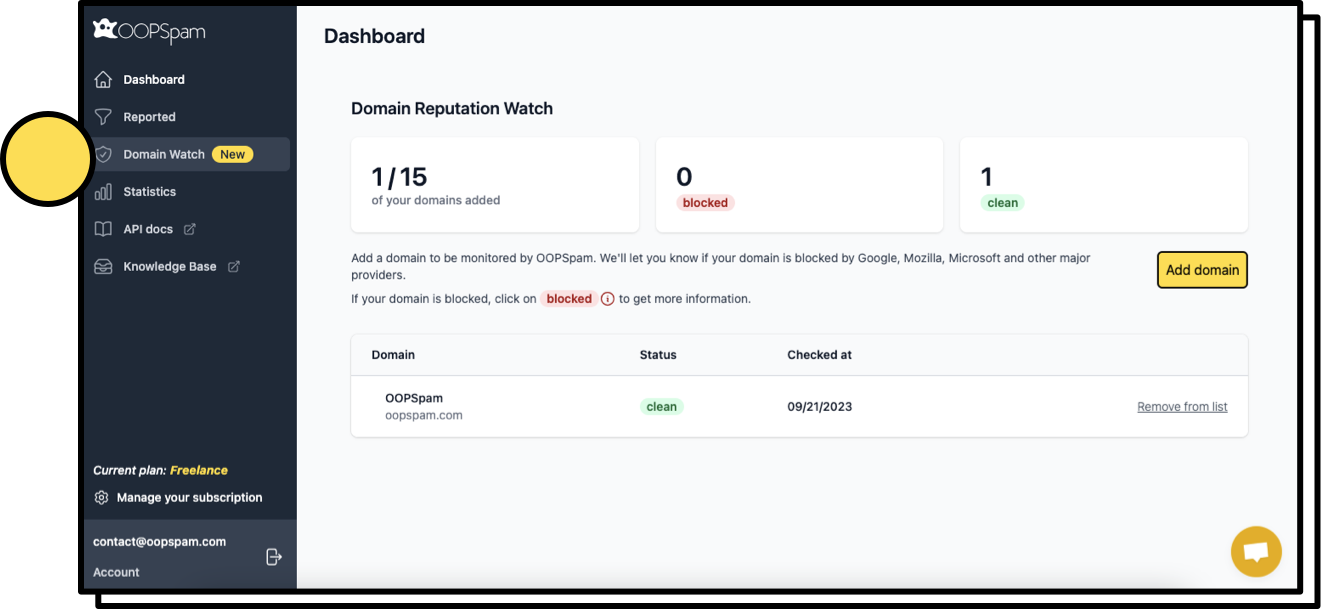
Also monitor your domain reputation, separate from complaints. Check it from your OOPSpam dashboard, or run a free scan with Domain Reputation Checker. A drop here often shows up before complaints do.
Run new subject lines through Spam Word Checker before you send. It takes five minutes and protects months of reputation.
Final takeaway
Stopping spam in beehiiv is not a one-time fix. Scan subscribers regularly, keep double opt-in and Smart Nudge on, watch your referral program and Boosts for fake signups, authenticate your domain, prune inactive contacts, and track your complaint rate. Each layer makes your publication harder for spam to reach and your posts more likely to land in the inbox.