How to Check Your Domain Reputation (And What to Do If It's Bad)

Technical Content Marketer

Reviewed by Onar Alili
Co-founder & Engineer
Published 7 min read
Domain reputation is the trust score mailbox providers and browsers assign to your domain based on spam complaints, blocklist status, and authentication. Check it in seconds with oopspam’s free Domain Reputation Checker, which scans your domain against 35+ blocklists at once. If your score is bad, fix your SPF, DKIM, and DMARC records, clean your email list, and request delisting from any blocklist that flags you.
What Is Domain Reputation?
Domain reputation is a trust rating that inbox providers (Gmail, Outlook, Yahoo), browsers, and security vendors assign to your domain. It answers one question: is this domain safe to deliver mail from, or safe to send traffic to?
A strong reputation means your emails land in the inbox and your website loads without warnings. A poor reputation means your emails go to spam, your links get flagged, or your domain gets blocked outright.
Reputation is built from real signals, not a fixed formula:
- Spam complaint rate
- Bounce rate and invalid addresses
- Blocklist status
- SPF, DKIM, and DMARC authentication
- Malware or phishing history tied to the domain
- Sending volume and consistency
How to Check Your Domain Reputation
1. Run a free domain reputation check
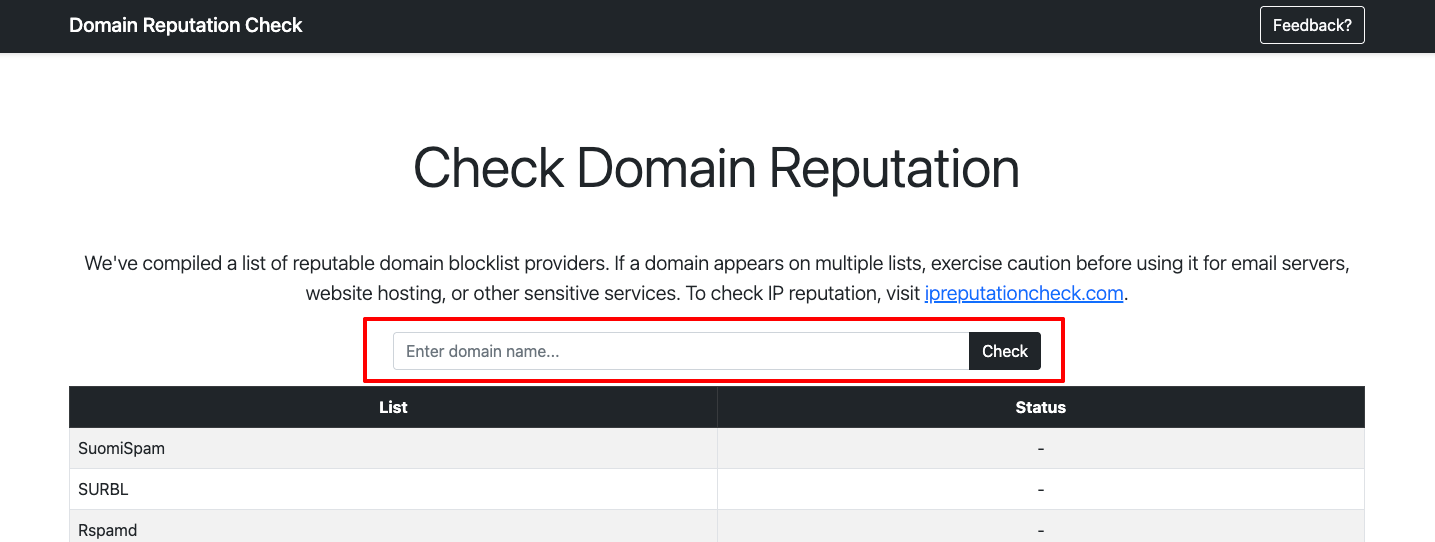
The fastest way to check your domain is a dedicated scanner. oopspam’s Domain Reputation Checker is free and checks your domain against more than 35 blocklists, including Spamhaus DBL, SURBL, SORBS, and phishing and malware lists, in one pass.
How to do it:
- Go to domainreputationcheck.com.
- Type in your domain (no “http://” needed).
- Click Check.
- Review the results table. Each blocklist shows “Listed” or “Not Listed.”
- If anything shows “Listed,” note which provider flagged you. You’ll need that for delisting later.

No signup is required, and it takes under a minute.
2. Set up ongoing monitoring
A one-time check only tells you about today. Reputation problems often start quietly, weeks before you notice bounces or complaints piling up.
oopspam’s Domain Reputation Watch solves this by monitoring your domains automatically. It runs weekly checks against major browsers, search engines, and email providers, and emails you the moment a domain gets flagged.
How to do it:
Log in to your oopspam dashboard (paid plans). Open Domain Reputation Watch.
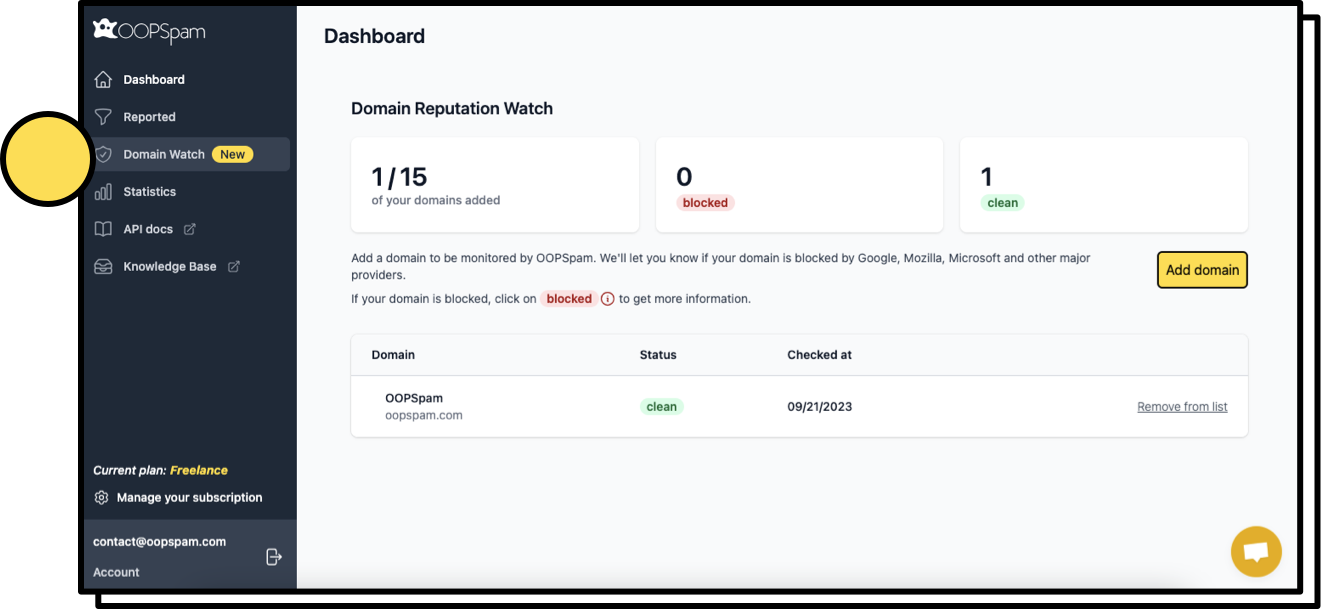
Click Add domain.
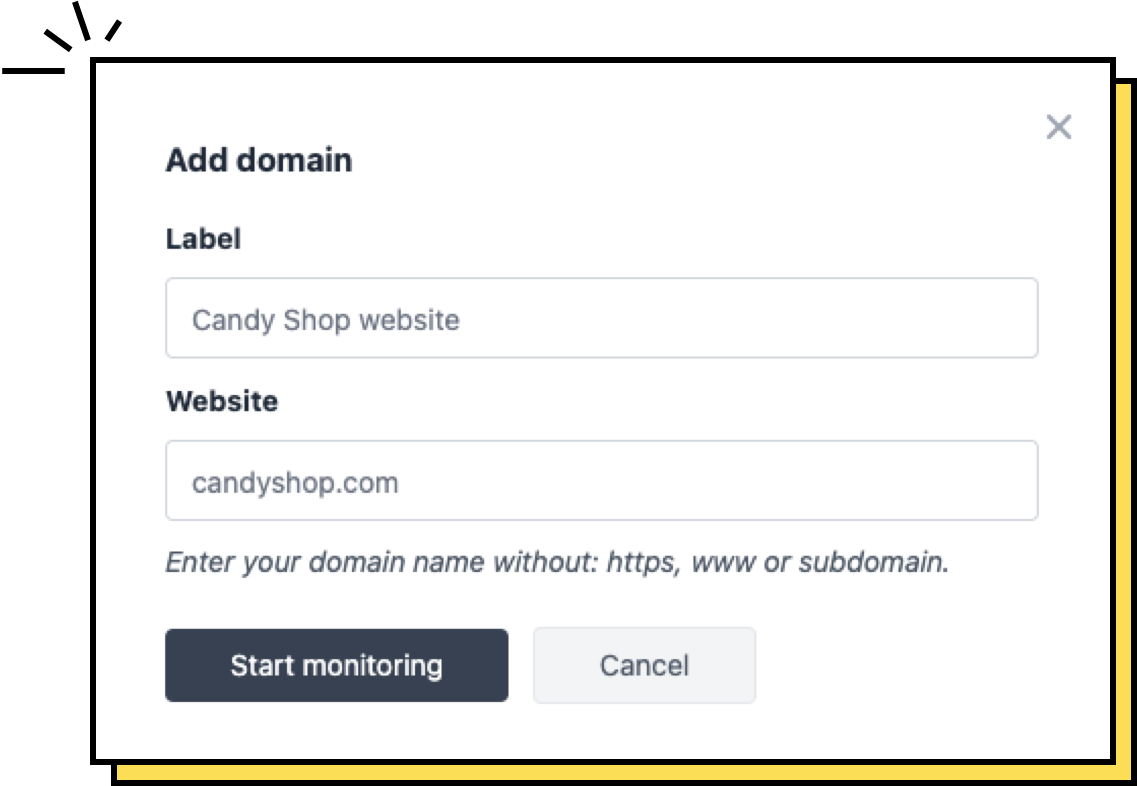
Enter the domain you want to monitor. Repeat for any client or additional domains your plan allows.
That’s it! oopspam checks every Monday and only emails you if a domain gets flagged, so your inbox stays quiet until something needs attention.
3. Check your authentication records
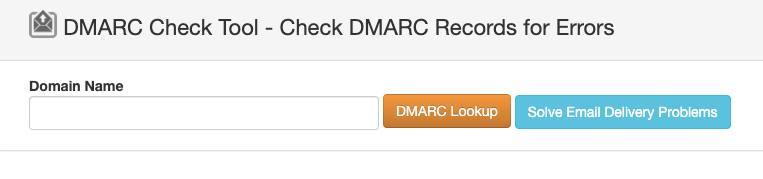
A domain can look clean on blocklists and still have a weak reputation because SPF, DKIM, or DMARC is missing or misconfigured. Gmail, Yahoo, and Microsoft now require these records for bulk senders, so an authentication gap alone can push mail to spam.
How to do it:
- Use any free SPF, DKIM, and DMARC checker (many mail providers include one).
- Enter your domain.
- Confirm all three show “Pass” or “Configured.” If any show missing or invalid, fix that record in your DNS settings before doing anything else.
4. Review engagement metrics
If you send high volumes of email, tools like Google Postmaster Tools can show how Gmail specifically views your sending domain, including spam rate and delivery errors.
How to do it:
- Sign in with the Google account tied to your sending domain.
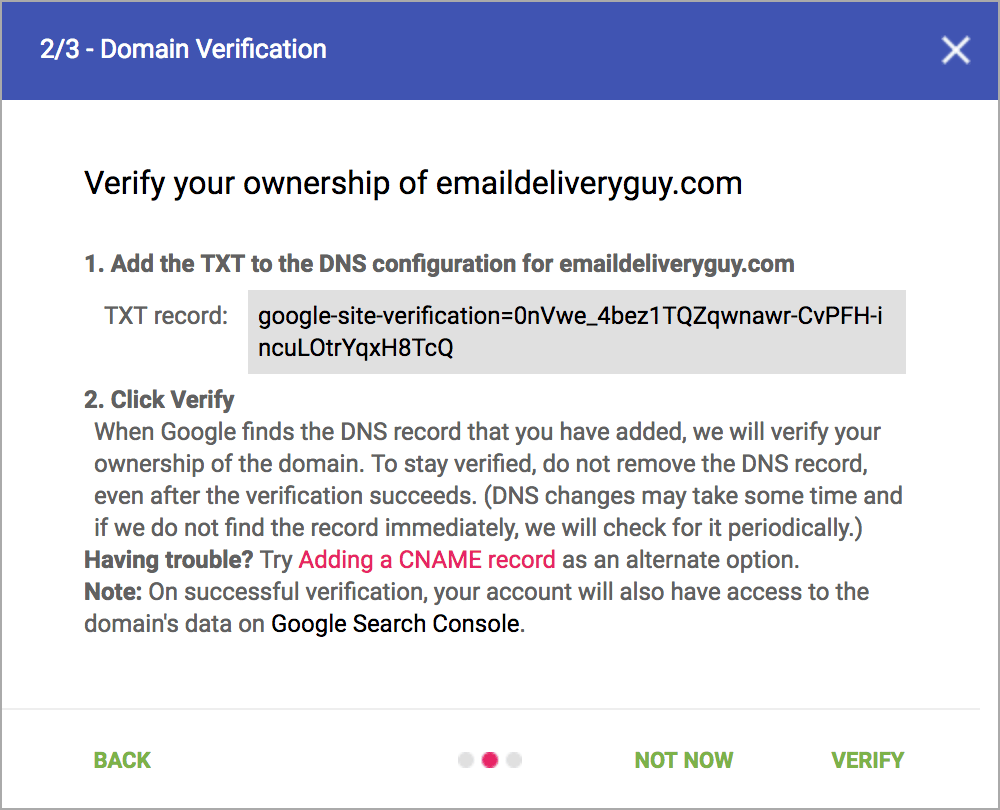
- Verify domain ownership with a DNS TXT record.
- Check the spam rate, IP reputation, and domain reputation graphs.
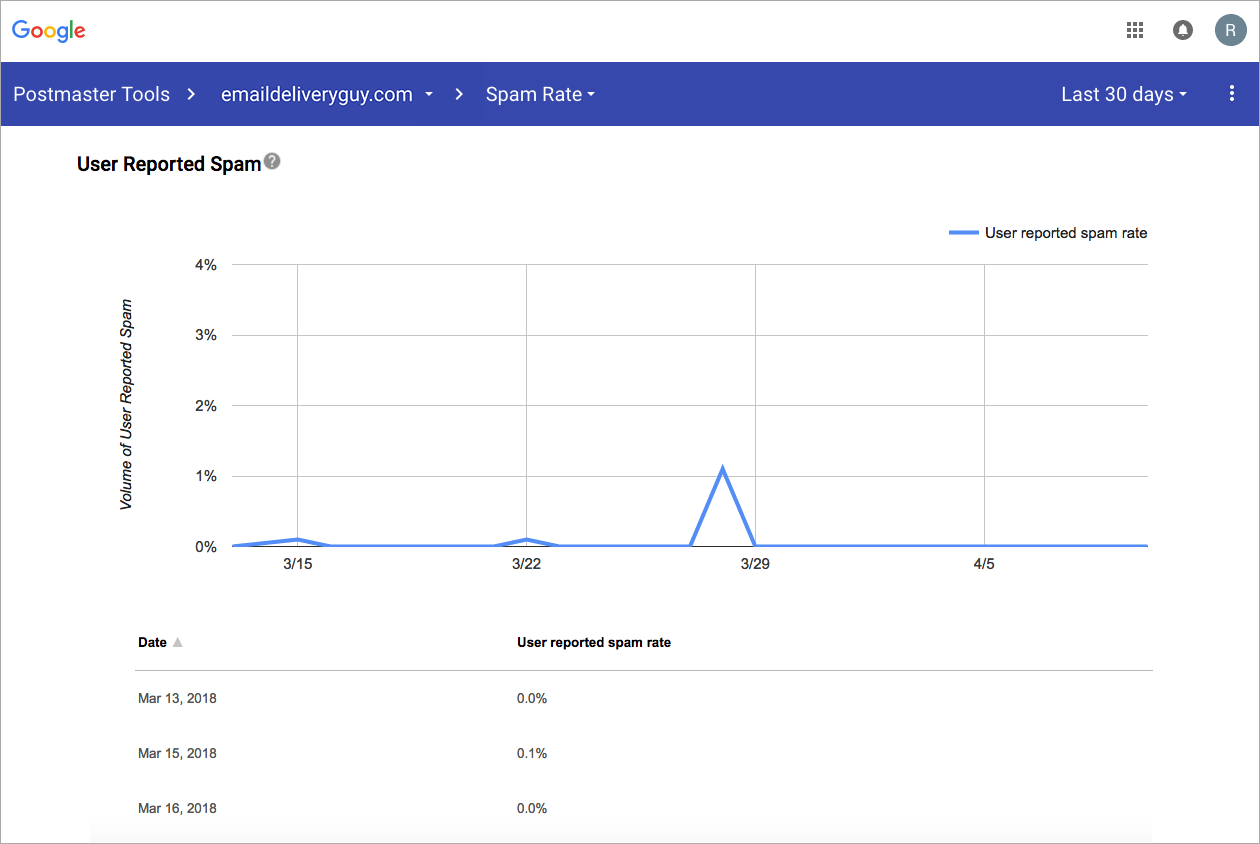
Treat this as a supplementary data point, not your primary check. It only covers Gmail, updates slowly, and does nothing for the browser and website side of reputation. Start with a full blocklist and authentication check first.
What to Do If Your Domain Reputation Is Bad
Fix your authentication first
Correct your SPF, DKIM, and DMARC DNS records before anything else. These records prove your emails are really from you.
How to do it:
- Log in to your domain’s DNS provider (where you manage DNS records).
- Add or correct the SPF TXT record with your sending providers listed.
- Add the DKIM record supplied by your email service.
- Add a DMARC TXT record, starting with a monitoring policy (p=none) before moving to enforcement.
- Re-run a checker after 24 to 48 hours to confirm all three pass.
Clean your email list
Stop sending to unengaged contacts, old lists, and invalid addresses. High bounce rates are one of the fastest ways to damage a domain. Keep bounces under 2%.
How to do it (using oopspam):
- Log in to your oopspam dashboard and open Integrations.
- Connect your email platform, such as ActiveCampaign or EmailOctopus.
- Select the list you want to scan.
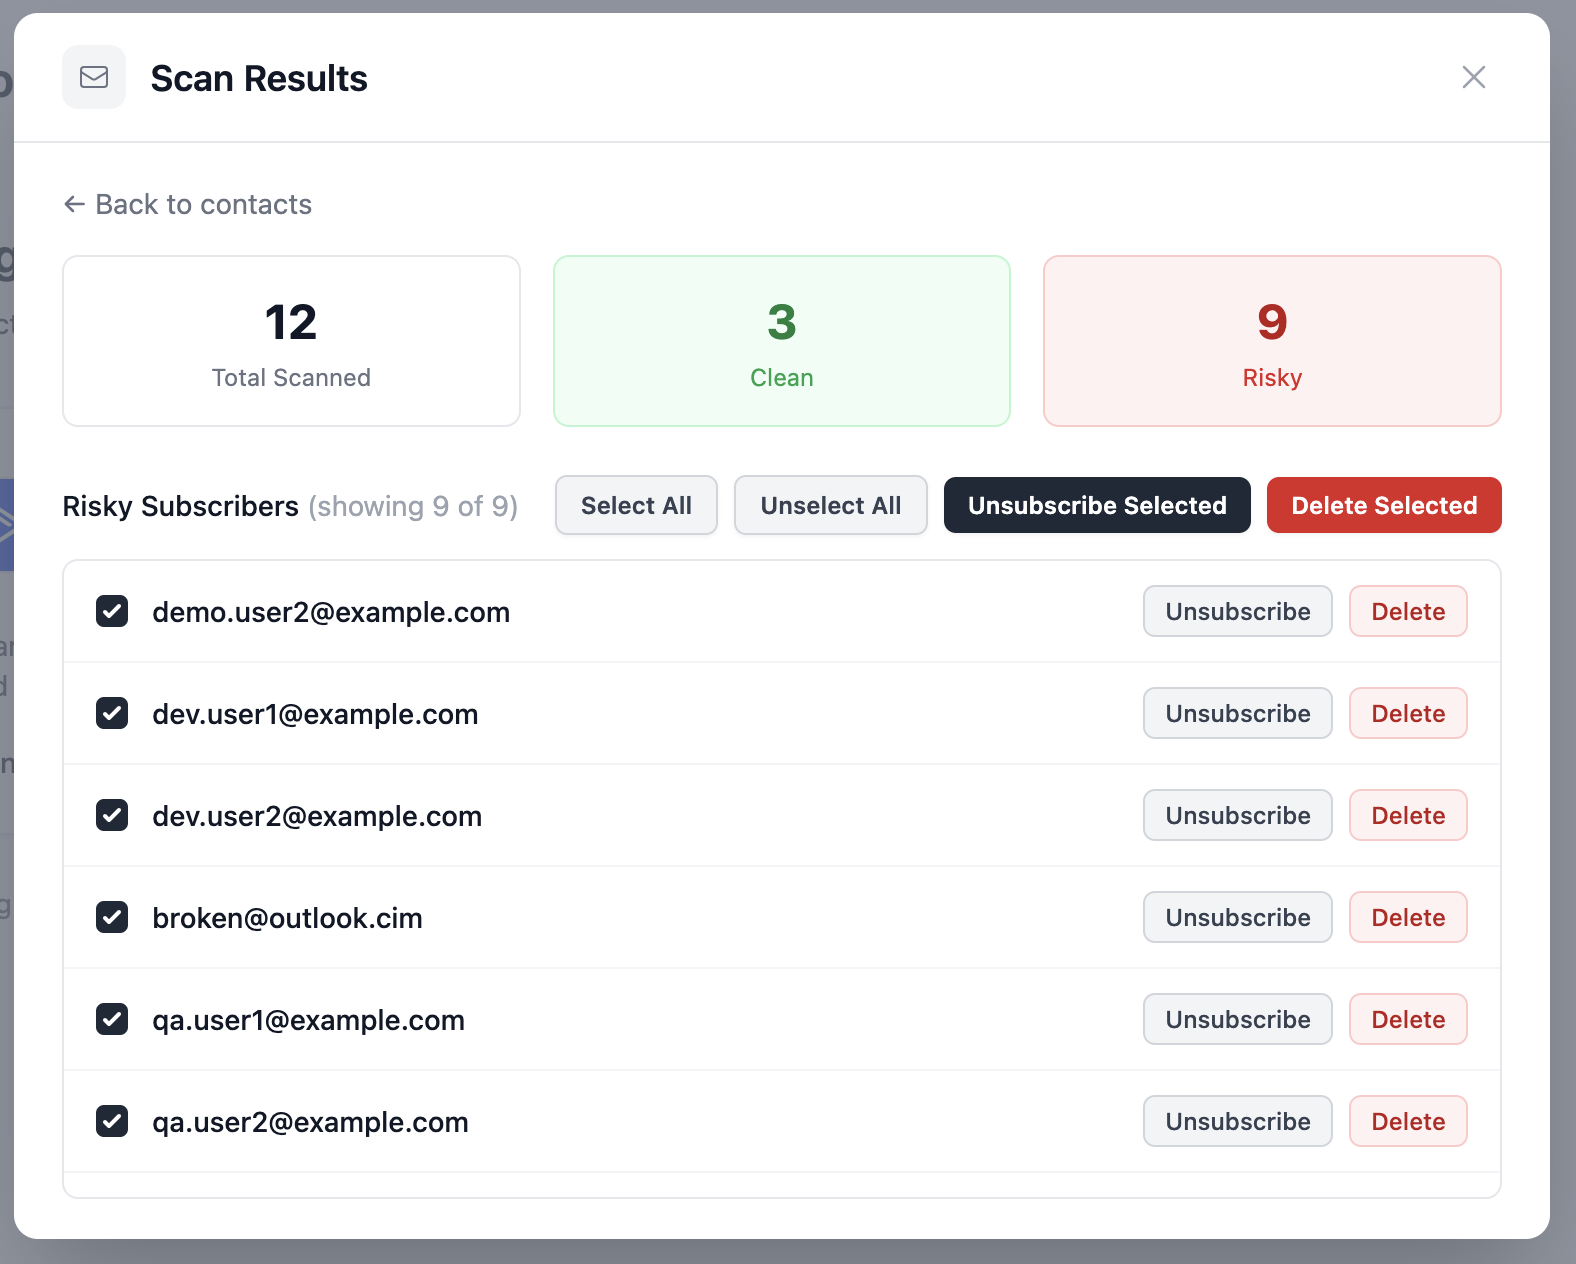
- Let oopspam scan every contact for spam traps, disposable addresses, and invalid emails.
- Delete or unsubscribe the flagged contacts before your next send.
If you manage lists in ActiveCampaign, see the full walkthrough. If leads flow into your CRM through Zapier, you can also block disposable and fake emails before they ever reach your list.
Request delisting from blocklists
If a scan shows your domain on a blocklist, stop the source of the problem first, then follow that specific provider’s delisting process.
How to do it:
- Confirm which blocklist flagged you (from your oopspam scan results).
- Fix the root cause first, such as a compromised account, a dirty list, or a volume spike.
- Go to that specific blocklist’s website and find its removal or delisting form.
- Submit the request with your domain and a brief explanation of the fix.
- Re-check your domain after a few days to confirm you’re delisted.
Skipping straight to a delisting request without fixing the cause usually gets you relisted within days.
Final thoughts
Checking your domain once and hoping for the best is not a strategy. The senders who avoid deliverability disasters check regularly and get alerted the moment something changes.
Start with a free scan at domainreputationcheck.com to see where your domain stands right now. Then set up oopspam’s Domain Reputation Watch so you’re notified automatically if a domain you manage ever gets flagged, instead of finding out from a client or a spike in bounces.
Pair that with clean sending practices: verified lists, proper authentication, and steady send volume. Reputation problems are much easier to prevent than to repair.