
Chazie Baniquid
Technical Content Marketer
6 minutes to read
How to Block VPN and Data Center IP Submissions in Kadence Forms
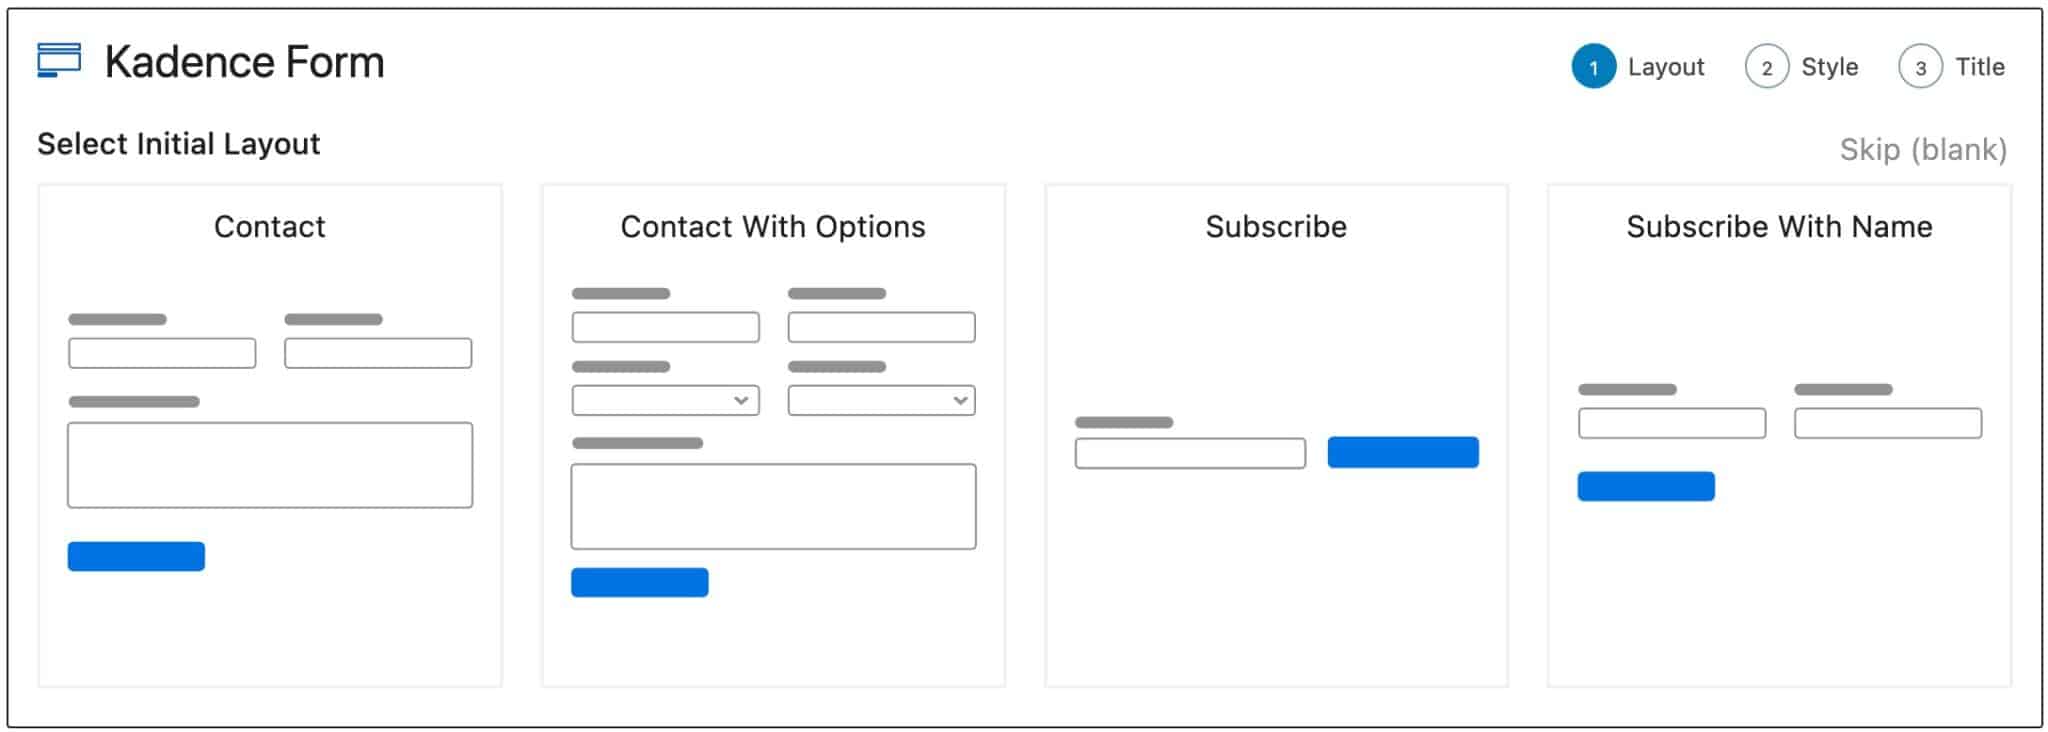
Kadence Forms offers a lightweight, flexible way to add forms to your WordPress site—but like any form plugin, it’s not immune to spam. If you’re noticing an increase in fake submissions or suspicious activity, VPNs and cloud servers could be the hidden culprits.
This guide will show you why these sources are an issue and how to block them effectively—either manually using Cloudflare or automatically with the OOPSpam Anti-Spam plugin.
Why Block VPN and Cloud Provider IPs in Kadence Forms?
Spambots have gotten smarter over the years. They now rely heavily on:
- VPN services to hide their true location
- Proxies to rotate their identities
- Cloud hosting to automate and scale their spam attacks
Blocking this type of traffic before it reaches your Kadence Forms can make a major difference in reducing:
- Junk submissions
- Fake leads
- Wasted admin time cleaning up spam
Blocking VPNs
VPNs allow spammers to mask their real IP addresses, making it harder for you to spot fraudulent activity. Blocking VPN IPs can dramatically cut down spam, but be aware—some real users, like remote workers or privacy-conscious visitors, may also use VPNs.
Blocking Cloud Providers
This step is even more crucial. Most automated spam comes directly from servers hosted on cloud platforms like AWS, Google Cloud, Azure, and DigitalOcean. Since legitimate users typically don’t submit forms directly from a cloud data center, blocking these IPs is both safer and more effective.
While traditional spam filters mainly react to known threats, IP blocking from data centers proactively stops new attacks before they even hit your inbox.
Want to confirm if an IP address belongs to a VPN or a cloud server? Use a tool like IP Reputation Check for quick verification.
Method 1: Manually Block VPN and Cloud IPs Using Cloudflare Firewall
If your website uses Cloudflare, you can set up custom firewall rules to block unwanted traffic based on their network origins.
How to Do It
Each network provider (like a VPN company or cloud host) is assigned an ASN (Autonomous System Number). With Cloudflare’s firewall, you can block traffic from specific ASNs.
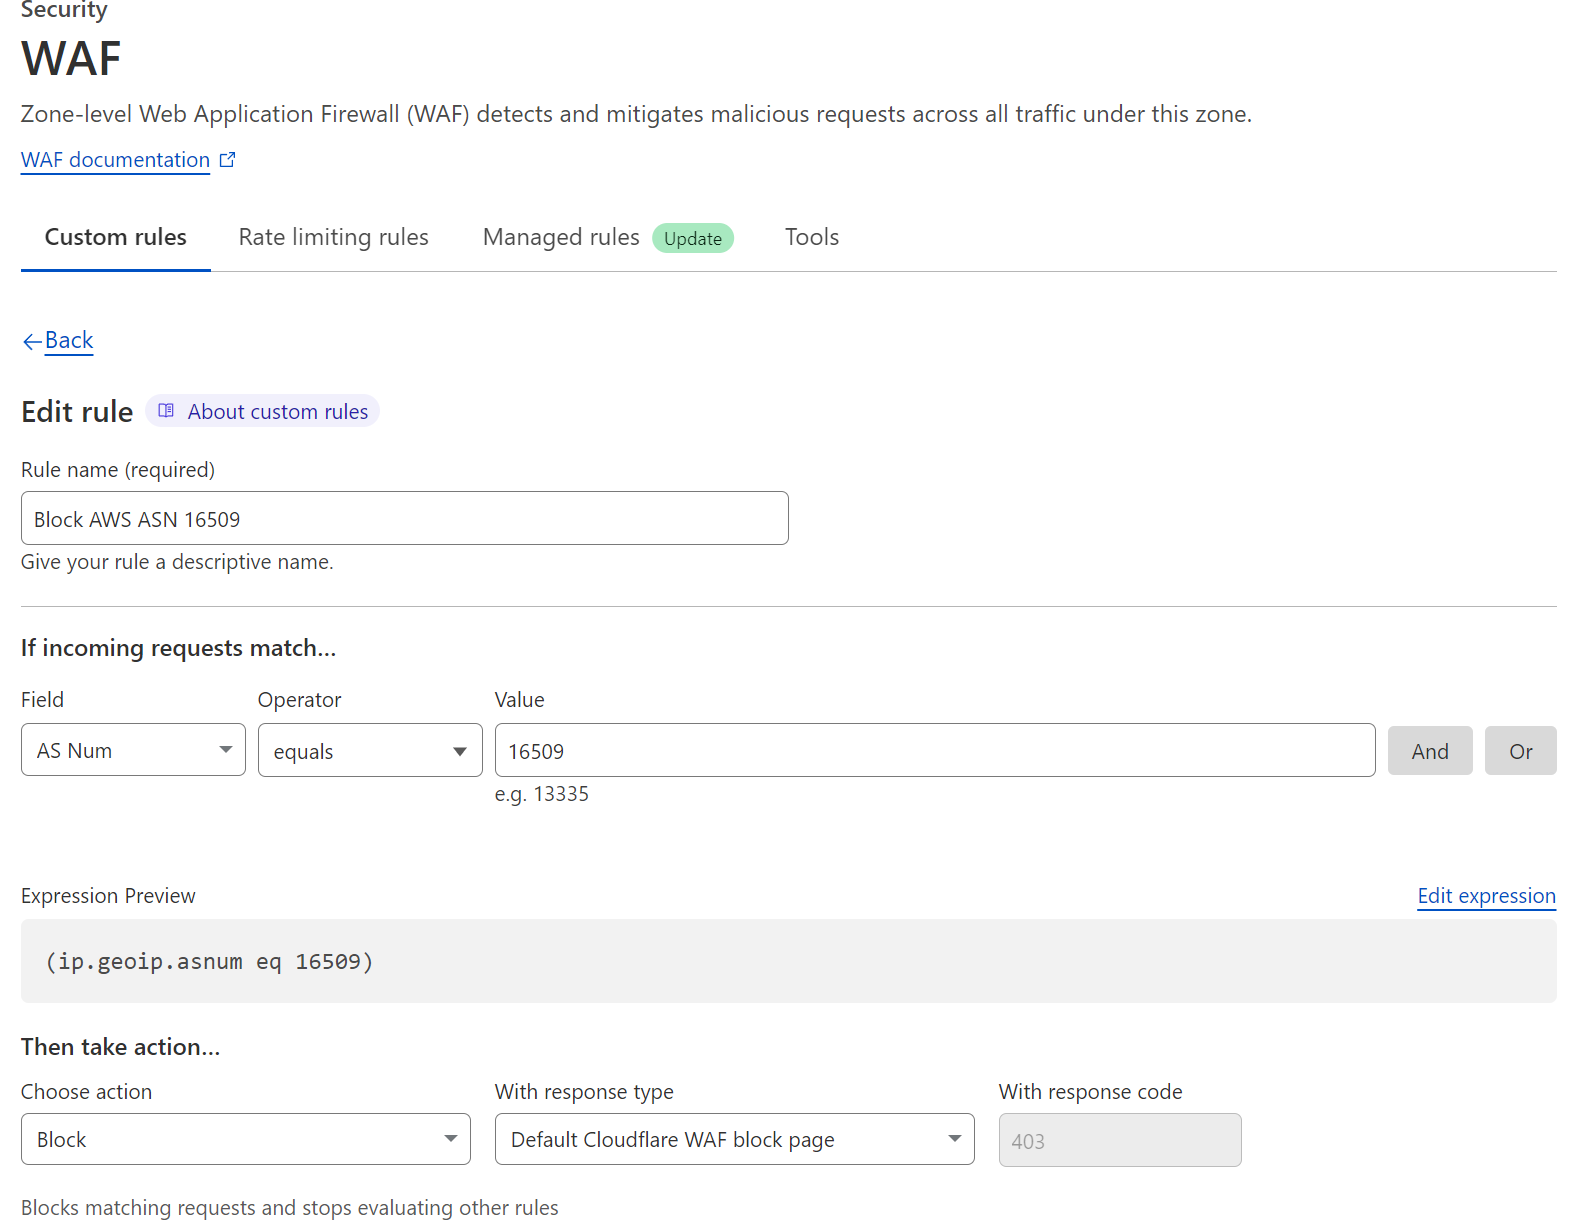
Example: If you notice spam originating from DigitalOcean, you can block ASN AS14061 via Cloudflare’s dashboard.
Challenges to Consider
- Manual maintenance: ASNs and IP ranges change frequently, so you’ll need to monitor and update the list regularly.
- Risk of false positives: You might inadvertently block legitimate users, especially businesses that use cloud infrastructure.
- Time-consuming: You’ll need to research, identify, and apply blocks manually, which isn’t ideal for every site owner.
This method is best suited for users with technical expertise or websites facing persistent, high-volume spam attacks.
Method 2: Automatically Block VPN and Cloud IPs in Kadence Forms Using the OOPSpam Plugin
Looking for an easier way? The OOPSpam WordPress plugin (that’s us 👋) integrates perfectly with Kadence Forms, allowing you to block VPNs and cloud server IPs with just a couple of clicks.
We recently introduced two new toggles under IP Filtering:
- Block VPNs
- Block Cloud Providers
By enabling these, you automatically filter spam submissions without needing to monitor or manage IP addresses yourself.
Unlike simple reCAPTCHA-based solutions, OOPSpam uses a real-time, constantly updated IP database to keep your forms protected:
- Covers IPs from 2,000+ cloud data centers
- Tracks known VPN and proxy services
- Adapts to new IP ranges and reputation changes daily
This means you’re not just blocking known spammers—you’re actively preventing new threats that haven’t even been reported yet.
Plus, if you’re using the OOPSpam API elsewhere across your site, these protections extend beyond Kadence Forms too.
How to Enable VPN and Cloud Blocking for Kadence Forms with OOPSpam
Setting this up is simple:
Step 1: Install or Update the OOPSpam Plugin
- Go to your WordPress dashboard
- Navigate to Plugins > Add New
- Search for OOPSpam Anti-Spam, install it, and activate the latest version
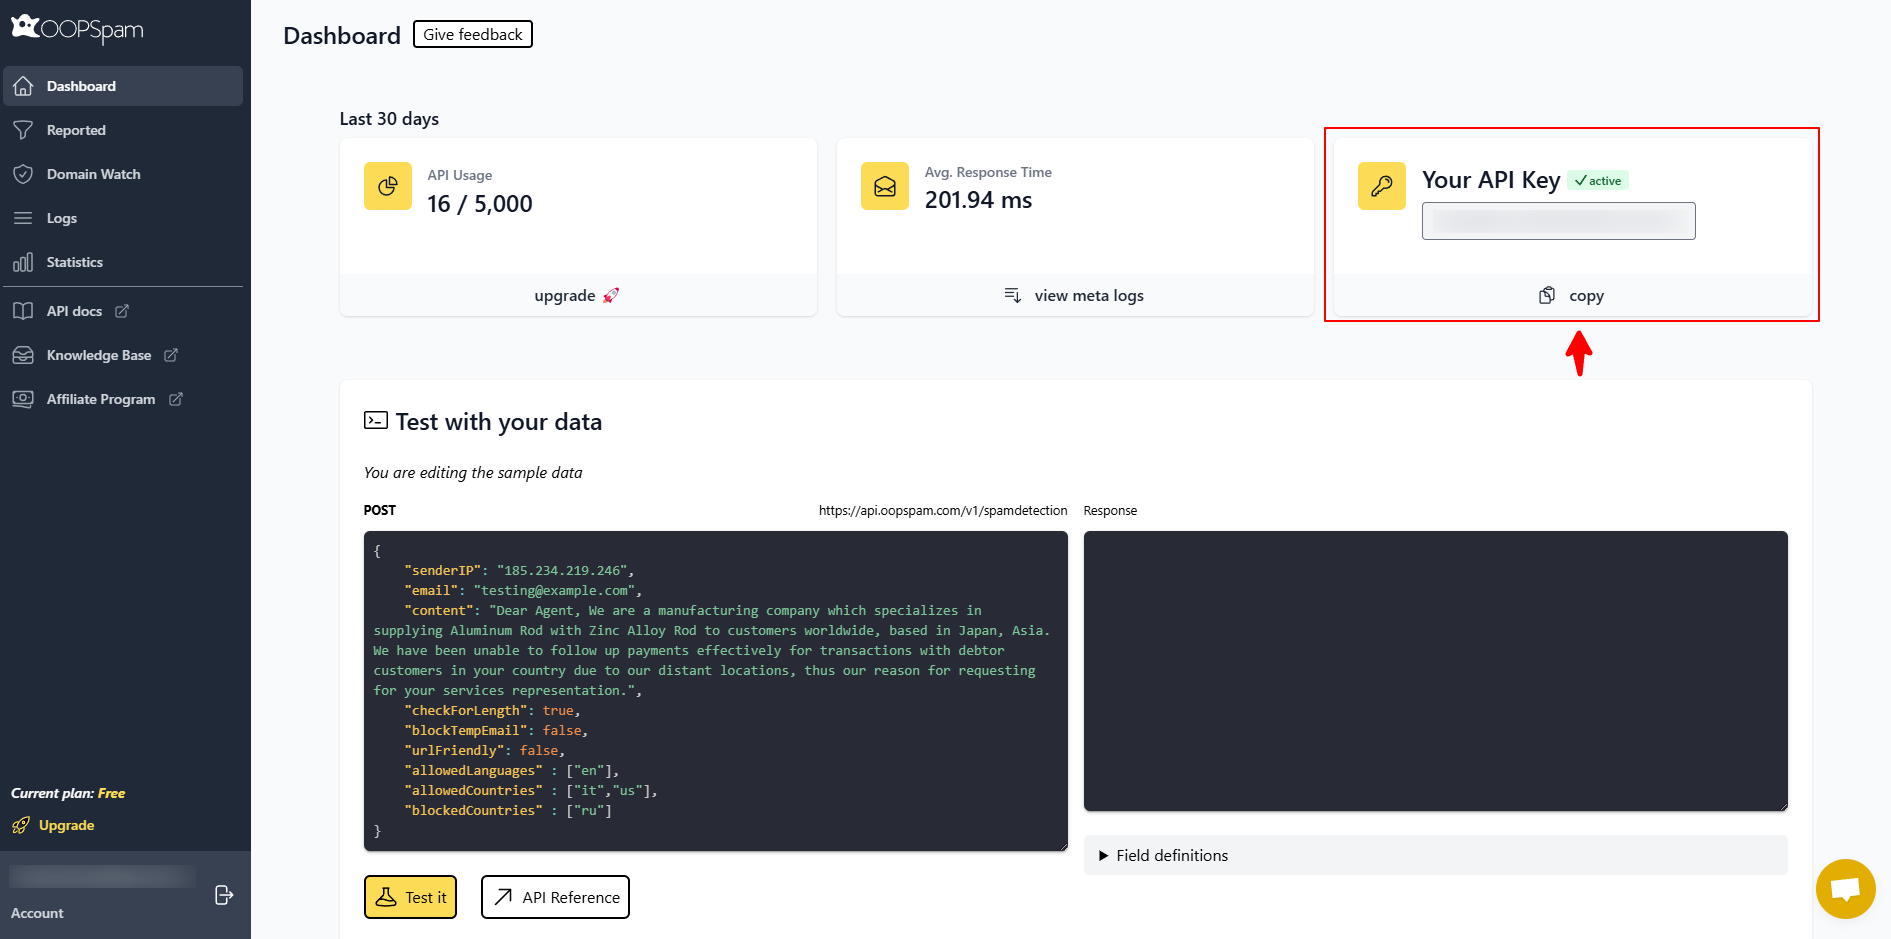
Sign up at the OOPSpam Dashboard and copy your API key.
Step 2: Configure the Plugin Settings
Inside your WordPress Admin:
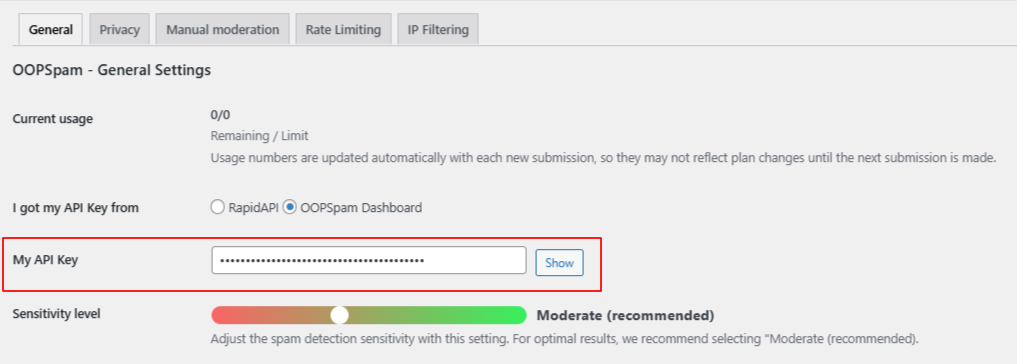
- Go to Settings > OOPSpam Anti-Spam
- Under the General tab, select “OOPSpam Dashboard” as the source
- Paste your API key into the “My API Key” field
If Kadence Forms is installed, a specific spam protection section will be available.
- Switch ON “Activate Spam Protection” for Kadence Forms.
- You can also customize the message that appears when a form submission is marked as spam.

Step 3: Turn on IP Filtering
Next, click the IP Filtering tab:
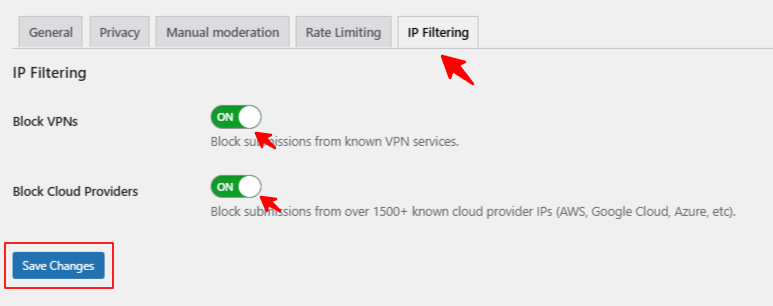
- Enable Block VPNs if you want to filter out traffic from anonymized sources (optional depending on your audience)
- Enable Block Cloud Providers for broad protection against bot attacks from data centers (strongly recommended)
After toggling your settings, click Save Changes—and you’re done!
OOPSpam will now silently protect your Kadence Forms without needing any further setup.
Best Practices for Managing Spam Protection
- Consider your audience: If you expect remote workers or international users, monitor the VPN blocking setting closely.
- Review flagged entries: Occasionally check submissions marked as spam to catch any false positives.
- Use a layered approach: Combine IP blocking with OOPSpam’s additional tools like language, country blocking, and keyword detection for maximum protection.
Final Thoughts
Spam submissions waste your time and clog your database—but protecting your Kadence Forms doesn’t have to be complicated. By blocking VPN and cloud provider IPs, you stop a huge portion of spam before it ever reaches your site.
Using OOPSpam, you can implement this protection quickly and effortlessly—keeping your website running smoothly and your form entries clean and genuine.
Have questions about setup or want help with integrating OOPSpam for Kadence Forms or other builders like Elementor Forms, Ninja Forms, or Fluent Forms? Reach out to us here—we’re happy to assist.