
Chazie Baniquid
Technical Content Marketer
4 minutes to read
How to Limit Form Submissions in Formidable Forms?
Sometimes you don’t want a form to stay open forever. Whether you’re running a sign-up sheet, collecting job applications, or reserving seats for an event, there comes a point where submissions need to stop. Formidable Forms makes this easy with its built-in scheduling and entry-limiting tools.
With just a few settings, you can decide when a form opens, when it closes, and how many responses it will accept.
Setting Up Form Limits in Formidable Forms
Before you begin, you’ll need to access your form’s settings to enable scheduling and entry limits.
Step 1: Open the Form’s Settings
To begin, log into your WordPress dashboard and navigate to Formidable Forms → Forms.
Choose the form you want to manage and click on the Settings gear icon. This is where you’ll find the scheduling and entry limit features.
Step 2: Configure Scheduling or Limits
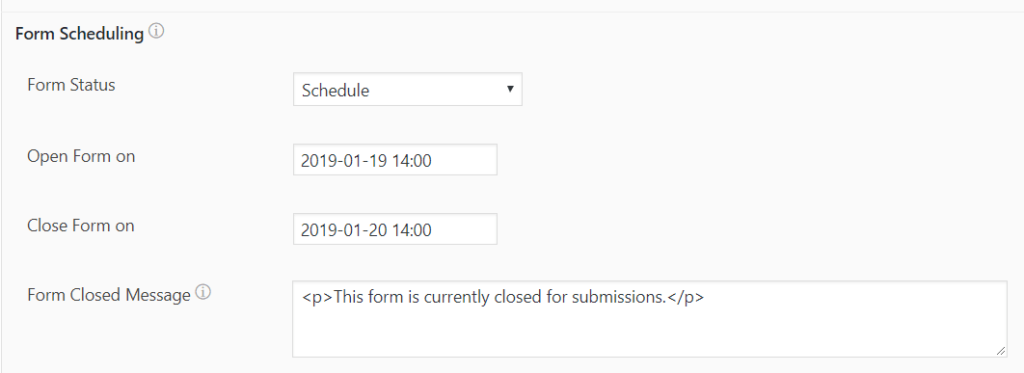
Inside the Form Scheduling settings, you’ll be able to pick how the form should behave.
- Select Closed if you want the form to be unavailable until you reopen it.
- Choose Schedule to set a start and end date so the form only accepts responses during that window.
- Use Limit entries to cap the number of submissions.
- Combine Schedule & Limit entries to apply both time and entry restrictions.
This gives you flexibility depending on whether you want to stop submissions after a deadline, after a quota, or both.
Step 3: Save and Verify
Click Update to apply your changes. Then test your form by submitting entries or checking the open/close dates. If the form hits the set cap or the deadline passes, users will see your custom message instead of the form.
Things to Keep in Mind
- Automatic cut-off: If you’ve set an entry limit, the form will stop taking submissions once the number is reached.
- User messaging: Add a custom message to explain why the form is closed, this keeps things clear for visitors.
- Plan requirement: Form Scheduling is only available in the Formidable Basic plan or higher, so free users will need to upgrade.
Advanced Rate Limiting Using OOPSpam
While Formidable’s built-in tools are powerful, sometimes you need more control. That’s where OOPSpam (that’s us 👋) comes in. It adds per-IP and per-email rate-limiting to stop abusive behavior and spam bursts.
Setting Up Rate Limiting with OOPSpam
To get started, install and activate the OOPSpam Anti-Spam plugin from the WordPress Plugin Repository. Once installed, create an account on OOPSpam’s site and generate your unique API key.
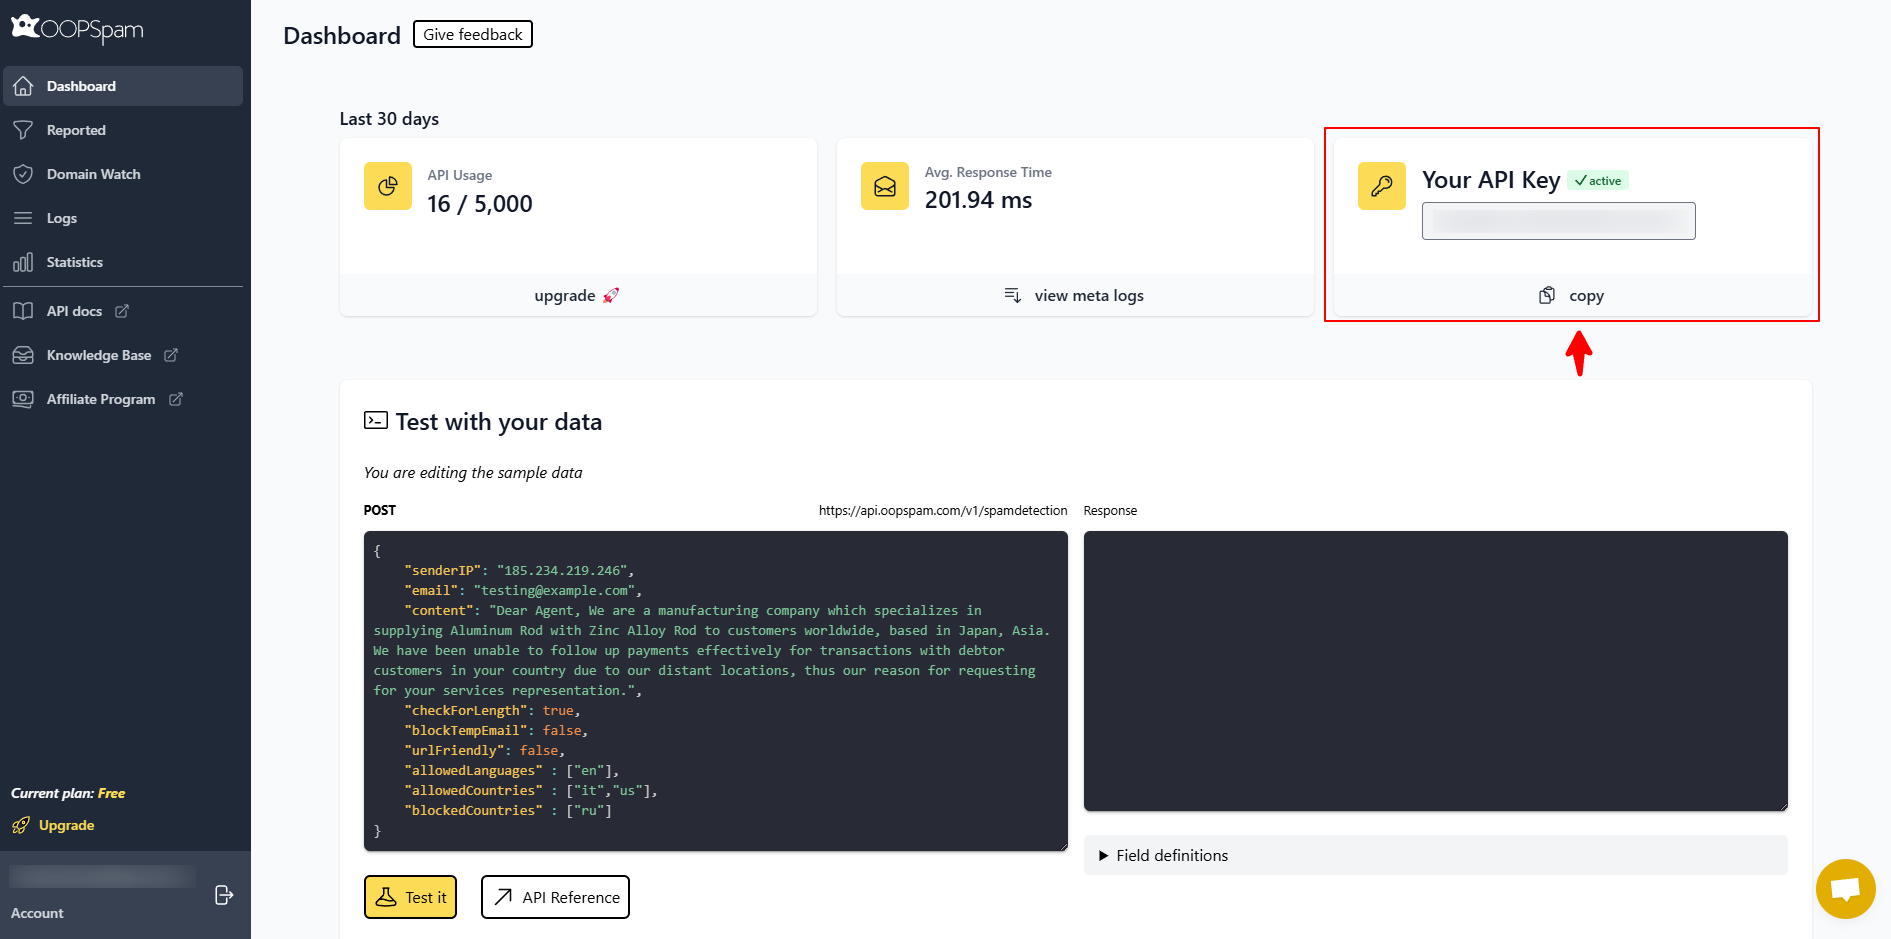
Enter this key under OOPSpam → General Settings in your WordPress dashboard.
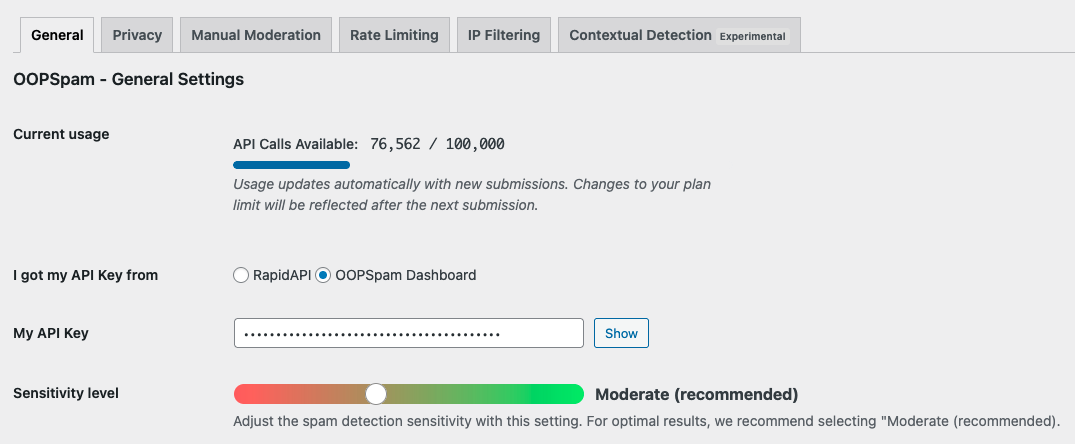
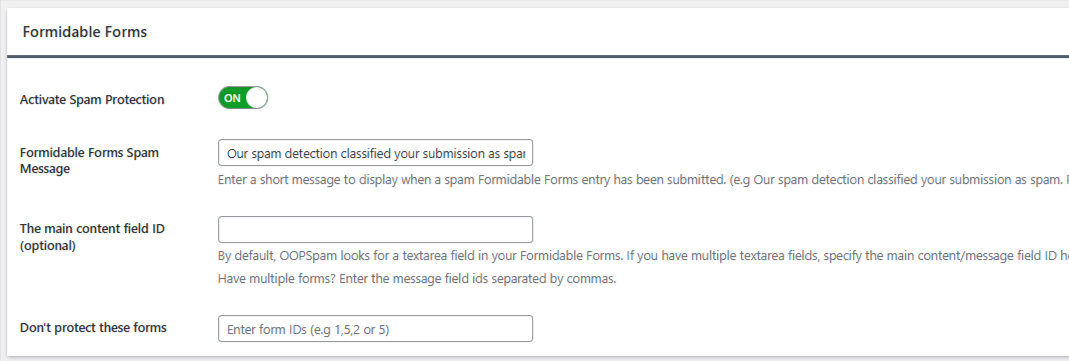
In the same tab, scroll and make sure to activate spam protection for Formidable Forms, so the plugin connects directly with your forms.
Next, open the Rate Limiting tab. Toggle the switch to Enable Rate Limiting. This ensures that all your forms will now follow the rules you configure.
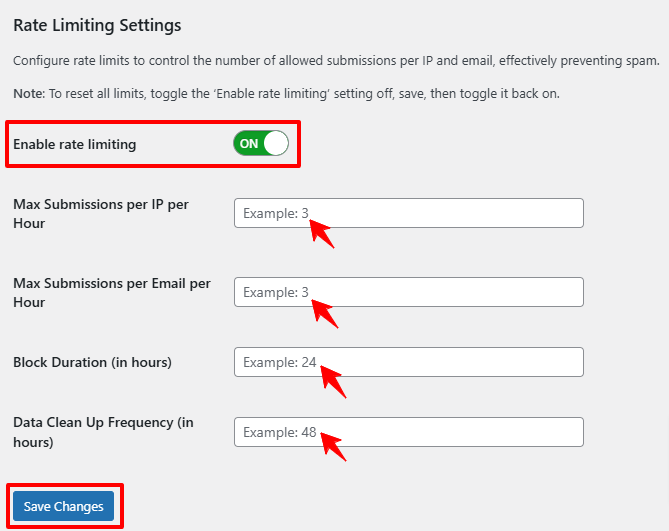
You can now customize how strict you want to be:
- Max Submissions per IP per Hour lets you stop multiple entries from a single IP address.
- Max Submissions per Email per Hour prevents repeat abuse from the same email address.
- Block Duration defines how long a user is blocked after exceeding the limit.
- Data Clean-Up Frequency clears old tracking logs to keep your site running smoothly.
Finally, click Save Changes. Test by attempting multiple submissions from the same source to make sure your settings are applied correctly.
Start with flexible rules if your form receives heavy traffic, and tighten them if you see abuse continuing.
Final thoughts
Formidable Forms gives you the tools to control how many entries a form accepts and when. By adding OOPSpam’s rate-limiting on top, you can block spam, stop duplicate entries, and keep submissions under control.