
Chazie Baniquid
Technical Content Marketer
3 minutes to read
How to Limit Form Submissions in HappyForms?
Limiting form submissions in HappyForms helps you prevent spam, manage event seats, or cap survey responses. You can set overall limits, restrict individual choices, and even add advanced filters for per-IP or per-email control. This keeps your forms clean and your data reliable.
Setting Up Limits in WordPress Forms Using HappyForms
HappyForms includes built-in options for capping the number of submissions your form accepts. Here’s how to configure them step by step.
Step 1: Open Your Form Settings
Go to Forms → Add New or edit an existing form. In the Setup tab, you’ll find submission controls available in the Pro version of HappyForms.
Step 2: Limit Individual Choices
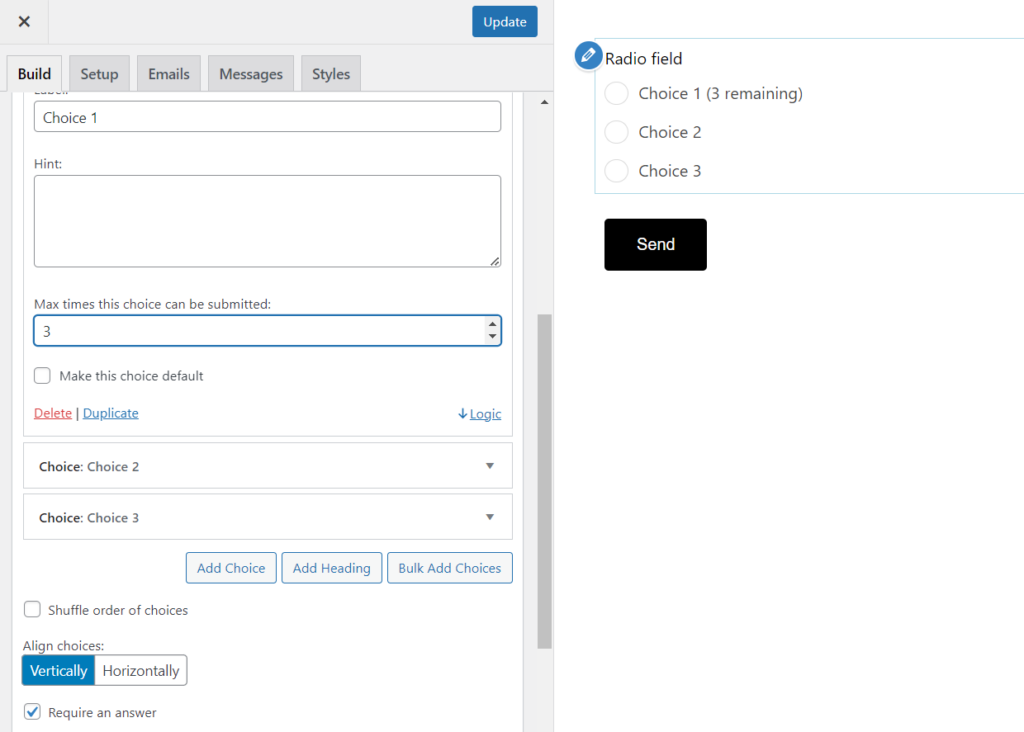
If you’re collecting bookings or stock reservations, limit each option:
- Add a choice field (radio, checkbox, or dropdown).
- Expand a choice and enable Max times this choice can be submitted.
- Enter the quantity allowed.
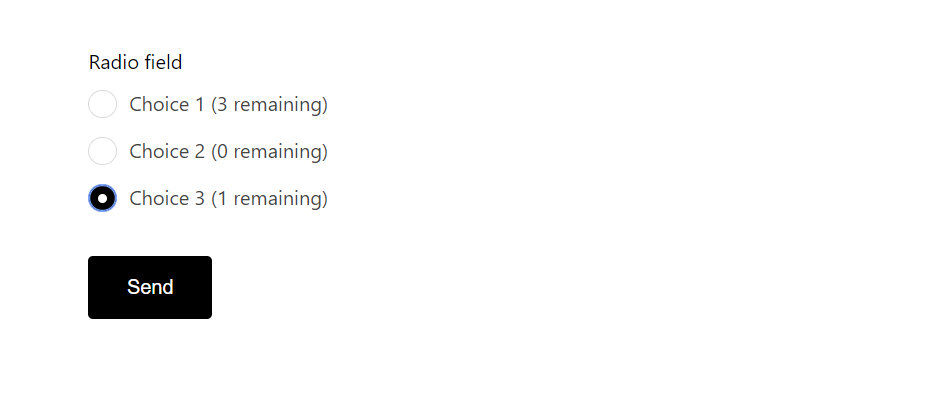
On the frontend, users will see how many remain, and the option disables when sold out.
Step 3: Test the Form
Preview the form. Each choice should display its remaining availability (e.g., “2 remaining”). Submit until you hit the cap to confirm it closes properly. Adjust numbers in the builder if needed.
Advanced Rate Limiting Using OOPSpam
For per-IP or per-email submission limits, OOPSpam (that’s us 👋) adds a layer of rate-limiting beyond HappyForms’ native features. Here’s how to set it up:
Setting Up Rate Limiting with OOPSpam
Note: The OOPSpam plugin works with the HappyForms Pro version only.
1. Install and Activate OOPSpam
Install and activate the OOPSpam Anti-Spam plugin from the WordPress Plugin Repository. Once installed, create an account with OOPSpam to generate your unique API key.
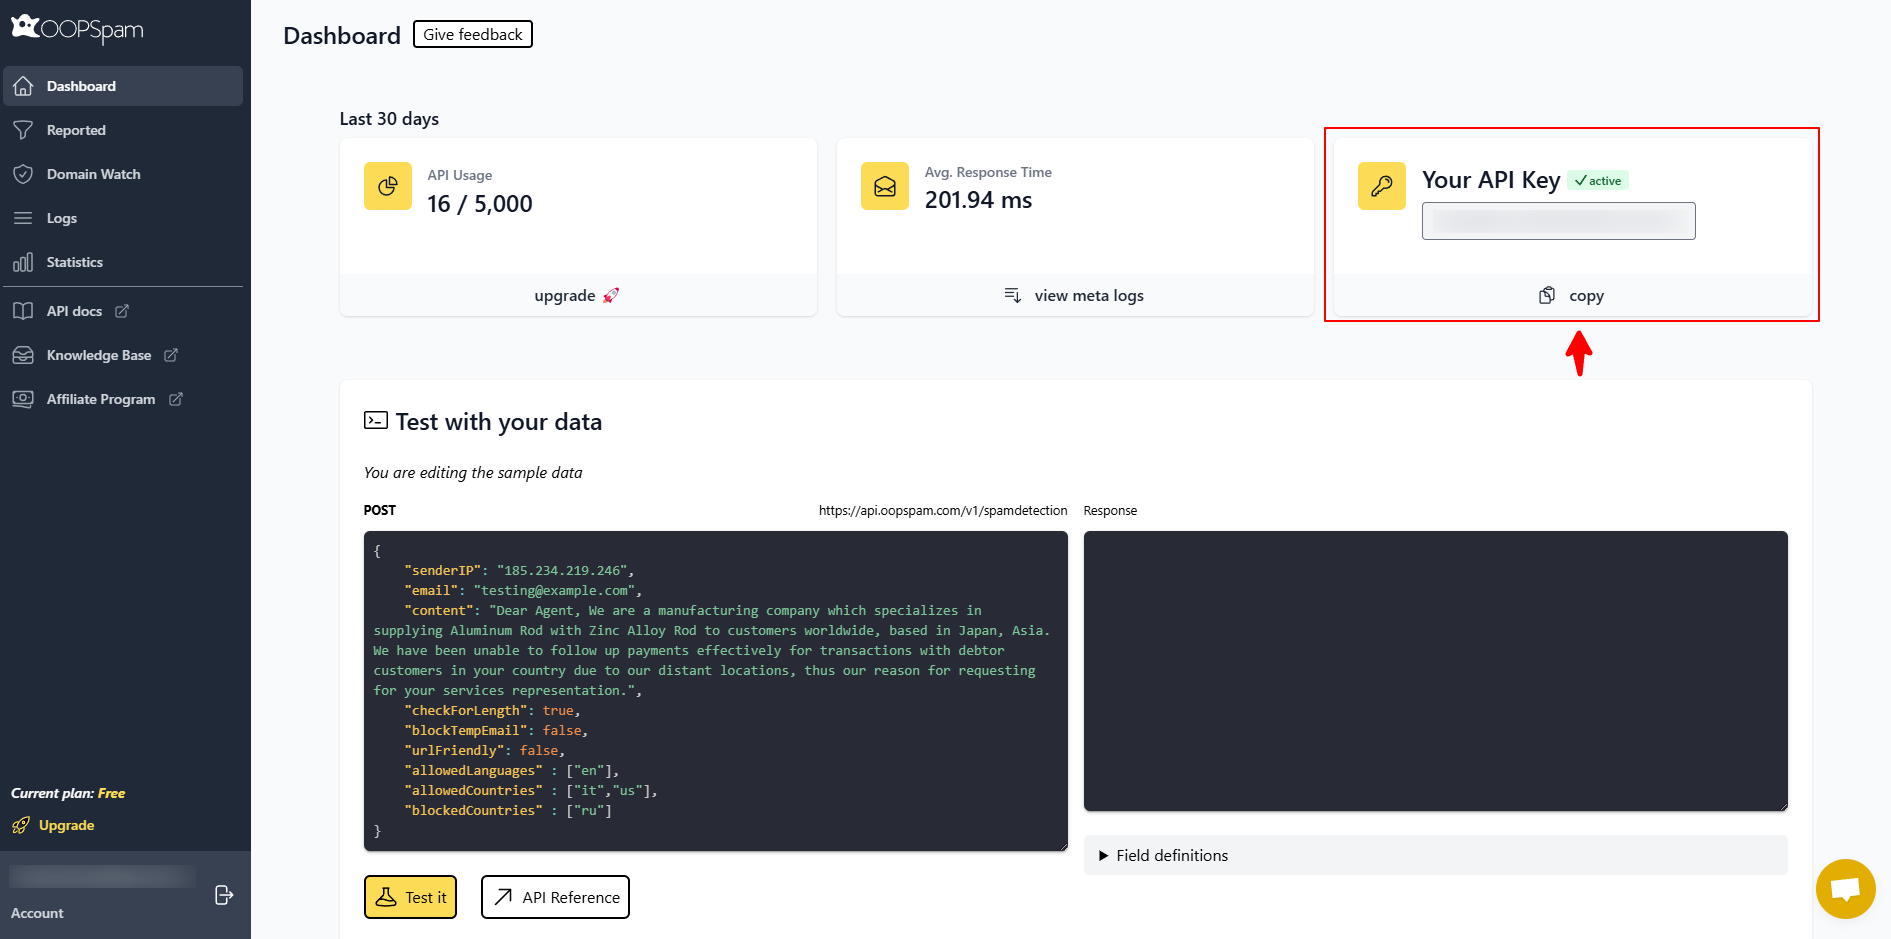
Enter the API key in the WordPress dashboard under OOPSpam → General Settings.
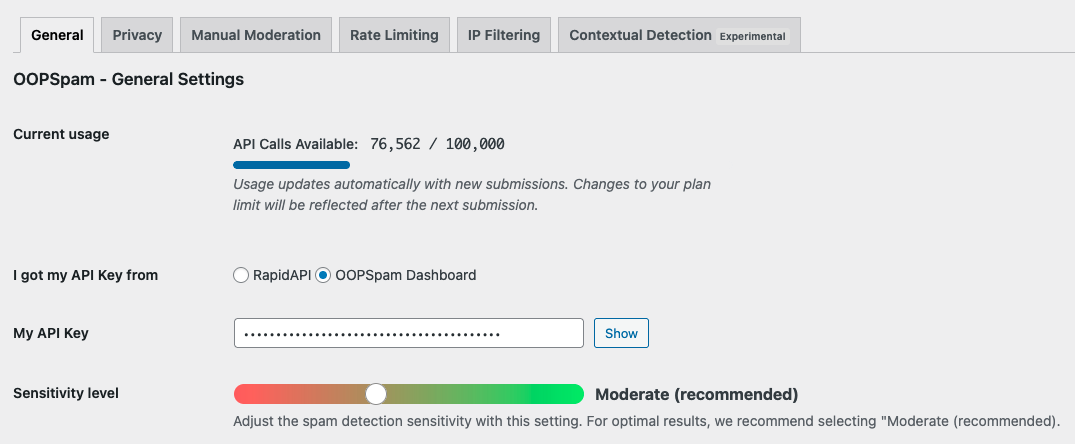
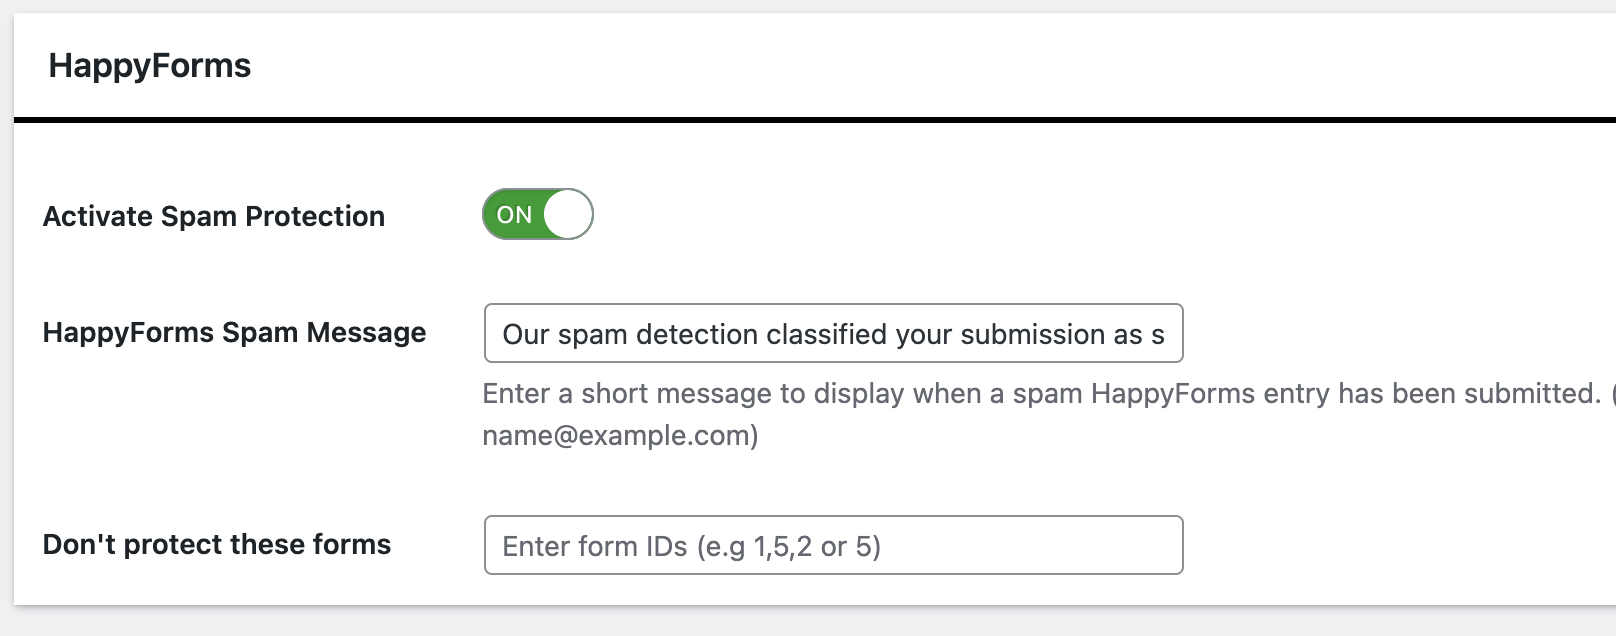
In the same tab, activate spam protection for HappyForms, so the plugin integrates directly with your forms. After this setup, OOPSpam will start filtering spam before it ever reaches your submissions.
2. Enable Rate Limiting
Navigate to the Rate Limiting tab and toggle the Enable Rate Limiting switch. This ensures all forms are covered by submission limits.
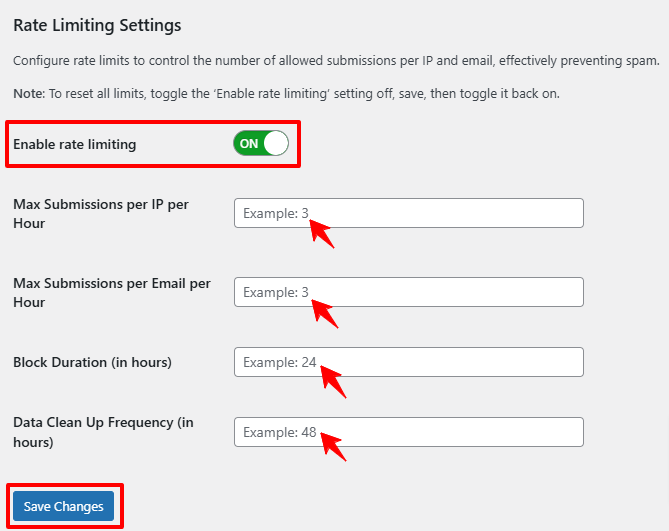
3. Set Submission Limits
- Max Submissions per IP per Hour → e.g., 3 entries per IP.
- Max Submissions per Email per Hour → stop the same email from spamming.
- Block Duration (hours) → decide how long users are blocked after exceeding limits (e.g., 24 hours).
- Data Clean-Up Frequency (hours) → clear logs regularly to keep performance smooth.
4. Save and Test
Click Save Changes and submit multiple entries to confirm the block works.
Tip: Start with lenient settings for high-traffic forms, then tighten if abuse continues.
Final thoughts
HappyForms makes it simple to cap entries and limit options in a form. By combining built-in settings with spam defenses and OOPSpam’s rate-limiting, you can stop abuse before it starts. Take a few minutes to set these controls now, and you’ll save hours dealing with junk or overbooked slots later.