
Onar Alili
Engineer
9 minutes to read
Spam protection for Bubble.io

I love no-code platforms. Bubble.io is perhaps one of the first and leading no-code solutions out there. It’s amazing how fast people can build with these platforms. Our first no-code app was Integromat app (now Make) which made it easy to add a spam filter to Integromat automated workflows.
Today, I’m excited to announce our official Bubble.io plugin. I say “official” because someone already developed an unofficial OOPSpam plugin for Bubble with our API, however, it’s not functional as it is not up to date. So we decided to take matters into our hands.
The plugin can be used to prevent spam in contact forms, review systems, or anywhere where spam messages may come. In this article, we will demonstrate it with a contact form.
- 1. Setting up a contact form
- 2. Installing OOPSpam & ipiphy Bubble plugins
- 3. Configuring spam filter
- 4. Terminate the workflow: it’s spam, don’t send email
1. Setting up a contact form
First, we need a contact form with different fields so we could connect our “Check for spam” action. This action will run when a visitor submits a contact form message. I’ll start with a pre-made template Bubble provides, called Startly - Startup Landing Page. It comes already built-in contact form.
Visit your dashboard on Bubble and create a new app. The pop-up would let you quickly get started with a pre-made template or you could start from a blank template.
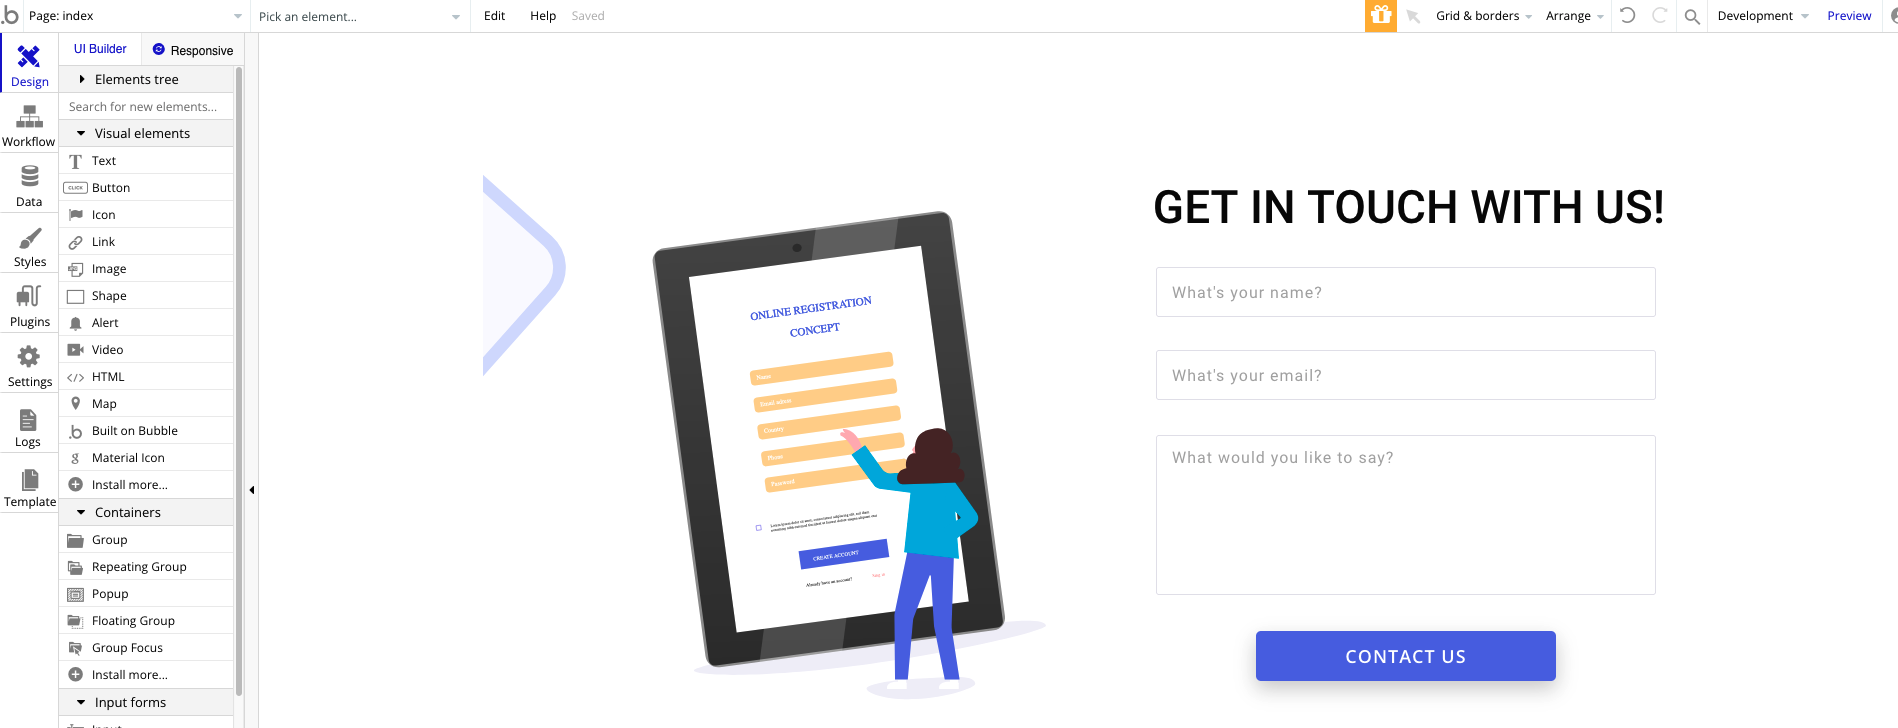
CONTACT US button is where all the magic happens. At the end of the article when a visitor clicks the button it should:
- Collect all the information from the contact form fields
- Show “Thank you” message
- Check if the submission is spam
- If spam, Terminate the flow
- If not, Send an email ✉️
- Done 🎉
2. Installing OOPSpam & ipiphy Bubble plugins
One of the parameters OOPSpam API allows you to pass is senderIP. While it is not necessary to send a visitor’s IP, it helps with spam detection. For that, we need to install the ipiphy plugin by Bubble. It is a simple plugin that would allow us to get a visitor’s IP.
The second plugin we need to install is our beloved OOPSpam Spam Detection plugin for Bubble.
Visit the Plugins tab in the template editing mode and click Add plugins. Search and install both OOPSpam and ipiphy.

ipiphy plugin doesn’t need any configuration. For the OOPSpam plugin we need get an API key. For that create a new account on the OOPSpam dashboard. Once registered and verified our email, we need to click the Copy to copy the API key.

Go back to Bubble and navigate to Plugins->OOPSpam Spam Detection and paste the API key we just copied.
We are done with a plugin setup. Time to move on adding spam filtering functionality to our contact form.
3. Configuring spam filter
Here is the flow we’d like to achieve:
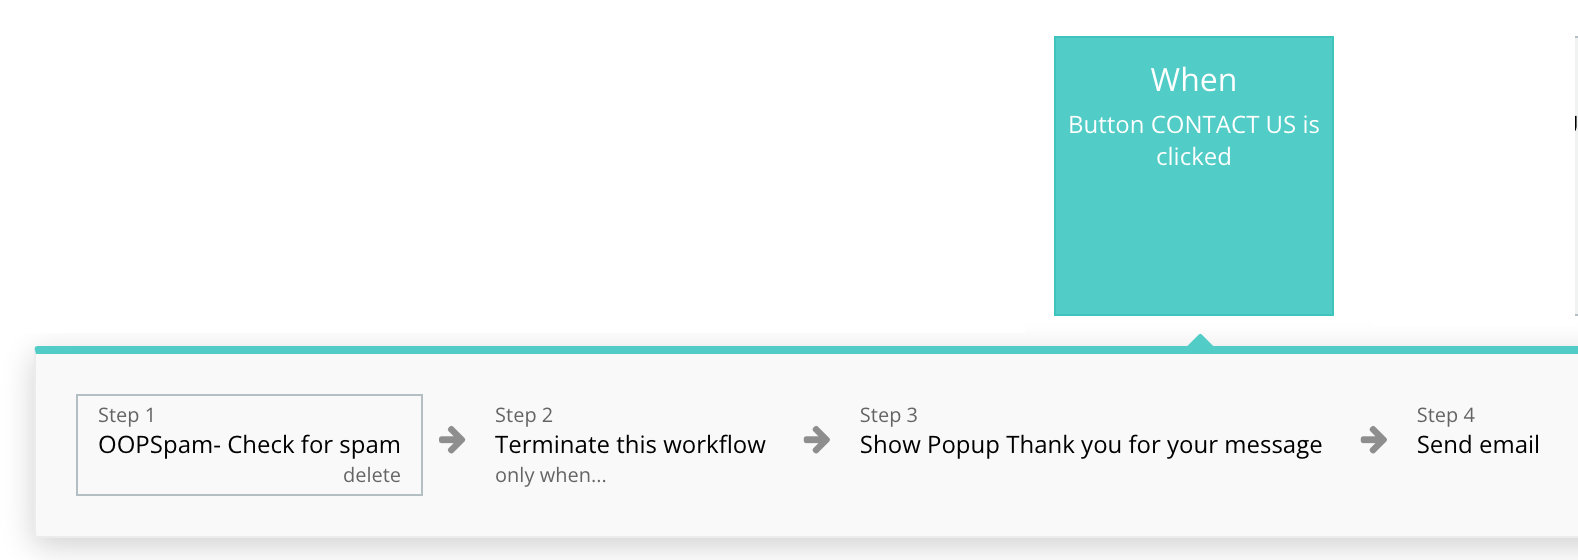
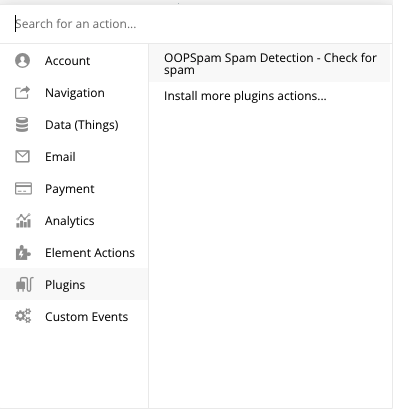
Visit Workflow tab then select When Button CONTACT US is clicked. Let’s add our first step action by clicking Click here to add an action and selecting Check for Spam action from the Plugins category.
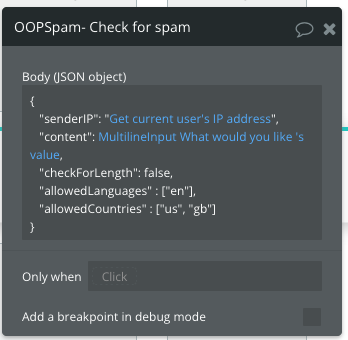
Now we have to pass all the necessary data to the plugin. Once you add the action a popup appears and allows us to input information. As of now, OOPSpam takes five inputs.
{
   "senderIP": <>,
   "email": <>,
   "content": <>,
   "checkForLength": <>,
   "allowedLanguages" : <>,
   "allowedCountries" : <>,
   "blockedCountries": <>,
   "blockTempEmail": true
}
On Bubble, <> stands for dynamic data. It means we can manually enter data or insert the output from a different plugin.
senderIP: We add output from the ipiphy plugin. For this, remove<>and select Insert dynamic data -> Get data from external API. From API provider dropdown select Get current user’s IP address and close.email: Select email field value from your sign up or contact forms.content: Here we pass a message we’re going to get from our contact form. Again remove<>and select your message field’s value. In our case, it is a Multilineinput element with the title What would you like to saycheckForLength: Short messages are usually spam. By default, any message shorter than 20 characters will be considered spam. To disable this, just enterfalseotherwise leave it as it is or typetrue.allowedLanguages: Would like to get messages only in English and Italian then enter["it","en"]. Check out all supported languages in our docs.allowedCountries: Similar toallowedLanguages, would like to get messages only from Italy and the US then enter two-letter country code["it","us". Check out all supported countries.blockedCountries: Block content from a certain country or countries. All you need to do is pass the two-letter country code as an array.blockTempEmail: Block temporary/disposable emails.
If you don’t need allowedLanguages, blockedCountries or allowedCountries filters just enter empty array [""].
🚨 In some cases like in sign up forms there is no data to enter into
contentfield. In this case, enter an empty value ”“ (double-quote) as value. The content field is required (even it is empty) that is why we make sure to have it in our JSON request body. Remember to also setcheckForLengthto false to prevent short messages from being marked as spam.
After setting up all these fields, you should have something like this:
At this point, our plugin is ready to handle upcoming spam. Now we need to show the “Thanks for the submission” message and set up termination flow logic (when not to send an email).
4. Terminate the workflow: it’s spam, don’t send email
Let’s add a thank you message. For step 2, add a new Show an element action and choose the Popup Thank you for your message element. This element comes with the template. You could show any different success message here.
A spammer/bot will see this conformation and move on to another websites to spam. But we still have work to do. With each contact form submission, an email will be sent to a site owner. To stop overflowing your inbox with a spam message, we need to terminate submission before it sends an email.
OOPSpam provides a Spam Score (
Score) for every submission. We recommend terminating flow based onScorefield. This is a number between 0-6. Usually, a score of 3 and above is considered spam.
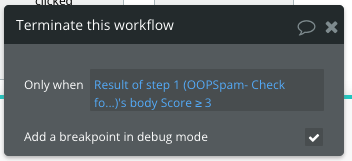
For that, we add a new Terminate this workflow action then Result of step 1 (OOPSpam - Check for spam)). Here grab the value of Score field and let action know that if Score is 3 or greater then terminate this flow.
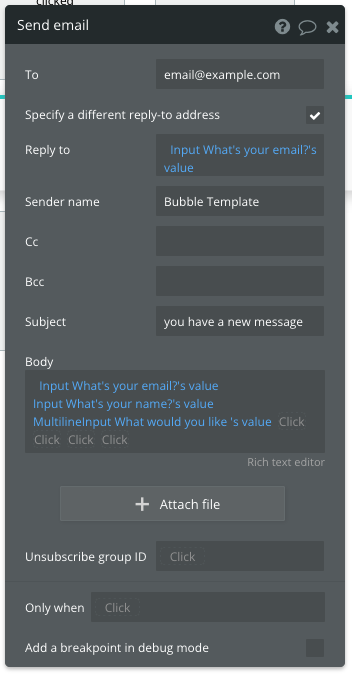
For our last step, add a new Send email action and fill out all the information you need from the contact form. This action will run if the submission isn’t spam.
That is it! We are all set. Now we have a functioning contact form with a spam filter on a Bubble website.
Have a spam-free day!