How to Limit Form Submissions in WP Booking System

Co-founder & Brand Designer

Reviewed by Onar Alili
Co-founder & Engineer
Published 9 min read
WP Booking System has no setting to limit bookings per email, IP address or hour. Its built-in controls limit what can be booked instead: Automatically Block Dates stops two bookings on the same dates, the Inventory add-on caps bookings per date, and the Booking Restrictions add-on sets stay length and booking windows. To limit how often one visitor can submit, add rate limiting with the oopspam Anti-Spam plugin (that’s us 👋).
WP Booking System is a booking calendar plugin for rentals, rooms, tours and appointments. Submission limits stop one visitor or bot from sending dozens of booking requests, filling your calendar with fake holds and your inbox with fake confirmations. This guide covers each option, step by step.
Method 1: Use WP Booking System’s Built-In Booking Controls
WP Booking System limits bookings by date and capacity, not by person. Two of these controls, Inventory and Booking Restrictions, are add-ons: their settings only appear after you install and activate them. These are the controls that cap how much can be booked:
| Setting | Where | What it limits |
|---|---|---|
| Automatically Block Dates | Calendar block > Form Options (or the calendar shortcode) | Marks booked dates as unavailable, so the same dates can't be booked twice |
| Minimum Days / Maximum Days | Calendar block > Form Options | Shortest and longest stay, without any add-on. Ignored once the Booking Restrictions add-on is active |
| Inventory field (Inventory add-on) | Form Builder > Pricing Form Elements > Inventory, plus the Inventory column in the calendar editor | Bookings per date. When a date reaches 0, it shows as booked |
| Maximum Limit (Inventory add-on) | Inventory field > General Options | How many slots one booking can take at once |
| Booking Restrictions (add-on) | Edit Form > Booking Restrictions tab > Enable Booking Restrictions | Stay length, fixed number of days, start and end days, advance reservation and turnaround time |
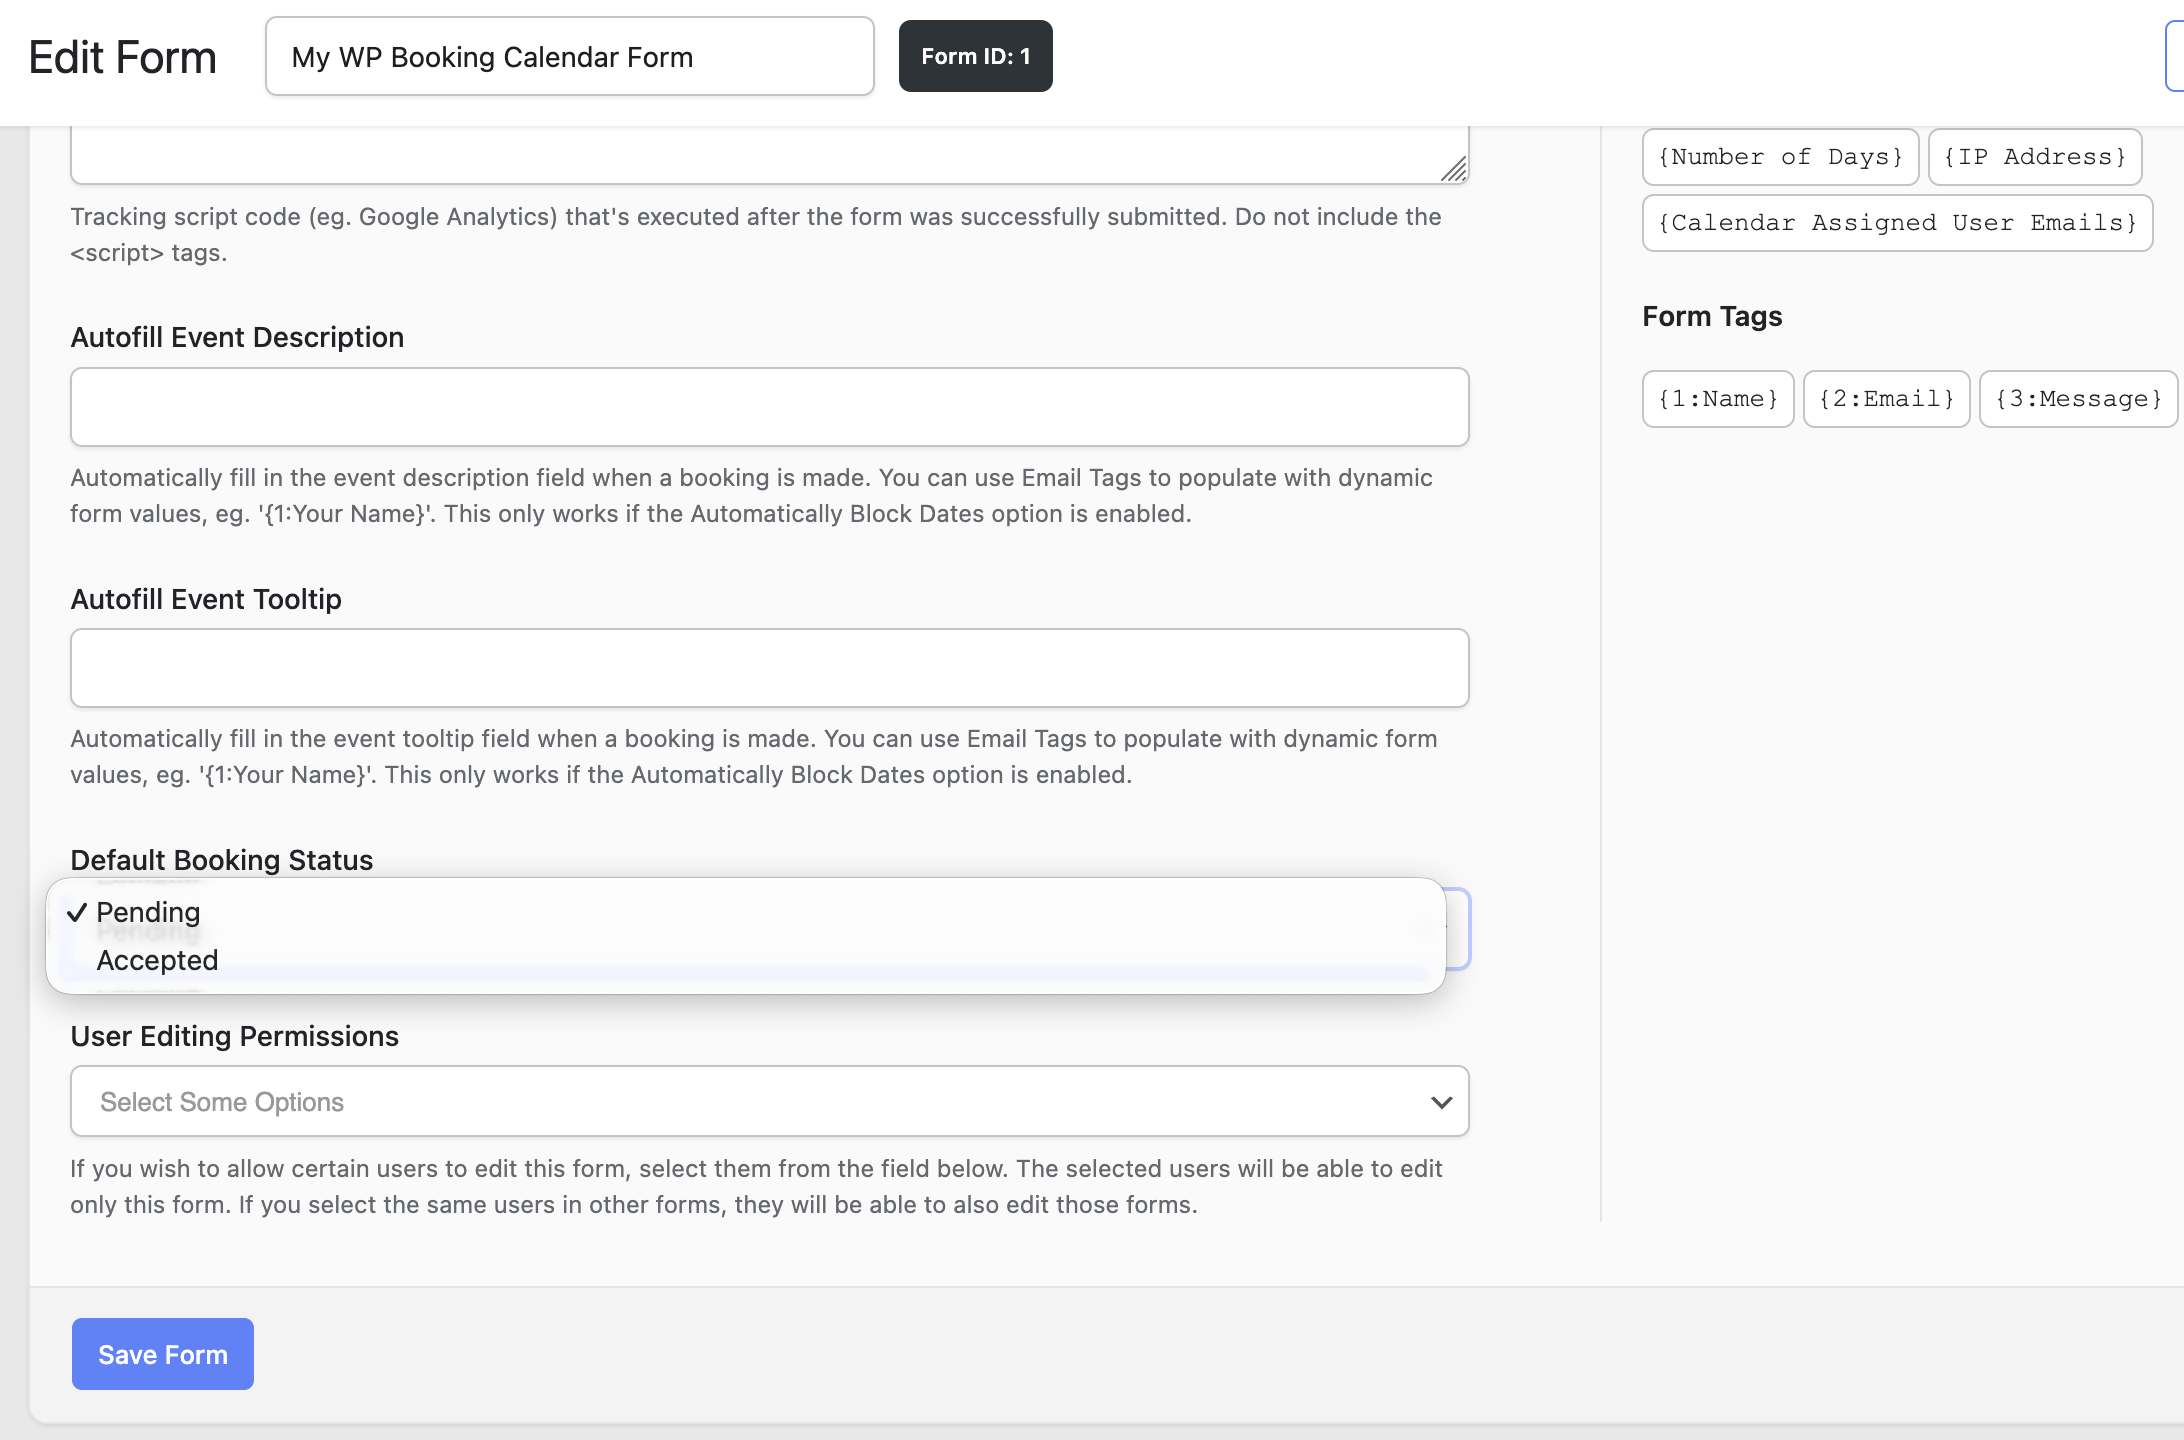
| Default Booking Status: Pending | Form Options > General Options | Nothing is confirmed until you accept it |
Sources: Inventory docs, Booking Restrictions add-on, General options.
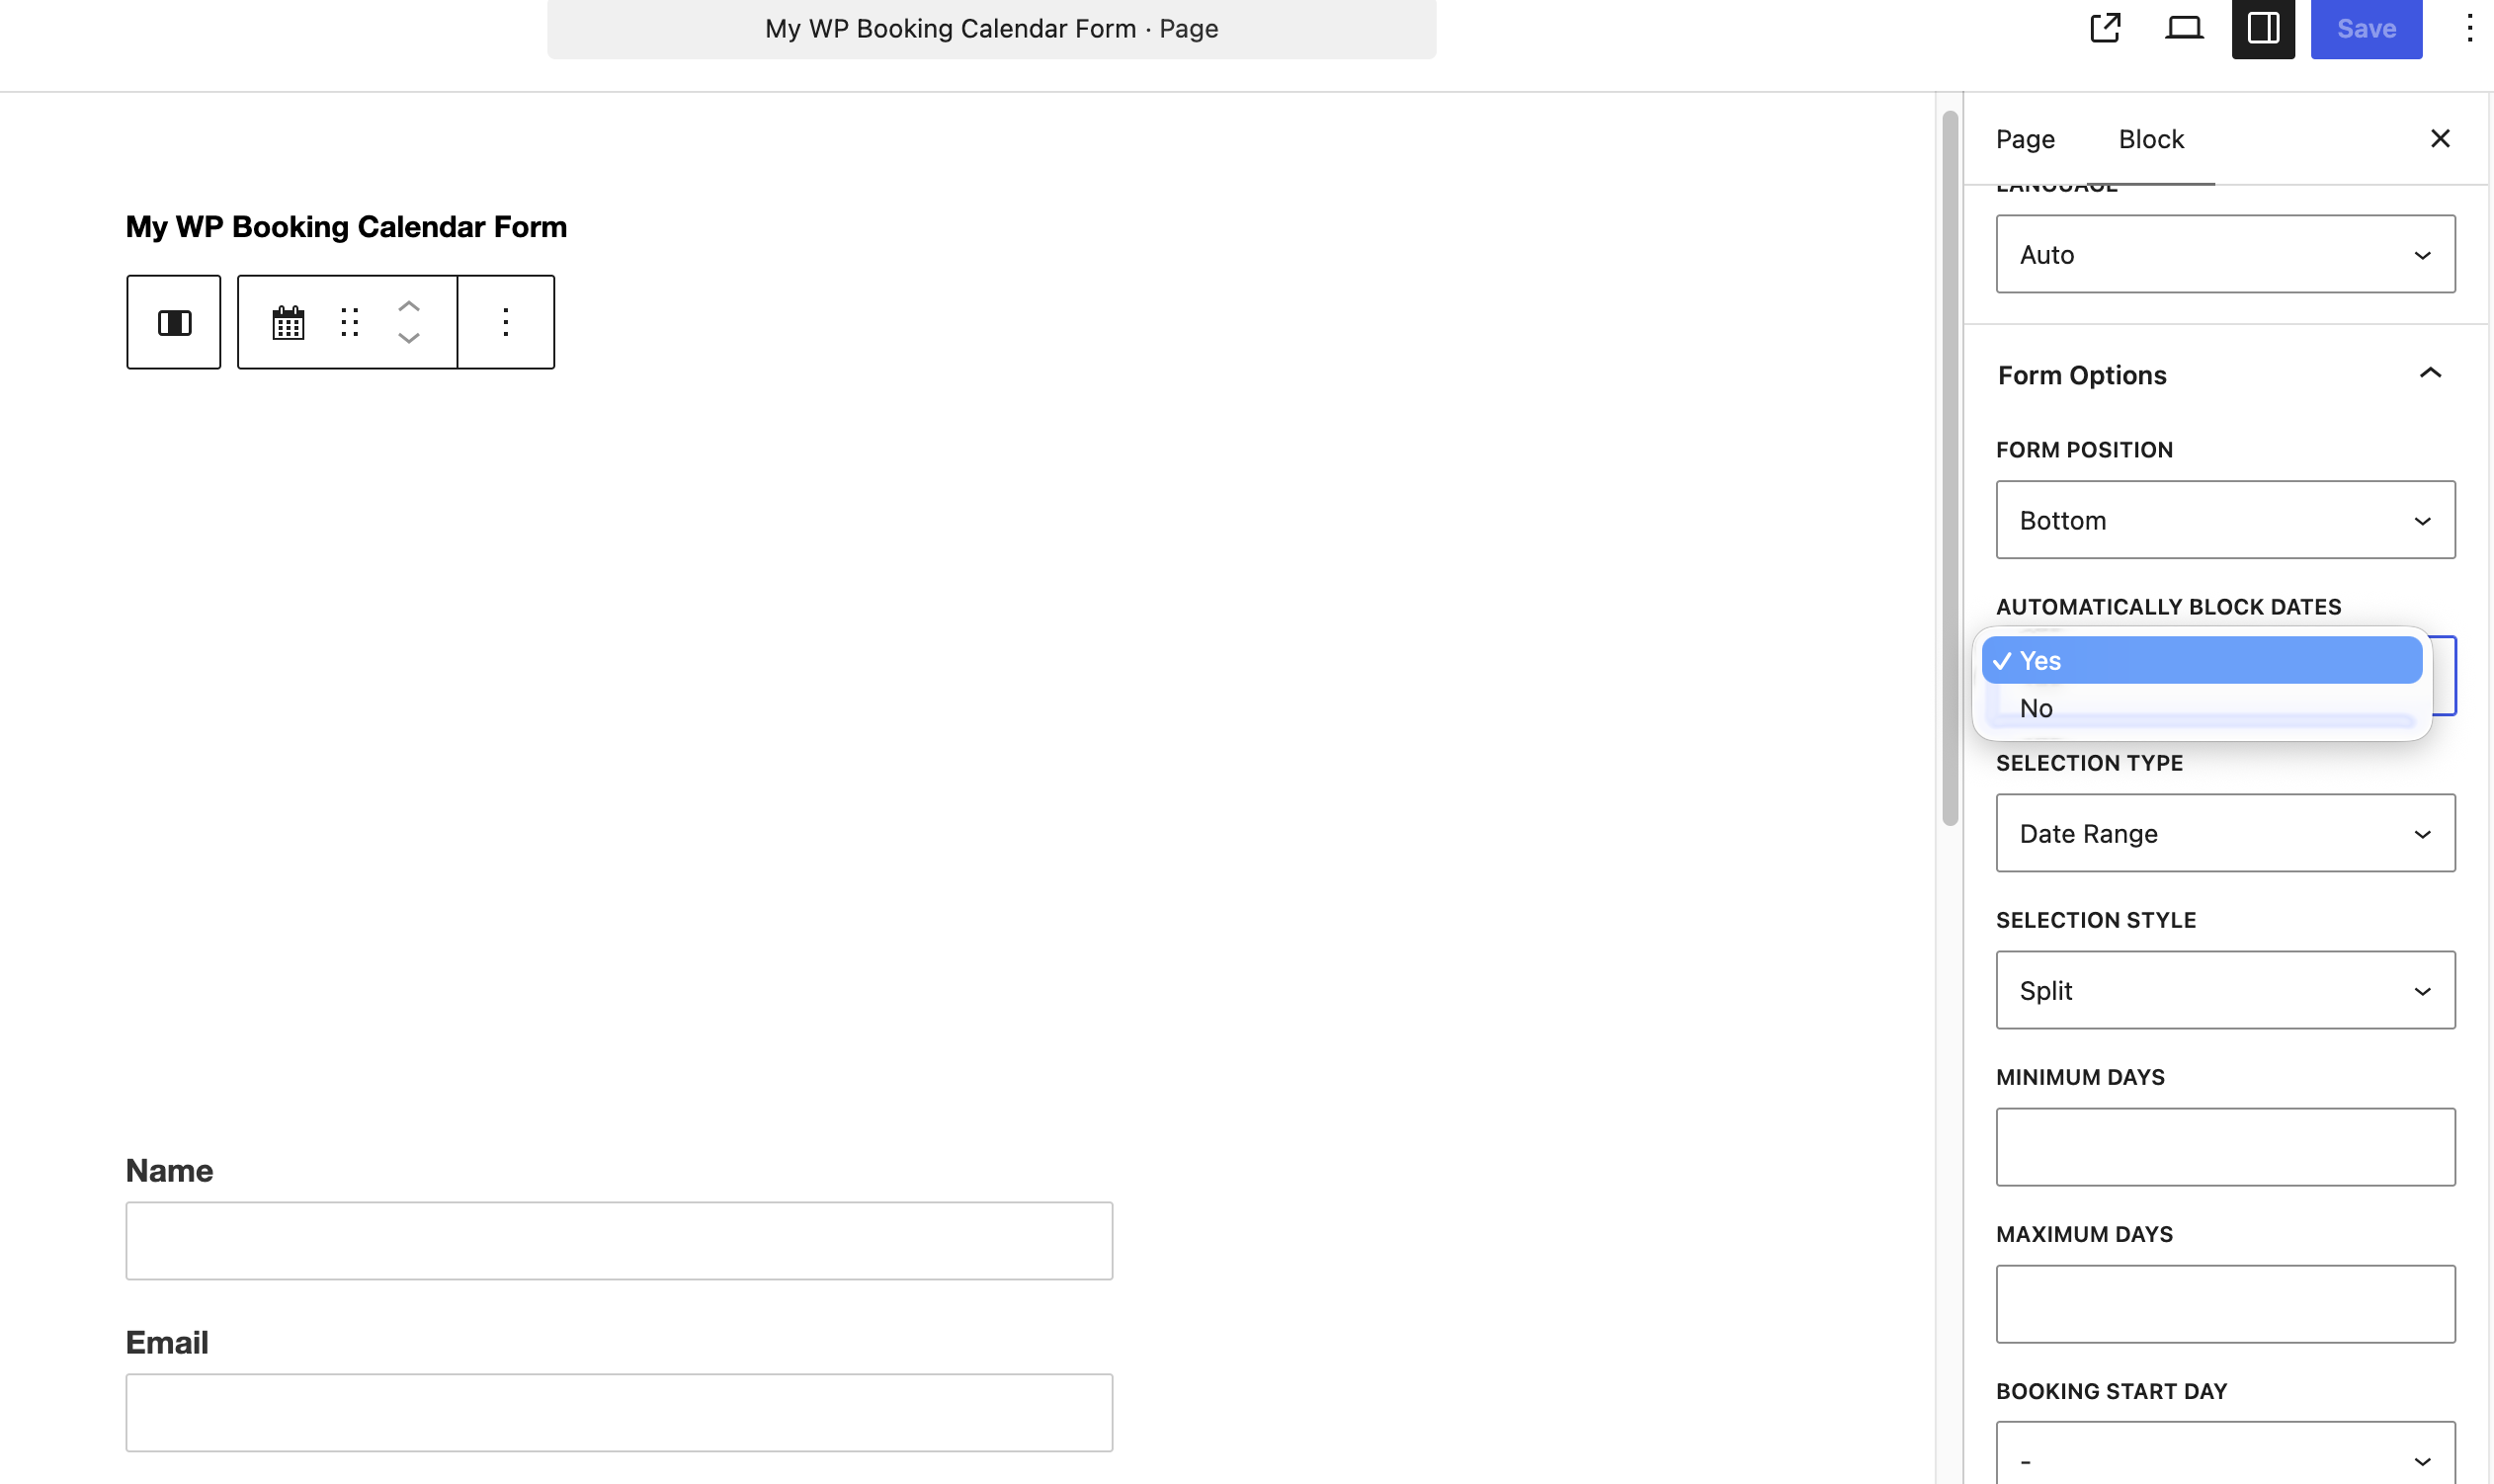
Automatically Block Dates is set where you embed the calendar. In the block editor, select the calendar block and open Form Options in the sidebar.
Inventory works per date. Set the starting number of slots with Default inventory in the calendar editor, then add the Inventory field to your form. Each booking takes one slot, or as many as the guest picks, up to the field’s Maximum Limit.
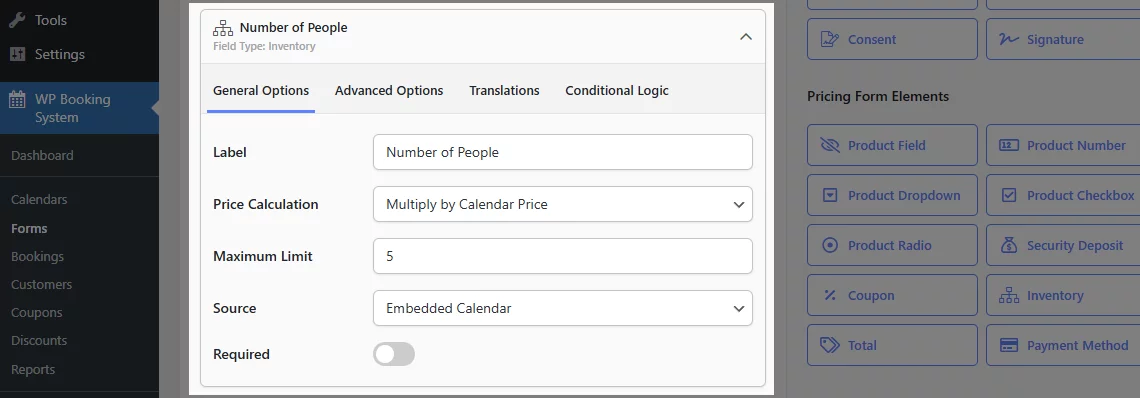
Image: WP Booking System
Booking Restrictions live in their own tab on the form. Turn on Enable Booking Restrictions, then set the General Rule. Click Add Custom Period Restriction Rule for seasons with different rules, such as a 7-night minimum in summer. Custom Period rules override the General Rule.
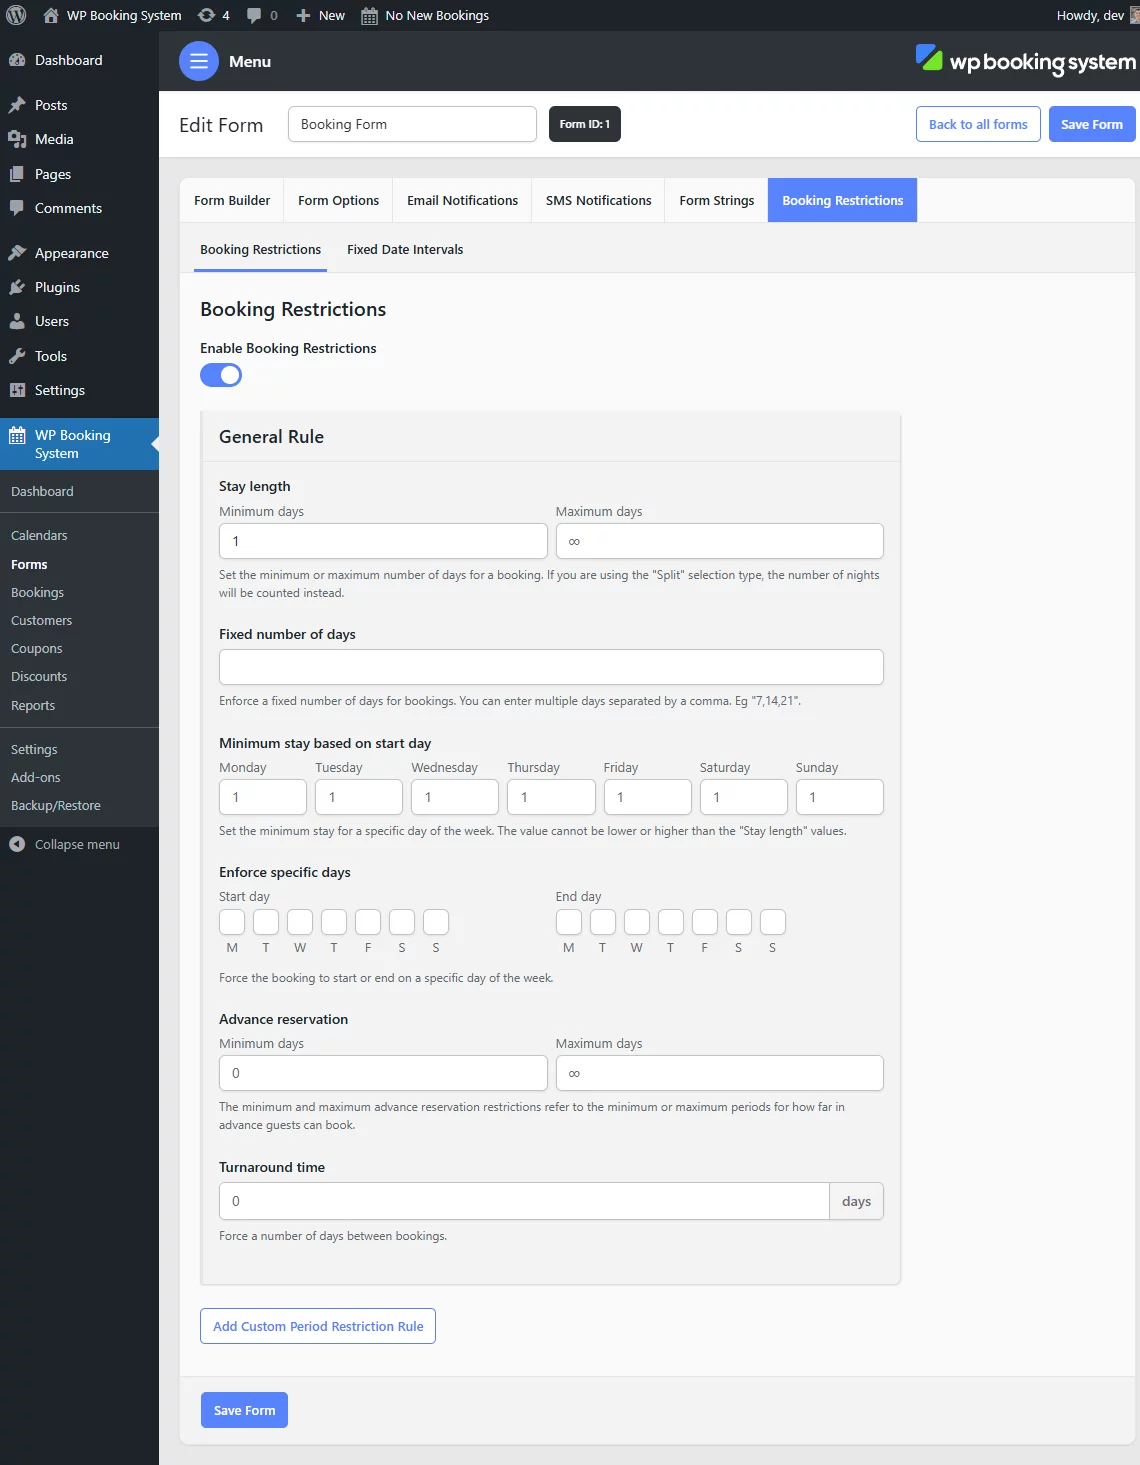
Image: WP Booking System
Which to use:
- One booking per date or unit: turn on Automatically Block Dates.
- Several slots per date, such as tours or classes: use the Inventory add-on with a Maximum Limit per booking.
- Stop long fake holds far in the future: set a maximum Stay length and a maximum Advance reservation in Booking Restrictions.
Limits of the built-in options: none of these count bookings per email, IP address or hour. A bot can send booking after booking for different dates, and each one blocks real availability until you reject it.
Method 2: Add a Custom Validation Rule (for Developers)
WP Booking System runs the wpbs_form_validation and wpbs_field_validation filters after every submission (custom validation rules). A developer can use them to reject a booking, for example when the same email already has a pending booking. Add the code to your theme’s functions.php or a small custom plugin.
This gives you exact business rules, but you write and maintain the code, and it still can’t stop a bot that uses a new email each time.
Method 3: Rate Limit Bookings per IP and Email with oopspam
The oopspam Anti-Spam plugin supports WP Booking System natively. It checks each booking on the server and blocks visitors who go over your hourly limit. It needs no code and works for every visitor.
How to Set It Up
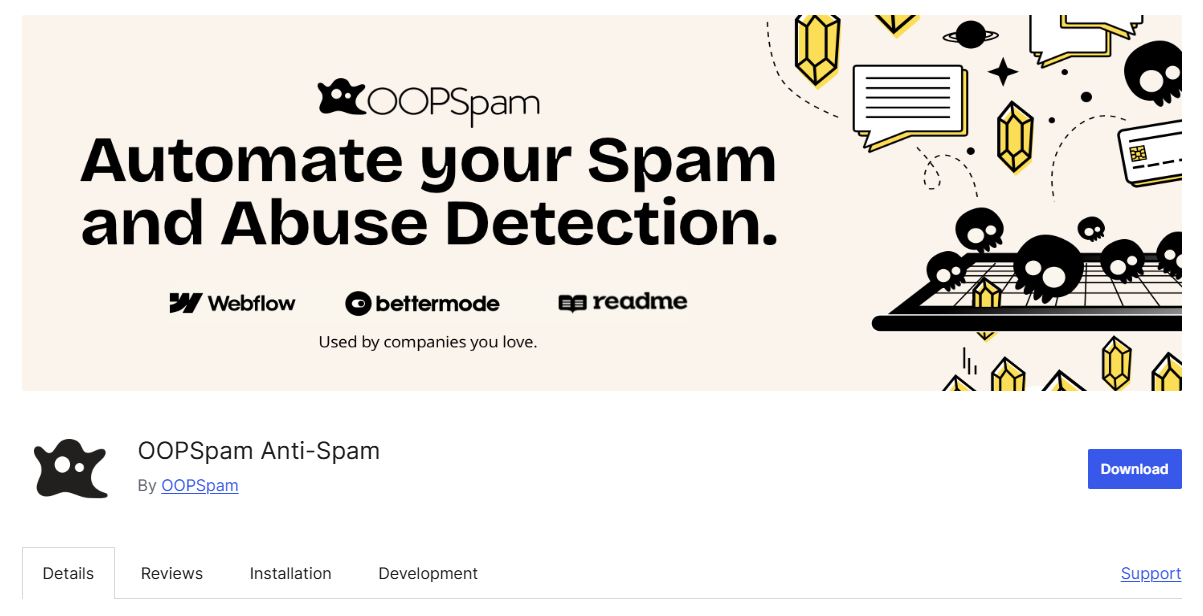
In WordPress, go to Plugins > Add New, search for oopspam Anti-Spam, then install and activate it.
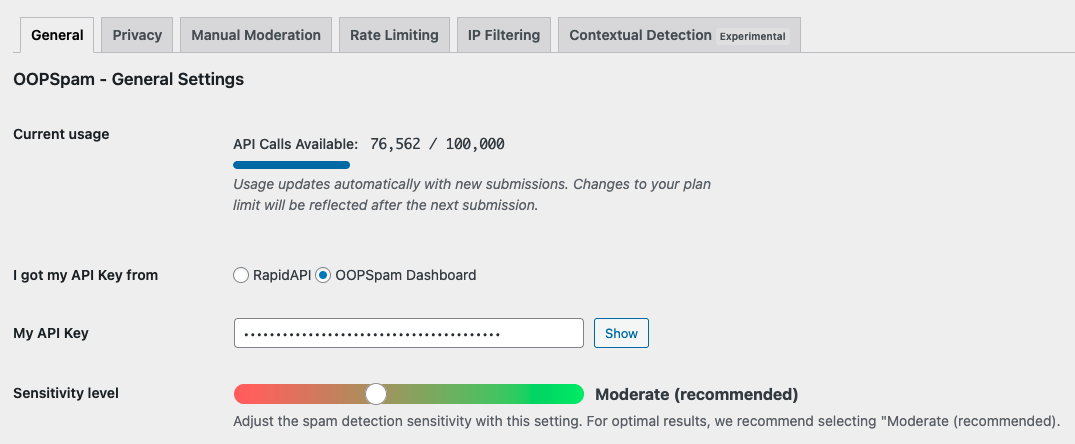
Create a free oopspam account and copy your API key. Go to Settings > oopspam Anti-Spam. In the General tab, select oopspam Dashboard as the source and paste your key into My API Key.
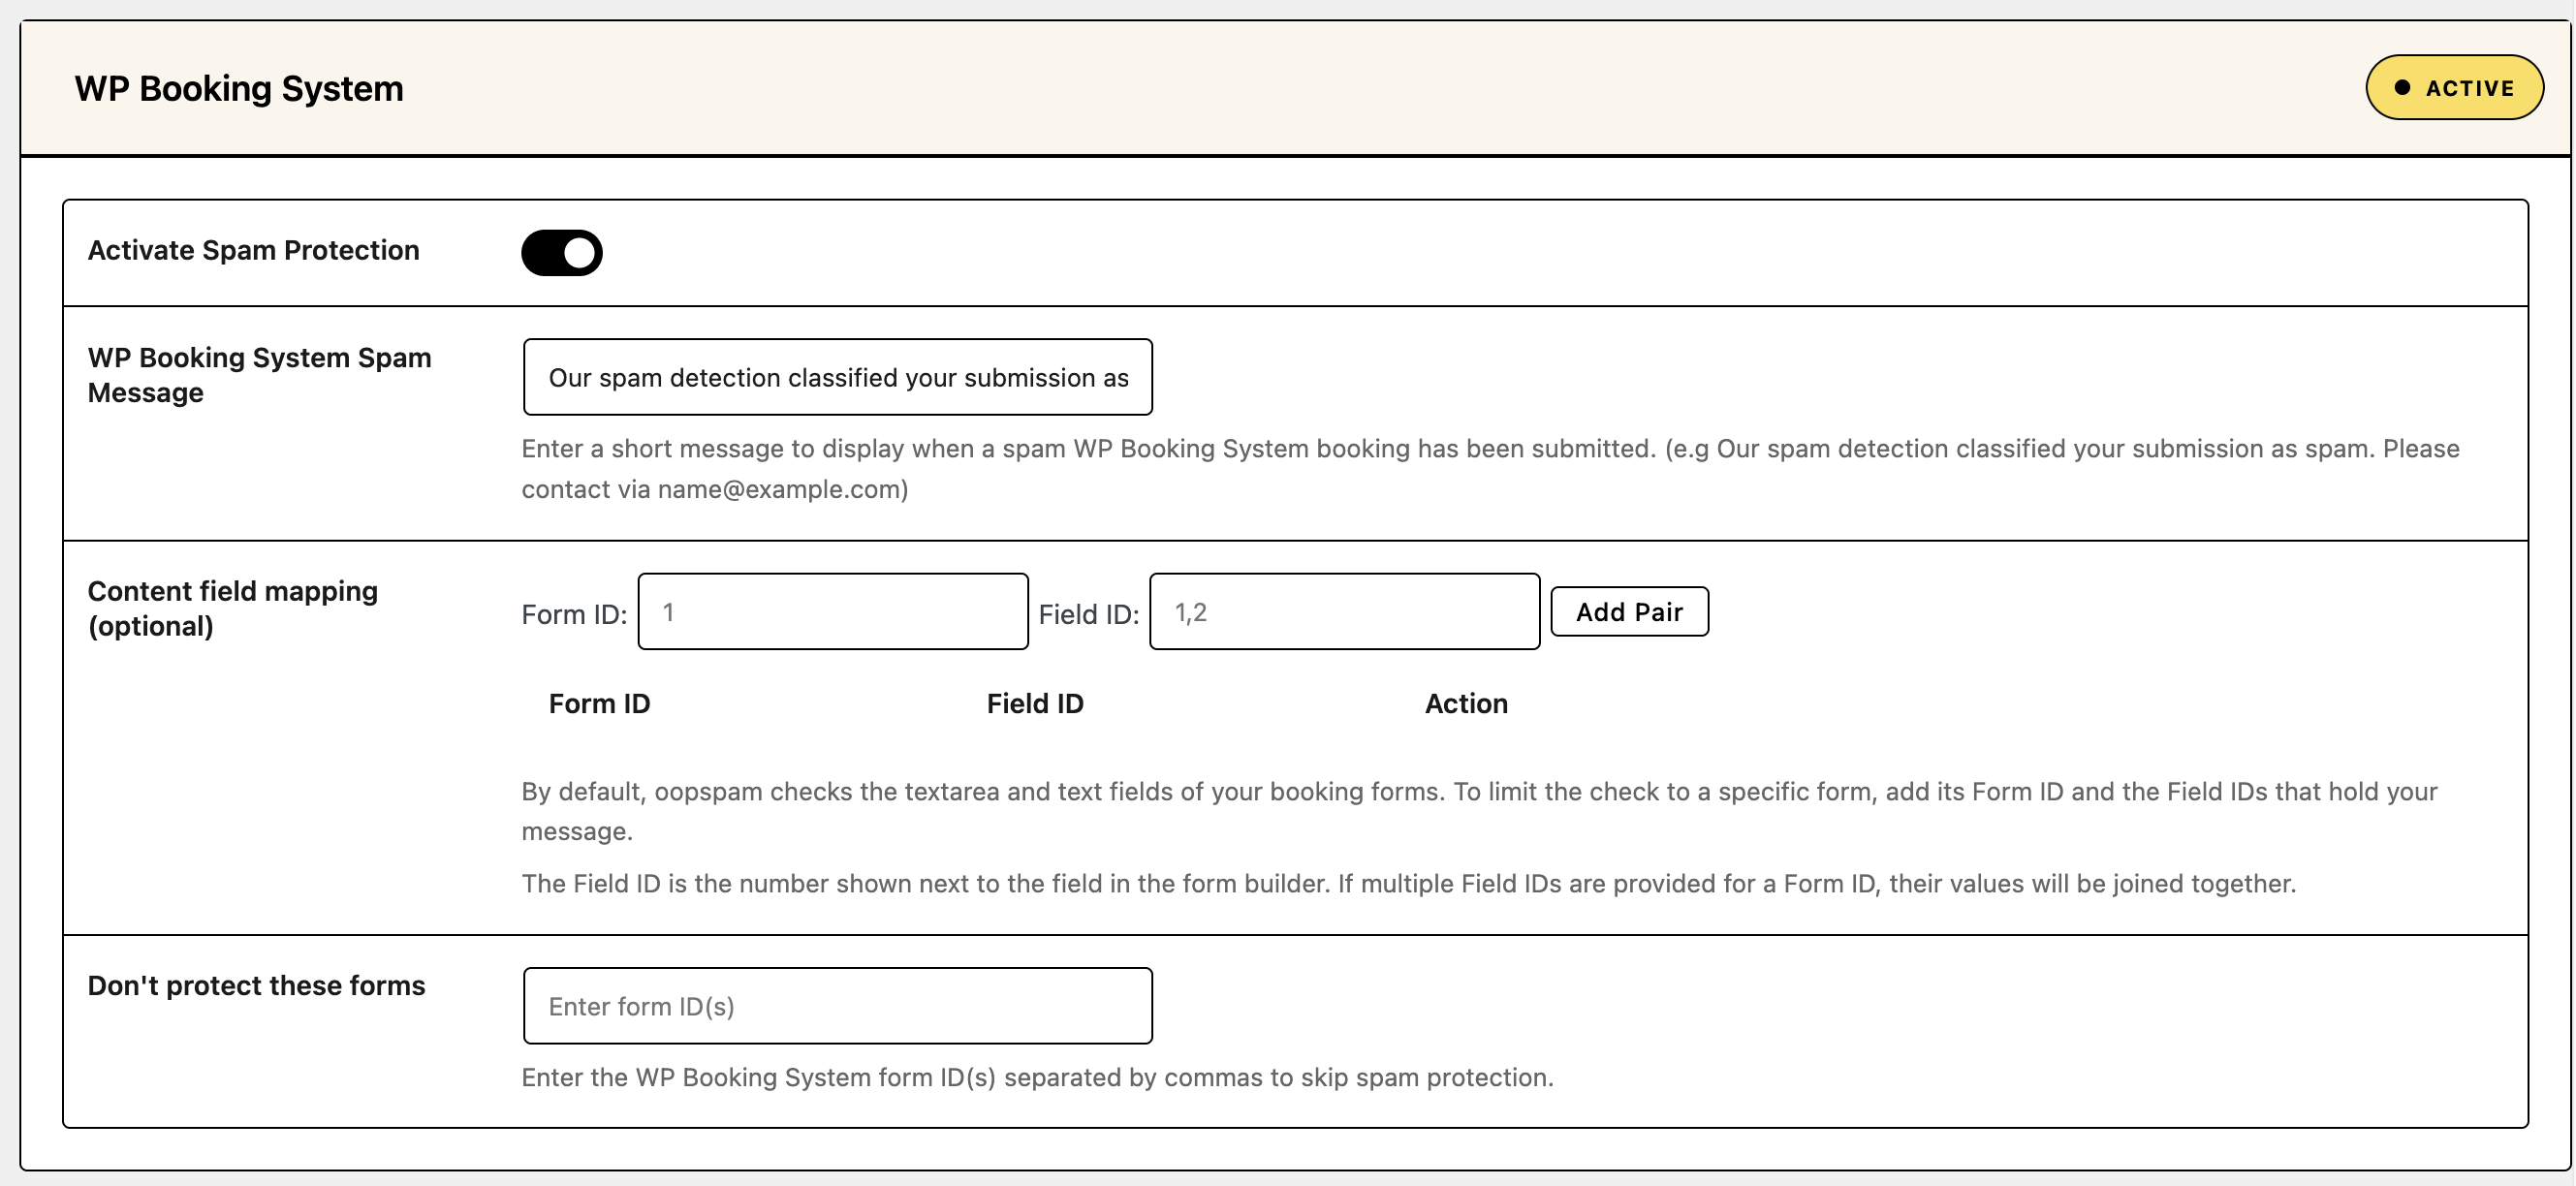
Scroll to the WP Booking System section and check Activate Spam Protection.
Open the Rate Limiting tab and turn on Enable Rate Limiting. Then set your limits:
- Max submissions per IP per hour: how many times one IP address can submit in an hour.
- Max submissions per email per hour: how many times one email address can submit in an hour.
- Block duration (in hours): how long an IP or email stays blocked after hitting the limit.
- Data clean-up frequency (in hours): how often oopspam clears the table it uses to track submissions.
Click Save Changes.
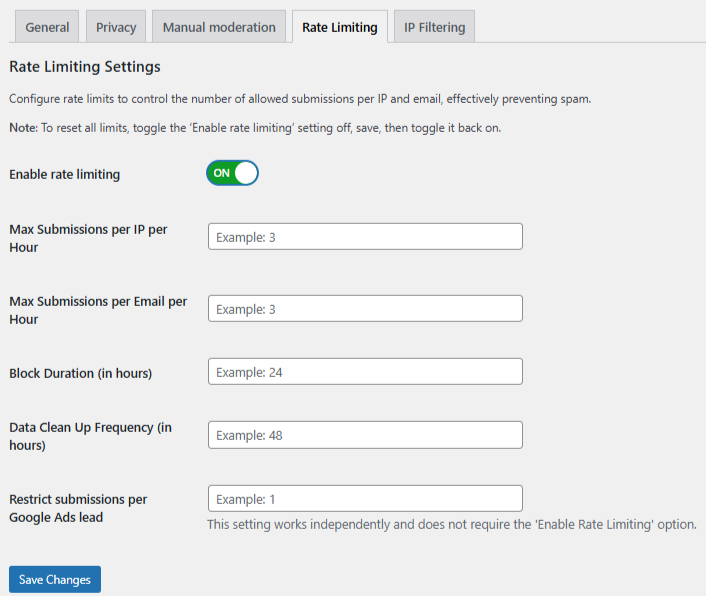
A good starting point is 3 submissions per hour per IP and per email, a 24-hour block and a 48-hour clean-up. Raise the numbers if guests often book several rooms or dates one after another.
If your site runs behind Cloudflare or another proxy, open the Misc tab and turn on Trust proxy headers. Without it, all visitors share the proxy’s IP and could hit the limit together.

Test It
Submit a few more bookings than your limit allows. The blocked attempt shows your spam message on the form. Set a custom message in the WP Booking System Spam Message field to tell real guests how to reach you.
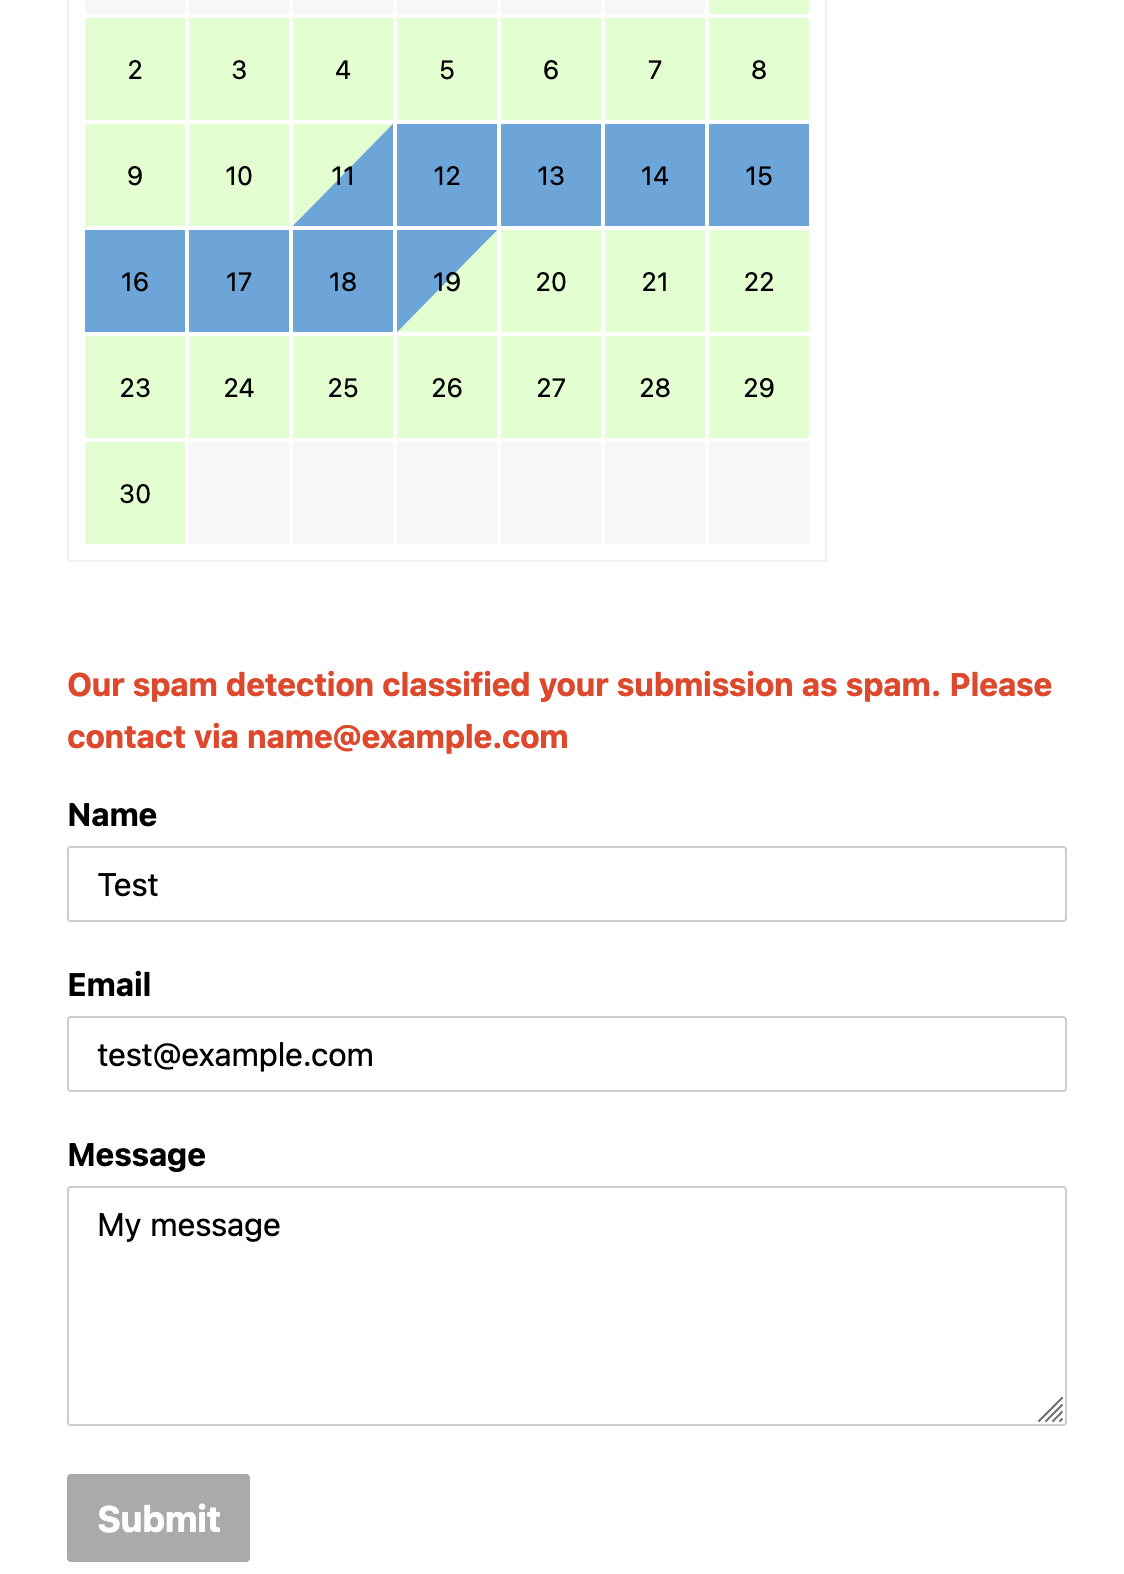
Check Form Spam Entries in WordPress to see blocked attempts and the reason (form entries guide).
Add More Filters
Rate limiting works best with oopspam’s other filters:
- VPN and data center blocking: see How to block VPN and data center IP submissions in WP Booking System.
- Country filtering: see How to block countries in WP Booking System.
- Disposable email blocking: see How to block disposable email addresses in WordPress forms. Throwaway addresses are a common way around per-email limits.
Which Method Should You Use?
| Goal | Best method |
|---|---|
| No double bookings | Automatically Block Dates |
| Several bookings per date (tours, classes) | Inventory add-on |
| Cap slots in one booking | Inventory add-on Maximum Limit |
| Stop long or far-future fake holds | Booking Restrictions: Stay length and Advance reservation |
| Review everything before it's confirmed | Default Booking Status: Pending |
| Stop floods from one visitor or bot | oopspam rate limiting |
FAQ
Can WP Booking System limit bookings per email or IP?
Not with a setting. A developer can write a custom validation rule, or you can use oopspam’s per-IP and per-email hourly limits with no code.
Can I limit bookings per hour in WP Booking System?
Not on its own. Use oopspam rate limiting to cap how many times one IP address or email can submit per hour.
Does Automatically Block Dates stop spam?
It stops two bookings on the same dates. It doesn’t stop fake bookings, and a fake booking can block real dates until you reject it. Keep new bookings Pending and add a spam filter.
Will rate limiting block real guests?
Rarely, if your limits are sensible. Three submissions per hour is enough for most booking forms. Raise it if guests often book several units in a row, and review Form Spam Entries for false positives.
Final Thoughts
Use WP Booking System’s date, inventory and restriction settings for the business rules: no double bookings, a fixed number of slots, a sensible stay length. Use oopspam rate limiting to stop floods from one visitor or bot. Together they keep your calendar open to real guests and closed to abuse.
