
Onar Alili
Engineer
7 minutes to read
Stop spam on HubSpot contact forms using Zapier and OOPSpam
Intro
HubSpot is a popular CRM solution that offers many different tools for businesses, including form creation. HubSpot’s forms can be used as contact forms, support tickets, or to generate leads, but they can also be targeted by spammers. To prevent spam, HubSpot offers built-in solutions such as reCaptcha and the ability to block specific email domains or free email providers. These settings can be accessed in Form editing mode under Marketing->Forms.
If you are still receiving spam submissions despite enabling the built-in spam prevention options in HubSpot, an alternative solution involves using automation tools like Zapier or Make to capture form submissions, filter them through with OOPSpam, and then send a filtered email notification to yourself. This approach can help further reduce the amount of spam you receive through your HubSpot contact forms.
Choose your automation tools (Zapier, Make, etc.)
We’ll be using Zapier for this tutorial, but you can do this with Make or any other automation platforms.
If you wish to skip the steps below, use the template we created for a quick start:
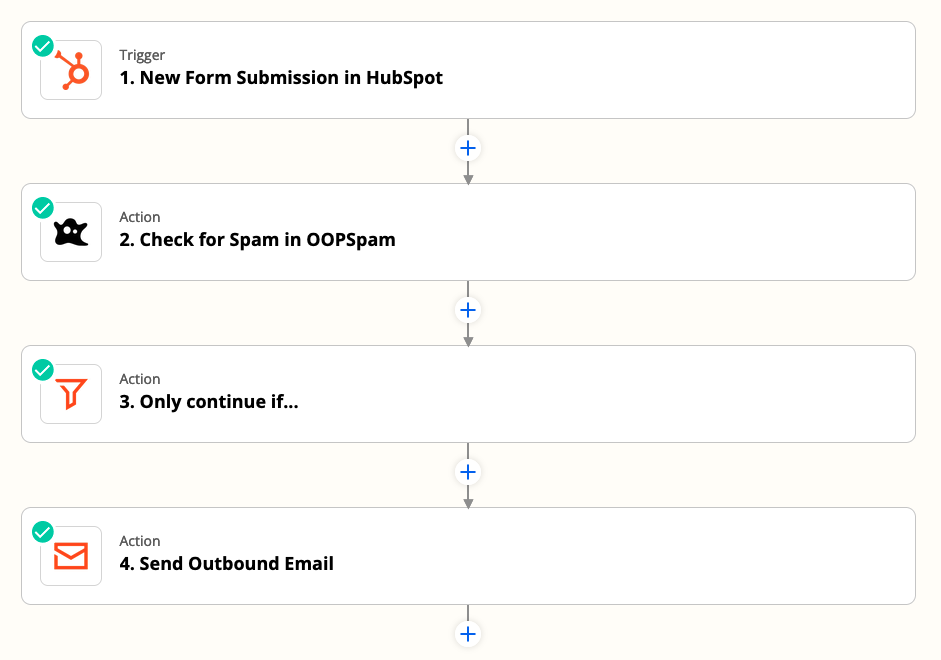
Zapier will walk you through the configuration for all 4 steps: HubSpot -> Spam check with OOPSpam -> Filter -> Email by Zapier.
Filter should be configured by default. The filter is straightforward with just one rule: continue processing only if the Spam Score is less than 3.
- Intro
- Choose your automation tools (Zapier, Make, etc.)
- Configuring HubSpot Zap
- Checking for spam with OOPSpam
- Filtering with Filter
- Send an email to yourself with Email by Zapier
- Final thoughts
Configuring HubSpot Zap
For demo purposes, we created a page using HubSpot Landing Page builder and embedded a form.

Let’s configure Zapier workflow to capture submissions through the form.
To set up HubSpot with the Form Submission event, follow these steps:
- Select HubSpot Zap and then under Event, select New Form Submission.
- Select Choose account to connect your HubSpot account.
- Select your form under Trigger
- An example submission will be populated at Test trigger. Check to see if you get the We found a form! message.
- You’re done! The next step is to check for spam.

Checking for spam with OOPSpam
To set up spam protection, follow these steps:
- Register for an API key on the OOPSpam dashboard.
- In Zapier, enter the API key when prompted on the “Choose Account” step.
-
Map necessary form information to OOPSpam’s fields:
- Content: This is where the form message goes.
- Sender IP: Leave blank.
- Email: Map the form submitter’s email here.
- Language Allowlist: Select any languages you expect to receive form submissions in.
- Allow messages only from these countries: Filter submissions by country. Available only if Sender IP is provided.
- Test the action and use the returned “Score” to approve or reject submissions.
See the GIF below for a visual guide.

Filtering with Filter
Now that we have our HubSpot contact form submissions flowing into Zapier, we can use the “Filter” app to set conditions for our automation flow to continue.
The “Filter” app provides the necessary tools to screen submissions, allowing us to determine which ones are legitimate and which are spam. In this case, we will use the app to specify that the “Score” (or Spam Score) must be less than 3. This ensures that only submissions with a low spam score will continue through.

Alternative Approach: Store Spam Submissions in Airtable
Another way to handle spam submissions in your HubSpot contact form is to use the Paths app in Zapier. With this approach, you can take different actions based on whether the submission is spam or not.
- Path A: If the Score is less than 3, then send an email.
- Path B: If the Score is greater than or equal to 3, then create a record in Airtable to store spam submissions for later review.
This alternative approach allows you to store all spam submissions in one place for future analysis. If you prefer, you can use another platform such as Google Sheets for this purpose.
It’s important to note that scores of 3 and higher should be considered as spam, while scores less than 3 are considered non-spam. This will ensure that only spam submissions are stored in Airtable or Google Sheets.

Send an email to yourself with Email by Zapier
The final step is to set up the Send Outbound Email to notify yourself of new submissions.

In order to send the email, you need to map the required fields to the data from the HubSpot contact form submissions. The required fields are:
- To: Your email address (up to 5 emails can be added).
- Subject: The name of the form.
- Body: The email body can be in HTML or plain text. In the example, the data points (email, name, message fields) are separated by line breaks using the <p> HTML tag.
- Reply To (optional): This field is not required, but it makes responding to submissions more convenient. The sender’s email can be added here so that you can simply click the “Reply” button in your email client if you want to respond to the submission.
Testing the email notification is an important step to ensure that you receive the notification correctly when a new submission is made. It is recommended to test the email by submitting a test form and verifying that the notification email is received with the correct information.
Additionally, you can use other email service apps such as Postmark or Mailgun instead of Email by Zapier to send the emails. These services can offer better deliverability, additional features and customization options such as email templates and analytic.
If you’re using embedded forms on your website, you can also add spam protection to embedded forms using OOPSpam and Zapier to automatically filter fake submissions.
Final thoughts
This was a basic workflow to filter spam with OOPSpam in your HubSpot forms using Zapier. You can also use other platforms to automate the process. Plus, you can add extra steps and conditions to make it more complex, such as sending an automated email response to the visitor confirming successful submission after the spam check or storing submissions in Google Sheets instead of sending an email.
